Refashioning: Shirt into Sleeveless Top

This morning I awoke to the end of New Dress A Day. I have become completely addicted to the blog, and will miss starting my blog reading each day by hopping over to see what refashioning magic Marisa has performed overnight (though I’m sure there’ll be plenty more to see on her blog once she’s caught up on some sleep).

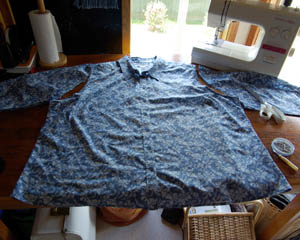
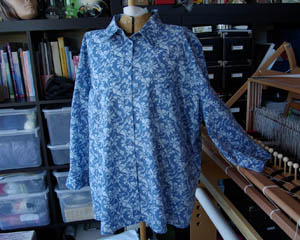
I’ve been wearing my own Marisa-inspired refashioned clothing. Yesterday I wore the striped skirt I made out of shorts and today I’m wearing shorts I added a waistband to. (I can’t believe how much more comfortable and flattering they are!) A few weeks ago I took the next step: I rifled through the clothing at one of the smaller op shops here, telling myself I was looking for clothes I could scavenge for fabric. I found two pieces. One was this shirt, found in the mens shirts rack despite being a womenswear shirt.

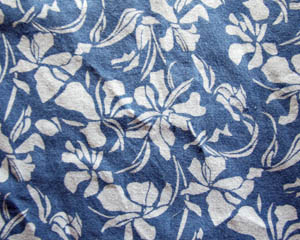
It was the fabric that caught my eye. Flowery enough to be feminine, but not overly bright and blossomy. The shirt was big, but I’d learned from New Dress A Day that buying big allows room to explore a variety of ways to change a garment. I found myself pinning and tucking instead of chopping it up for fabric.

The pockets came off first:

Then the sleeves:

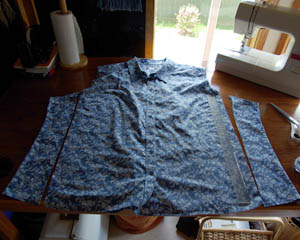
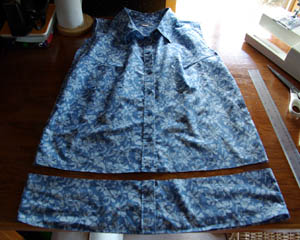
I laid a shirt and sleeveless top on top to get an idea where to start trimming, then off came the sides:

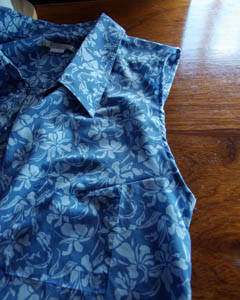
Trying it on, I could see that the armholes now gaped a lot. This wasn’t surprising. I’d done patternmaking way back in my 20s and knew about the sort of shaping challenge boobs present. I sewed some darts:

Then trimmed some fabric off the bottom as it seemed a bit long now.

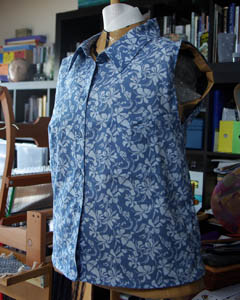
And then… it was done:

The other garment I picked up at the op shop is a simple cotton drawstring beach skirt that also caught my eye because of the fabric colour and print. I’m planning to make a top out of it. But I suspect I’m going to have to swear off refashioning after that, because I’m running out of room in my wardrobe. Which is ironic, since this all started a few months ago when I started culling clothes from my wardrobe because I was running out of room.

Summer Solstice

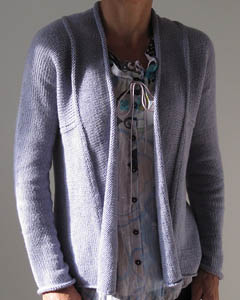
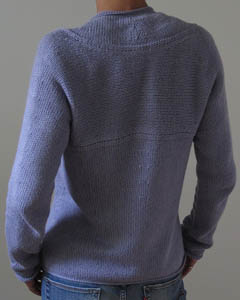
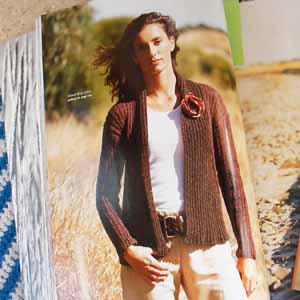
Recently, via Ravelry, I swapped a pattern I accidentally bought twice for this one:

It has a really interesting construction and no seams. I love a pattern with no seams!

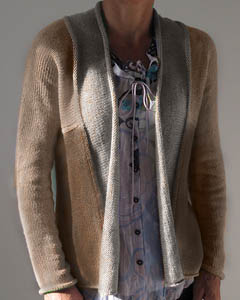
It reminded me a lot of a cardigan by Jo Sharp that I knit back in 2008, that I absolutely love:

I knit that one out of a Cleckheaton Country Silk, and between buying the grey for the body and looking for a second colour for the collar, they conveniently changed the shade of grey to a lighter one.

This pattern involved a LOT of ribbing. Summer Solstice doesn’t. Another bonus!

Not wanting to buy more yarn, I looked at the stash and it struck me that I could use this yarn for it if I knit the body, sleeves and collar different colours:

So I got to playing with ‘replace colour’ in Photoshop:

I like this combo.

I’ve knit a tension swatch and started knitting. The only thing I’m worried about is that the yarn is a bit scratchier than I’d prefer. I’m aware that I’m knitting it on faith that it’ll soften up with washing and use. The swatch seemed to improve after I washed it. It’s funny how, whenever I find a yarn is a bit scratchy, I always decide I’ll consider it a ‘jacket’ rather than ‘cardigan’. Even though it makes little difference to how and when I’ll wear it. Being a bit sensitive to wool anyway, I always wear a layer of cotton underneath no matter what kind of garment it is.

New Yarn, New Projects

Getting down to the ‘bottom’ of the stash (well, down to 10 kilos) has it’s problems. As I’ve already mentioned in another post, I’m now having to tackle some ‘difficult’ yarns. The sideways vest was an good example of nice yarns that don’t lend themselves easily to available patterns, and designing my own pattern seemed like the only solution.

Another solution is to buy more yarn.

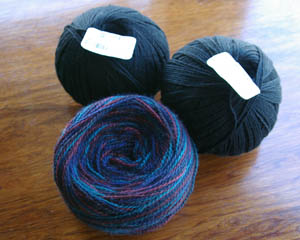
As in the case of this one:

For which I took advantage of Bendigo Woollen Mills having a sale and bought some Luxury 8ply in black to go with it:

The plan is to knit the front and back of a sweater in stripes of the coloured yarn and black, with the sleeves and bands all black. I’ll use a basic pattern from one of my books, minimising the risk of error and reknitting that comes with designing it myself.

I also picked up some light green cotton for a gift, because I had nothing remotely suitable in the stash:

This one will be my own design, but a very simple one done on the knitting machine if all goes well.

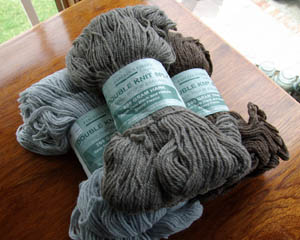
But for handknitting, I’m hoping to tackle this yarn next:

Natural coloured yarn I picked up in New Zealand. I wanted to buy a hank in each colour, but held back and chose three. Of course, finding a pattern I liked that used equal quantities of three colours isn’t that easy. I’m going to try a pattern for a single-colour cardigan and use a different colour for the sleeves, waist section and collar. More on that to come in another post.

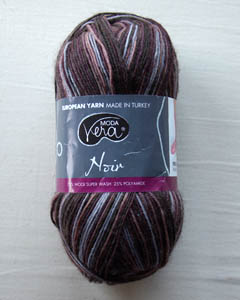
My next pair of socks will be a Christmas present for Dad knit out of this:

Refashioning: Shorts to Skirts

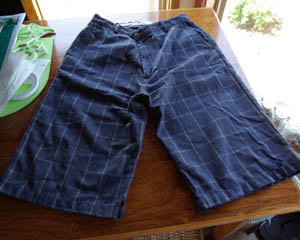
The weather has taken a sudden turn toward summer here, so I recently dragged out all the pairs of shorts I own and tried them on. As I suspected, only two pairs still fit me. Of the three that didn’t I wasn’t too disappointed about discarding two, but I was a bit sad about this pair:

Nearly all my shorts are menswear, and these are no exception. I have a long body and high waistline, so low waisted pants either don’t fit me or are unbearably uncomfortable. Even what they call ‘high waisted’ these days is a bit low on me. For the last ten to fifteen years I’ve bought only one or two pairs of women’s pants, and I am so looking forward to waistline fashions to swing the other way again. In the meantime, I discovered a while back that the baggier styles of men’s pants and shorts can be comfortable. These shorts actually looked good, too. Funny how when things fit they look good on you. But I’ve put on weight since I bought them and they weren’t looking good or feeling comfortable any more.

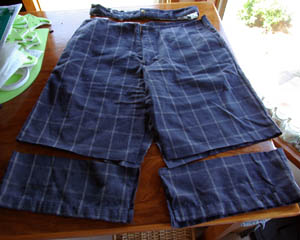
So I got chopping:

The waistband came off. The inner leg seams were unpicked so I could sew fronts to fronts and backs to backs. I also took some fabric off the bottom of both legs to make into a new waistband.

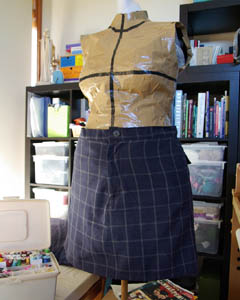
I haz new skirt:

In fact, a few days later I had another look at the pair of shorts I was going to cut up intro strips for rag rugs, and decided to cut the inner leg seam to see if they’d fit better as a skirt. Sure enough, there was plenty of room once the waistband could sit at my natural waist line. So I got sewing – and this time I didn’t have to redo the waistband so it was a lot faster:

New denim skirt!

In the end I didn’t have to toss any of the pairs of shorts. The third too-small pair, made of cheap lightweight cotton, were fixed by cutting off the waistband and adding a band of stretchy ribbing. In this case they remained as shorts – and very comfortable they are, too!

Finished – Knitting

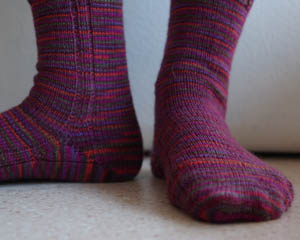
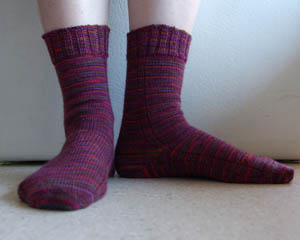
My three WIPs are done and dusted. First, the socks:

Yarn: Touch Yarn Magic Merino for Socks
Pattern: my own toe-up version with a short-row heel.
Verdict: I love them! I used to knit my socks with 56 stitches around, but lately I’ve found I get a bit swelly around the ankles from time to time, and then my socks get a bit tight. So I’ve gone up to 60 stitches with these socks and added a couple of stitches of purl to form a teeny bit of ribbing. I had fun incorporating the purl lines into the foot and short-row heel. For the leg I simply knit plain then when I got to the cuff I dropped the stitches that were to be purls and turned them into purls with a crochet hook – much faster than ribbing as I knit. But the foot of the sock doesn’t need to be larger, so next time I’ll start the socks with 56 stitches, then increase to 60 for the leg and then do the dropping and hooking as purl thing at the end.

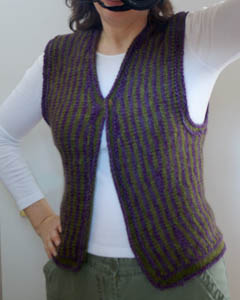
The sideways vest:

Yarn: Eki Riva Natal and Oro Inca held together
Pattern: One I made up
Verdict: Unfortunately I don’t like it. Though it looks okay and I like the stripes and short rows, the fit isn’t quite right (armholes too low) and I simply don’t like the way yarn with little memory hangs. I am much fussier with my own designed garments than with other people’s patterns, but I think this would better fit someone taller than me (or with a longer body). It’ll probably end up at the op shop, and I’ll chalk it up as an interesting exploration of a technique and more yarn out of the stash.

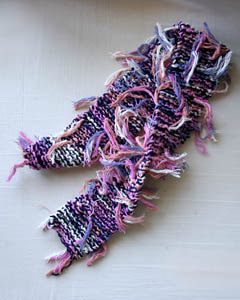
Finally, the garter stitch loom ends scarf:

I was right in predicting that the scarf would be too short. No problem, I just frogged it and reknit the yarn doubled with some navy cotton from a project I recently frogged, giving myself even more garter stitch therapy. I’m not into pink, even combined with other colours, so this’ll be given away.

Finished Projects – Loom Stand

I’m going to skip Sketch Sunday this week and maybe next week, too, because I’m proofing a copy edit of a book in a shorter than usual time and it’ll be easier to do a few sketches to catch up when I have more free time again. In the meantime, I have a few partly prepared posts I can publish.

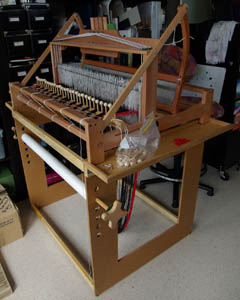
Here’s the mostly finished loom stand:

We still have to make and attach pedals, but for now I can continue using the lever system to move the shafts. I’m halfway through tying on a warp, and I’m finding that having the ends hang instead of piling up on a table beneath makes them easier to handle. It’s also much more comfortable to sit at the loom, because there’s room to get my knees under the front beam.
I’m really happy with how it came out. I can get to the shelving beside it much easier than I could get to it when there was a big table in front. But the workroom cleanup has a long way to go yet. I still have a lot of projects to tackle in order to get more stuff off the floor, and some of them are big. And, as I said at the start, work is eating up most of my time at the moment.
One Piece Wearables & Canvas Remix

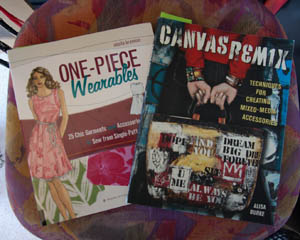
I ordered these two books from Fishpond recently, having seen them both on blogs.

One Piece Wearables is a book of garments made from one pattern piece (and the patterns are supplied within a pocket in the cover), using ties or elastic and avoiding zips and/or buttonholes – though I did spot one zipper. Having one piece of fabric make up a garment is meant to keep the process simple for new and time-poor sewers. I’m not entirely convinced that the patterns always achieve that, but most do and, well, you don’t know until you try them out. The book uses illustrations rather than photographs which is nice, but while some illustrations are well done, others aren’t as successful and it detracts a bit from the book overall. There’s also a theme of men fawning over women that’s a bit cheesy. Still, the approach of the book is interesting with a range of patterns to try, and there are definitely a few garments in this that I’d like to make.

Canvas Remix is a book written by Alisa Burke, an artist whose blog I follow. I’m drawn to her bold, painterly style with its graffiti inspired spontaneity, and the book explains her techniques well and has a range of tutorials for fun projects. I want to explore the layering demonstrated in this book, but I can’t decide whether I want to produce fabric to make things with, or paintings. Maybe both. I’m thinking that, either way, it has all the satisfaction of playing with texture and layers that attracts me to art journalling, without the journaling part that doesn’t interest me as much.

Work in Progress – Recycled Foam Stamps

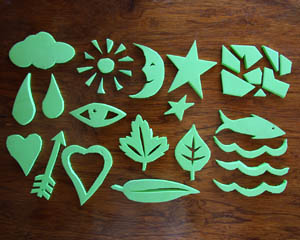
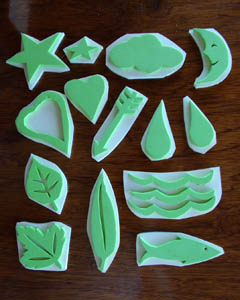
I’ve been wanting to try making some simple stamps out of foam since seeing several crafty bloggers doing it. The trouble was, most of those bloggers lived overseas and Aussie manufacturers don’t appear to use the same kinds of foam in our packaging here. I tried a polystyrene meat tray, but it didn’t work very well.

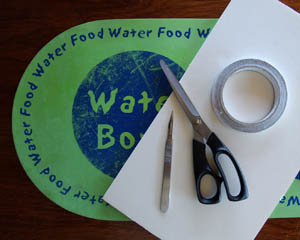
Recently I replaced this cat feeding mat when the old one started looking a bit worn and tired. I decided to see if it would be a suitable material

It turned out to be rather nice to work with. I could cut out rough shapes with scissors, then add detail with a scalpel.

I stuck the pieces onto an old sheet of foam core and cut them out.

Now I just need to try printing with them.

Work in Progress – Duct Tape Dress Form

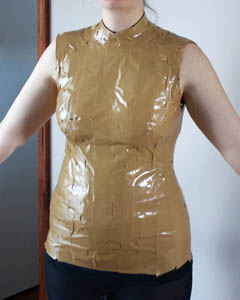
My recent foray into refashioning clothing got me wondering if it would be any help if I had a dress form. Now, I’m not going to go out and buy one just to find out. I’d seen instructions on making your own out of duct tape on the web, and there was a tutorial in Wendy Bernard’s Custom Knits, too. It looked like too much fun not to try it.

The idea is you put on a sacrificial t-shirt and get a friend to wrap you up in tape. I got Paul to do it for me.

Once a few layers have been applied and some marks to indicate the bust and waist line, etc. your friend cuts it down the back so you can escape. Then you tape it up again, add a base and stuff it with batting.

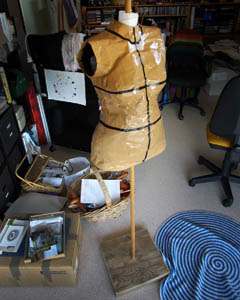
I took it a step further and got Paul to make this stand for me out of a block of wood and dowel, so I can put a skirt on it and the length will fall about as far from the floor as it would on me. I’m stuffing it with bubble wrap. I’ve run out of bubble wrap with it only half full, however. Unfortunately, while I saved a whole heap over the last year to use while the kitchen renovation was happening, I threw most of it out once we’d unpacked everything.

It’s only a matter of time before Paul’s eBay habit brings more bubble wrap into the house. I just have to be patient…

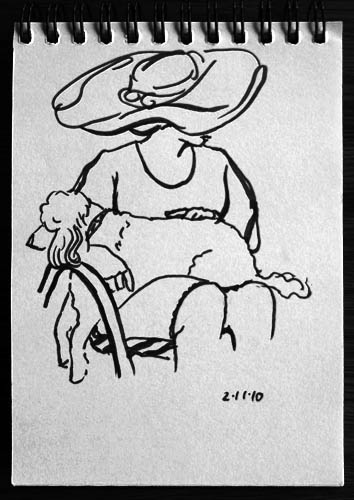
Sketch Sunday 53

The Melbourne Cup is one of those strange local holidays that, despite it only being a public holiday in metropolitan Melbourne, is so celebrated and part of the local culture that I tend to forget that not everybody in the country – or even the state – is having the day off. This year we went to a friend’s BBQ lunch. The hostess lives in the country, though not much more than an hour’s drive from the city, on a large block. She’s always been keen to have people out there to paint and sketch for the day.

When I took my sketchbook out and started looking around for things to draw, friends who have noted my new habit openly suggested I draw the dogs, both who are poodles and were sitting on people’s laps. One of them was sitting on the hostesses lap, so I made a start drawing that.

Now here’s the funny thing. The hostess put the dog down, got up and went inside.

Maybe she felt uncomfortable about being sketched, but it was openly discussed, I said I was going to draw her and changed position to get a good view. She’s not the sort to hold back from saying ‘don’t draw me’.

Maybe she realised she was uncomfortable only after I started. Now, of course, I’m all uncomfortable about having drawn her and wondering if I caused offence.

Anyway, I did get enough line work done to roughly capture the dog, and I simply drew the hostess’ hat from memory so I didn’t have a headless figure – in fact I’d intended to have the hat mostly cover the face anyway.