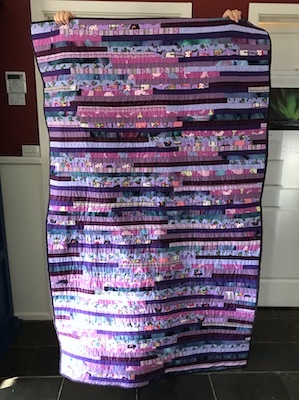
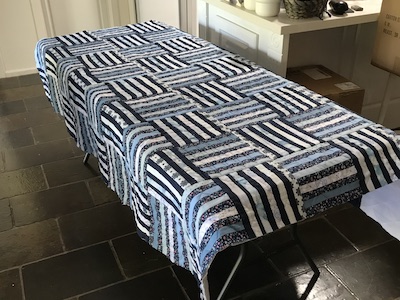
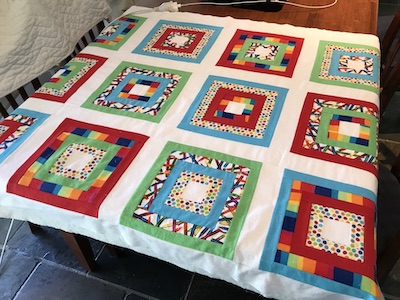
The Purple Quilt is done. It’s a cosy couch quilt size.
This one makes me feel competent. The strip sequence came out nicely, and the newer way of binding went well. I like the colour combination.
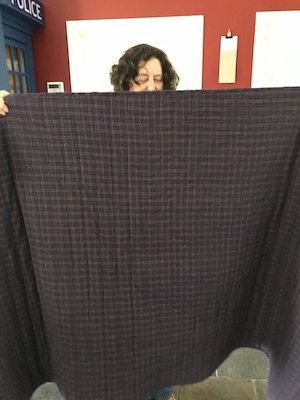
The back is a brushed cotton plaid.
“Stitch in the ditch” on every second row seems to work just as nicely as every row and takes half the time and thread. If I was to make another quilt, out of those blue leftovers, I’d do another one of these strip quilts.
It turns out I’ve been doing binding wrong. Well, not the usual way for quilts. I’m supposed to be making a wide strip, ironing it in half, sewing the raw edges to the back of the quilt, then folding it over to to the front and sewing it down. I’ve been making a narrower strip, sewing one raw edge to the back, folding the other edge over then sewing it to the front.
I tried this new method and it is slightly easier. However, I forgot which side of the quilt I was supposed to be sewing it to first, and wound up having to hand stitch it down. Never mind. I do quite enjoy hand stitching, even if it sets my back off.
Here’s the back of the quilt:
Here’s another shot of the front:
It’s far from perfect. On the other side of the galaxy from perfect. But I actually finished it, which I doubted more times than I can count. I’m calling it the ‘learner quilt’.
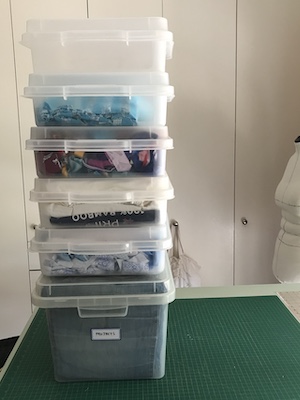
When I started, all these boxes were full of flannelette strips and some uncut fabric:
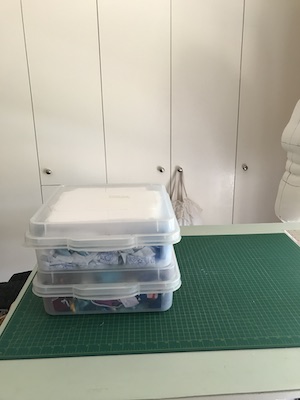
And this is what I have left:
Whatever I do with the leftovers, it’s not going to be quilts. I might make fabric-wrapped rope baskets from it. I might made fabric pompoms. I might use it as stuffing. I might just send it all to fabric recycling.
What I do know, is that a bag of scrap fabric can go a loooooong way. That huge bag of flannelette pieces I bought for $100 in early 2020 became five woven floor rugs and nine quilts from knee to double bed size. And that’s after a third of pieces were culled at the beginning because they weren’t the right size and shape to become strips.
I won’t be buying random bags of fabric again!
I also won’t be making flannelette floor rugs again. There’s too much time spent ironing the strips to conceal the raw edges, and I don’t think my body (or even my loom) is up for the pounding of the beater to get a tight rug. That’s fine, because I have three big rugs in my storage chest ready for when the one I’m using wears out, which is probably a lifetime’s supply considering how good the current one looks.
I might make a flannelette quilt again. The fabric does make a cushy quilt. But it wouldn’t be a big one.
I’d like to try making a ‘normal’ cotton fabric quilt one day. But not for some time, I think. I’ve had enough of quilting. It’s time to get back to the sewing I meant to do before all this started.
But wait, I hear you say. What about the topstitching and binding of all those unfinished quilts? Well, I decided I only had to get the flannelette strips made into quilt tops by the end of summer. My plan after that is to tackle finishing one quilt a month, and hopefully have them all done by the end of the year.
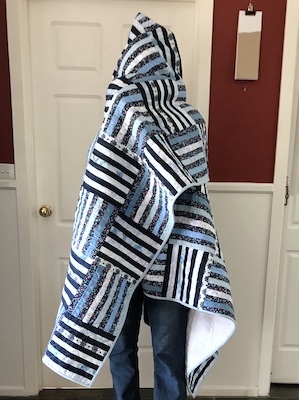
I was a bit fed up with the numerous problems this quilt kept throwing at me, and tempted to pack it away for a while, but I knew I’d probably forget how I was fixing the rows of blocks so I had to get that part done. To preserve my will to live, and because the Sew Mini was old and I didn’t want to overheat it, I also decided to fix no more than one row of blocks at a time. I got distracted by the Purple Quilt top, but once that was done I returned to the blue quilt and finished the last three rows of blocks one hot Sunday when I just wanted easy, brainless sewing to do.
Then I did put it aside. Using a walking foot would make the topstitching much neater, and I didn’t think the one I had would fit the Juno. Instead, I made the Square Cat Quilt and Crayon Quilt.
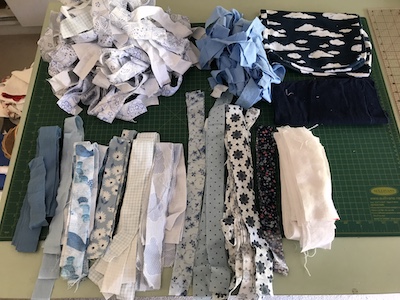
That left me with this:
The leftovers from the Blue Quilt.
And everything else.
I didn’t want to do anything with the blue leftovers it until I’d finished the blue quilt in case I wanted to add more sashing and patchwork to the sides. The mixed leftovers batch didn’t inspire me. Not even the skull-themed fabric strips. I was almost left with nothing to work on.
But then the Juki was back and working beautifully. I launched into finishing the Blue Quilt. The quilt-as-you-go method is designed to lesson the time you spend wrestling a big, heavy quilt. But the more you add, the bigger it gets and in the final stage you do have a big, heavy quilt to deal with. During the break I’d had an idea to lesson the strain. Instead of just adding rows of blocks and it getting bigger and bigger, I could work from both sides simultaneously, creating two smaller sections that would be joined at the middle. Only when the middle section had to be top-stitched would it be a PITA to handle.
To add the middle section, I sewed it onto one already quilted part, then sewed the other side of the top onto the other already quilted part, then hand stitched the backing in place.
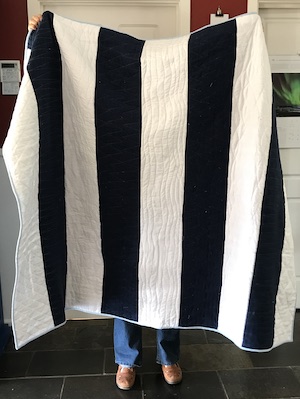
Then I just had to top stitch it. Yeah. What a monster. I had to unpick nearly half of it and sew from the other end to try and smooth it out, but I tell you, if there were quilt exams this one would get an F-.
But it was assembled at last.
And I hadn’t needed to put aside the blue batch of leftover strips. There wasn’t any way I was going to wrestle the monster Blue Quilt a minute longer. Well, except for the binding, but that’s another story.
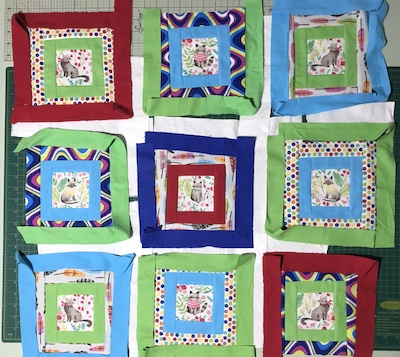
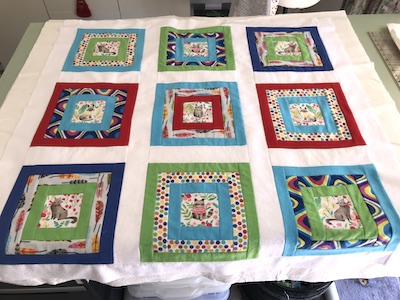
When I considered what quilt to make next, I considered the leftover strips and asked myself what I would hate to toss out. My eyes went to the crayon and psychedelic fabric, and the uncut pieces of fabric with feathers and cat-in-a-garden designs.
I started playing and found myself making borders around a white square. I’d seen this method of building blocks in videos, and it looked simple and fast. I began matching solid coloured strips and chose three that matched well, and I was ready to start the construction.
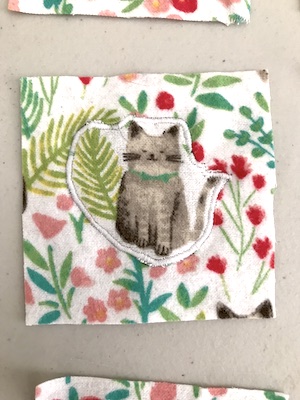
I began with the squares, which I fussy cut. I wasn’t able to get one of the types of cat cut from the fabric and managed 8 squares. But when I laid them out it seemed obvious that a 3×3 grid would work best. So I cut around the cat an appliquéd it to a square cut from a plain garden part of the fabric.
Next I laid out coloured strips for borders. Then I took three of the multicoloured fabrics I liked – feathers, dots and psychedelic stripes – and added the next round of borders. Then more colour, and sashing in white.
And I got sewing.
I’m calling this the Square Cat Quilt
I really enjoyed the patchworking method, so I decided to do another quilt using it. This one used the crayon, dotty and thick stripe rainbow fabric cut across not along the stripes. I was able to make twelve blocks before I ran out of fabric.
This became the Crayon Quilt
At this point, I was also spending time cutting backing, batting and allocating fabric for binding. By the time I finished the second squares and borders quilt, I had five quilt sandwiches ready for top stitching. Add to that the Blue Quilt, which used the quilt-as-you-go method, and I had six quilts to finish.
And one or maybe two more quilt tops to make before I was done for the summer.
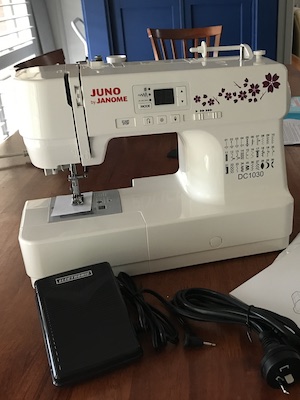
So, thanks partly to the Juki requiring a service and repair, I have a new machine.
I’d had a shop web page for it bookmarked for many months – maybe even a year – as a machine for taking to friends’ houses or lessons. When the Juki started eating needles I checked on the web page and to my delight it was on sale, reduced by 33%.
So the Sew Mini went back in the cupboard and I put the Juno to work. Oh, it was nice to have a variable speed foot pedal again!
I turned my attention to the batch of striped fabric strips. I discovered three things: firstly, I had leftovers from the Snakes & Ladders quilt already sewn together; secondly, the overall combination of stripe patterns didn’t combine that nicely; thirdly, it also contained some uncut pieces of fabrics.
Regarding the already sewn pieces, some were in pairs, some were several pairs sewn together in a short column. They were of similar widths so if all the pairs were joined I would have a longer column. Four of the fabrics – about half of them – were a combination of strips cut along and across the stripes, and could be sewn together the same way. I could do a column of each, then join them all together with a strip of white between. So I did that.
Midway through fixing the rows of blocks for the blue quilt, I got bored. So I took the batch of purple strips, ironed them, removed those with selvedges, and sorted them into stacks of the same fabric and laid them out in an appealing colour sequence. I had near enough to twenty of most of the fabric designs. So I cut in half a few strips of the ones that were less than twenty, then got to sewing it all into one long strip.
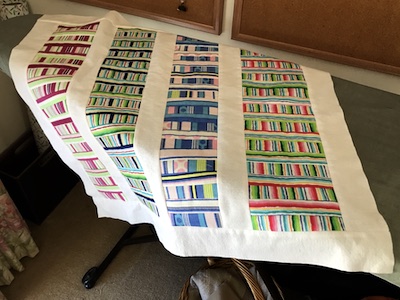
With that done, measured, counted and did some math and worked out that if I cut the strips 120 cm long and sewed them together lengthwise I’d get a quilt top around 180 to 200 cm long. So I started doing that. 2-3 days sewing later and I had this:
Which I’m pretty happy with, and put in the pile of quilting to do when I get the Juki back.
With the Blue Quilt and Rainbow Cat quilt in limbo it seemed a good time to assess the remaining flannelette strips. I didn’t want a quilt with fire engines, monkeys, frogs, princesses and other themes for children, so I removed those. I put aside some black and red skull themed strips to make a lap blanket with because I like them. The remaining strip stash was made up of solid colours, strips of multicolour striped fabric, quite a bit of purple, and leftovers from the Blue Quilt.
I’d had an idea for a quilt that looked like a watercolour paint box, but multicolour fabric wouldn’t work for that and I didn’t have enough variety of single colour fabric in green, yellow and orange fabric. The fact that the fabric I had was limiting my creativity was a good thing: it meant the quantity of strips had reduced significantly. If I wasn’t going to buy more fabric I had to work with what I had. So what could I make?
Idea 1: a purple quilt
Idea 2: another blue quilt (but using an easier technique)
Idea 3: a graduated solid colour quilt – perhaps with alternating white stripes
Idea 4: a quilt from all the leftover striped fabric
Idea 5: a skull-themed lap quilt
So not so plenty to keep me entertained for a while. However, this was supposed to be the Summer of Quilts, not the Summer and Autumn of Quilts. I wanted to be finished and done with flannelette strips by the end of February so I could go back to sewing clothing in March, even if it meant tossing the remainder into the recycling.
If I couldn’t get all the quilts made by then, what should I aim to complete?
The answer was this: as many tops as possible. My aim was to use as many of the strips as possible. I didn’t need the topstitching part done to achieve that. The Rainbow Cat Quilt, Blue Quilt and anything else I made could be quilted another time.
Could I get the above five quilt tops made in less than a month? Perhaps, if I worked fast and smart. No fancy block designs. No paper piecing of blocks that changed shape after the blocks were sewn together. Just strip quilts, like the aqua quilt, or very basic blocks.
The tail end of the Summer of Quilts was going to me a race against the calendar.
Sewing the squares for this was so much fun – the most enjoyable technique I’ve used so far in this Summer of Quilts.
A friend decided to have a sewing day, so I wound up sewing squares every day for a week to get them done in time for it. I figured it would be a quick and easy task to sew the squares together, but it turned out taking the paper off the back is quite time-consuming, so I only got half of the top constructed.
The next day I was tired, and the next week was really busy, and then I was really, really tired. After a week I hadn’t touched the quilt except to remove the rest of the paper. Eventually I did get the top finished. I cut the backing and batting and made the sandwich.
But then the shop that I had ordered the rainbow topstitching thread from rang to say it wasn’t in stock so they’d have to order from the supplier, which meant it wouldn’t arrive for a few weeks. I put the quilt aside and returned to the Blue Quilt.
Well, three weeks later there was no sign of the thread, so I gave up on that and started looking at other ideas. In the interim, I had discovered that the quilt had relaxed and distorted, pulling in at some corners and protruding at others. I resewed the protruding ones to get them to sit flatter, but I don’t have room to let out the seams where the corners pull in. It looked like machine quilting would be very troublesome.
So I decided I would hand quilt it. Which I expect will be slow work, but maybe, hopefully meditative. But at least I don’t have to wait for the Juki to come back from the repairer do it.
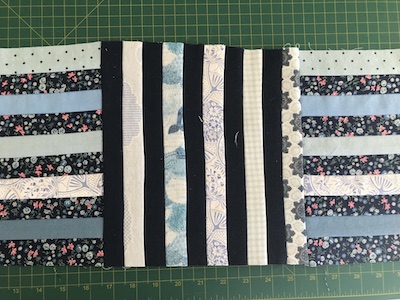
I didn’t get back to quilting for a week, and when I did I was all fired up to sew the rows together. However when I looked at them, I realised that in my determination to get the rows sewn, I’d made a big mistake.
My blocks looked wonky.
The middle block is square, but the righthand one is pulling it in and the lefthand one is stretching it out.
Some were 9 3/4 inches wide, but most were 9 1/4. I looked at the markings on my square ruler and realised that I’d been distracted by the big fat dominant red lines that marked the half inches, and put my marking tape at the 9 1/4 mark.
Ten stripes together measured 9 3/4 inches. I’d had to do a bit of stretching and pinching of seams to get the blocks to fit together, and this explained why. I went for a walk and considered what to do. I could remove two stripes and cut the blocks down, or I could sew every other seams of the stripes to narrow the strip width. Either way, I was going to have to unpick every row of blocks and rework them in some way.
I decided on the latter option. But I didn’t do all the blocks at once (at first). To make the task seem less like drudgery, I began a quilt-as-you-go method at the same time. (I had been intending to send the quilt to a quilting service, but when I read the tips and tricks on their website it said “Don’t use selvedges” and I groaned aloud. If I’d rejected all the flannelette strips that had selvedges I wouldn’t have had enough for the quilt!)
This meant making a sandwich and quilting the first row, then sewing on the second row and backing at the same time, then tucking batting between and pinning it all together before quilting the new section. Then sewing on the next row until the whole quilt was done.
For the quilting of the first row I did a simple 45 degree angle grid, not trying to be precise. It involved a lot of turning of the fabric sandwich, which I realised was going to get slower and more annoying as the quilt grew in size. So for the second row I did a simpler vertical zig zag, and was able to avoid turning the sandwich by using the backwards stitch on my machine. Having done two different patterns, I decided to see if I could do something different on each additional row. On the third I did wavy horizontal lines, using a walking foot.
As I was fixing the blocks of the fourth row, my machine started breaking needles at random times. It seemed to happen whenever I changed the bobbin, but then it would happen when I hadn’t changed anything – one seam would work perfectly but when I started the next: BAM! Another needle broken. There seemed no option but to take it in for repair.
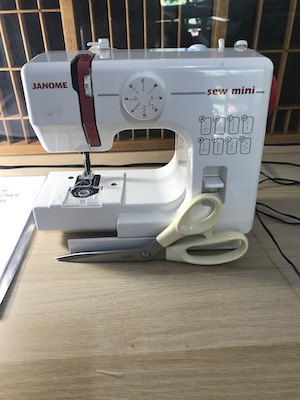
I’d given my old regular machine to the op shop, so the only back up I had was this:
Scissors for scale.
Which is very cute, very basic, very noisy, but for fixing the blocks it works just fine.