I took a five day break from sewing before starting on the next stretch fabric projects, and rather than continue making tops I started with a couple of UFOs. The first was to put ribbing cuffs on my painting jacket, which I’ve been meaning to do for, um, over thirty years. The second was to put ribbing cuffs on a jacket I made from woven material some time ago. I’d already changed the collar to ribbing last year, then got distracted by quilts and other things. The old too-narrow collar looked like it was eked of a scrap of fabric – which it was – and the sleeves were too short, so these bomber jacket inspired changes improve both the look and wearability of the garment.
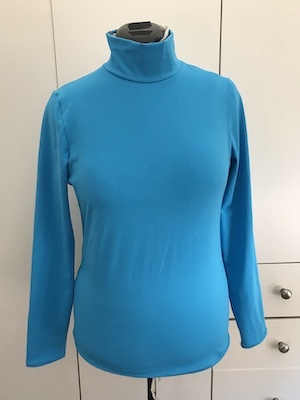
The next day, the Saturday of the Easter long weekend, was a craft and chat day with some friends. I felt familiar enough with the pattern and overlocker to whip up another mock turtleneck.
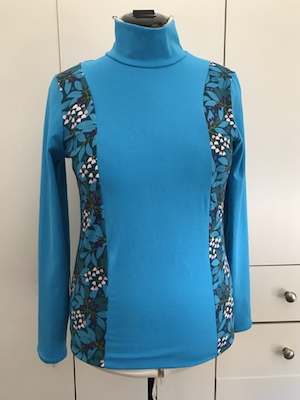
Then I took the leftovers of aqua and floral fabric and made this colour-blocked top.
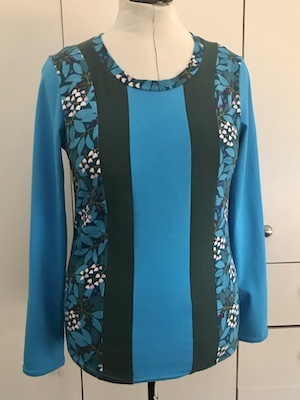
However, I wasn’t satisfied with the second one. Something about it felt out of balance. It looked like I was wearing an ill-fitting vest. So I checked what fabric I had left in the stash and did a bit of tweaking on my phone, and eventually settled on adding vertical stripes and a scoop-neck.
With the Mushroom Top done, I was almost ready to change the thread on the overlocker. But there was one more idea I wanted to try.
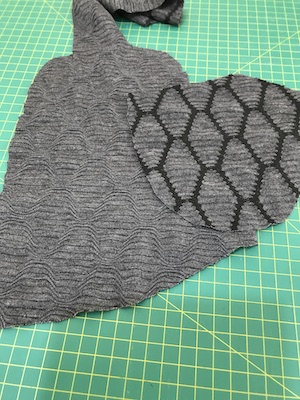
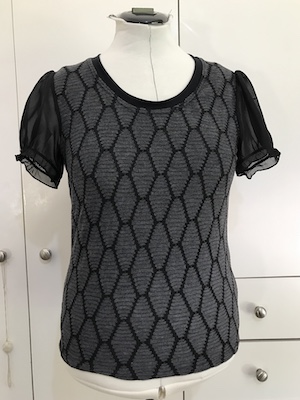
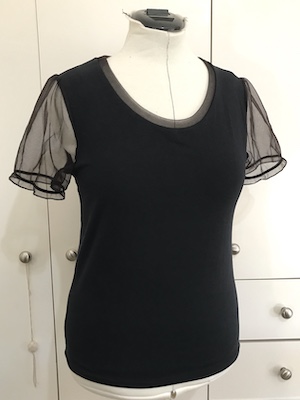
I had noticed when making the Textured Turtleneck that the back of the fabric was nice too.
I’d also noted that the sleeves on the top that inspired the Gauze-Sleeved T-shirt were still in pretty good shape.
So I spread out the textured fabric to see if I had enough for the body of a top. Yes, I did. Then I unpicked the gauze sleeves and they came off without a hitch. The two fabrics next to each other looked pretty good, so then it was just a matter of cutting out and sewing.
Which, of course, didn’t go as straightforwardly as that. My brain kept insisting that the black hexagon side of the fabric was the wrong side, so there was a lot of unpicking. I tried removing the gauze neckband on the old top but it wasn’t coming off without a fight that would probably destroy it. Fortunately, I had a piece of the black fabric I’d used for the Mushroom Top neckband – the bit I’d trimmed off – and it was big enough to use for the neckband on this new top.
It came out even better than I expected:
At this point, I was definitely in the groove of sewing with stretch fabrics. I had two new gauze-sleeved t-shirts, one freshly made mock turtleneck and one long-sleeved top added to my wardrobe – along with the Cascade Skirt. The to-do list consisted of an aqua mock turtleneck, a long-sleeved colour-blocked top, a navy t-shirt and possibly a navy colour-blocked top, and a batch of fabric that might be big enough to make another wrap dress. So I was not quite half way through.
I admit, the next garment I made was influencer influenced. There was a frugal sewing challenge for March happening via YouTube at the time. I didn’t want to join it, and it wouldn’t have qualified because I wasn’t using a free pattern anyway, but it was encouraging sewers to make things out of scraps and there was a lot of talk about colour-blocking.
I had two in mind, one in an aqua and complimentary floral fabric, and another based on a scrap of mushroom printed fabric plus a mix of black, dark green and brown leftover knit fabric.
I intended to make a mock turtleneck out of the aqua fabric, too, so I cut those pieces out first. Then I put it and the aqua and floral fabric aside. Sewing them would mean switching out the thread on the overlocker and it made more sense to tackle all the projects that used the black on the machine. Which did include the mushroom top.
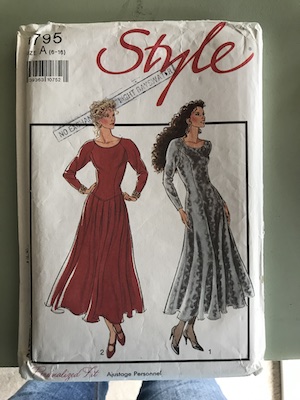
The mushroom fabric was too small for any piece of the Alexi top pattern, but I had an idea to turn this dress pattern, with princess and raglan seams into a top:
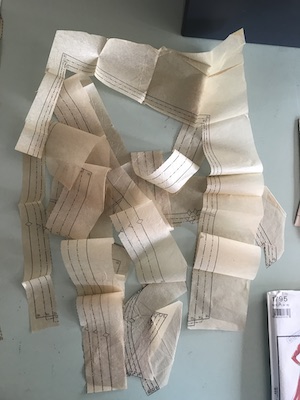
I made the righthand version back in the 90s, out of a chocolate brown stretch velvet with a rose pattern. It worked perfectly, but with such a full skirt was very heavy. I was a size 10 back then, and hadn’t learned to trace off a pattern in the size I wanted, but I’d kept all the pattern offcuts.
All I had to do was tape them all back on. I spent half a day tracing and altering the pattern, and doing a test version. I used the skirt fabric from the test version of a wrap dress I made year and a half ago (so using up another ‘scrap’):
The result was a bit too nipped in at the waist, but otherwise fit fine. I made some pattern adjustments, then started designing.
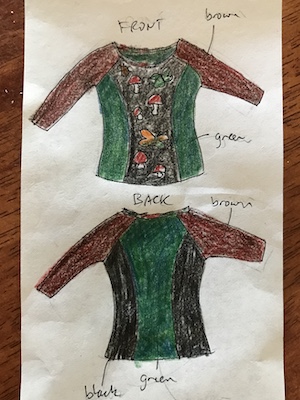
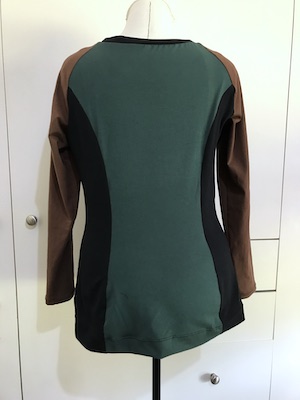
The centre front fit easily on the mushroom fabric, but there wasn’t enough to do a centre back. I examined the black fabric scraps, and the only pieces that fit onto that was the side back. Since I didn’t want any colour of fabric butting up against itself, the rest was pretty much decided for me. The side fronts and centre back would have to be green, and the arms had to be brown. I did a sketch to see if I liked it:
I did, so a few days later I cut out the pieces and got sewing. It all went together well until I got to the neck band. As soon as I put it on I felt uncomfortable. The neck opening was much too big. I’m not sure why I didn’t feel that way with the test version, but then the weather had got a bit chillier. I removed the band, shortened and re-pinned it. Didn’t sit right. I made a wider band and tried that. Really didn’t sit right. Finally I put it on the mannequin, pinched in the raglan seams, pinned on the original band – and that fixed it. So I sewed on the band and altered the pattern.
The Mushroom Top was done:
The back:
Constructing this post and seeing the dress pattern again, I realise that the dress is probably supposed to have shoulder pads, so that would explain the extra roominess there. I’m glad I put the work into making it into a top pattern, because it is a good one for using up smaller pieces of fabric. I might use it for the blue and floral top… or I might do something else.
The Cascade Skirt was top of my list of garments to make, and once it was out of the way I wanted to get stuck into sewing up as much stretch fabric as I could. Not because I had an excess of it, but because approaching winter always makes me want to sew the sort of clothes I wear in cooler seasons: skivvies, mock turtlenecks, long-sleeved t-shirt tops and leggings.
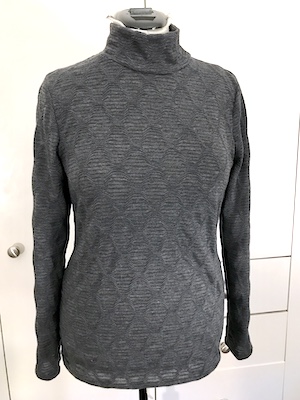
I had no fabric earmarked for leggings, but plenty for tops. My wardrobe contains plenty of skivvies and long-sleeved t-shirt tops, but not as many mock turtlenecks. So for my first project I made the Textured Turtleneck, out of some grey textured cotton-synthetic blend offcuts from a destash.
The pattern I used is the Alexi top from StyleArc. I’ve used and adapted it so much that the paper has become very delicate where all the pins holes are, so after I made the grey top I traced a new copy.
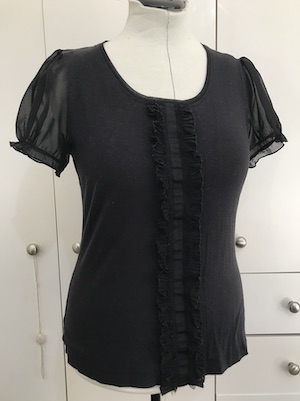
The next piece I made was another adapted of Alexi, this time to make a knockoff of a t-shirt I love, but the fabric of the body is so low quality that it has faded and lost elasticity despite not being worn or washed very much.
It only needed some extra width added to the centre of the (shortened) sleeve pattern to create the puff, and a different shape for the neckline. However, the sewing was a challenge because the gauze fabric was slippery to work with. It took two attempts for me to get the neck band looking good. I was pretty chuffed with the resulting Gauze-Sleeved Top.
Then, encouraged by sewing YouTubers advocating for pressing a garment when it’s done, I melted the neckband and had to cut it off and redo it. The up side to that was the neckline looks better a little lower.
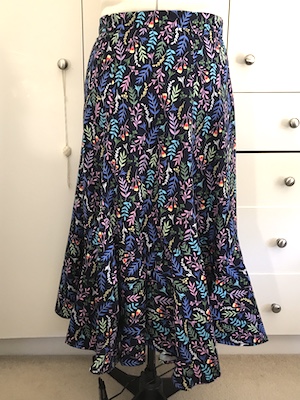
I’ve finally started the sewing I meant to do six months ago. First up was a copy of a skirt I love but is getting thin and developing holes. I traced a pattern from it and bought fabric last year, so it was just a matter of cutting and sewing.
The fabric is a touch thicker and stiffer than the original’s, but still nice to wear and, unlike the original, isn’t see through.
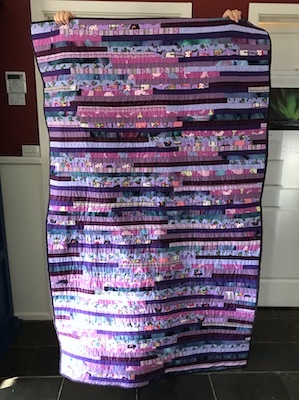
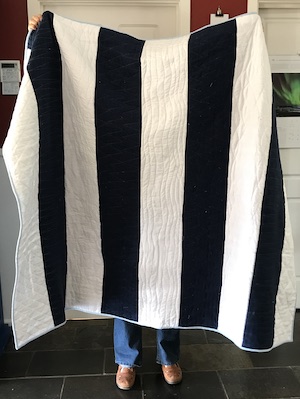
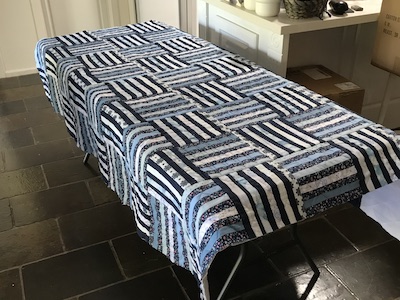
The Purple Quilt is done. It’s a cosy couch quilt size.
This one makes me feel competent. The strip sequence came out nicely, and the newer way of binding went well. I like the colour combination.
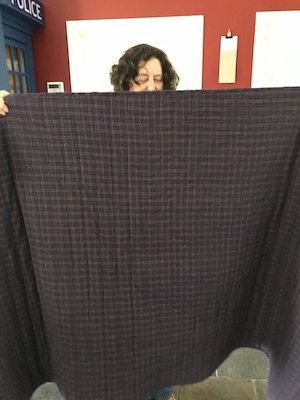
The back is a brushed cotton plaid.
“Stitch in the ditch” on every second row seems to work just as nicely as every row and takes half the time and thread. If I was to make another quilt, out of those blue leftovers, I’d do another one of these strip quilts.
It turns out I’ve been doing binding wrong. Well, not the usual way for quilts. I’m supposed to be making a wide strip, ironing it in half, sewing the raw edges to the back of the quilt, then folding it over to to the front and sewing it down. I’ve been making a narrower strip, sewing one raw edge to the back, folding the other edge over then sewing it to the front.
I tried this new method and it is slightly easier. However, I forgot which side of the quilt I was supposed to be sewing it to first, and wound up having to hand stitch it down. Never mind. I do quite enjoy hand stitching, even if it sets my back off.
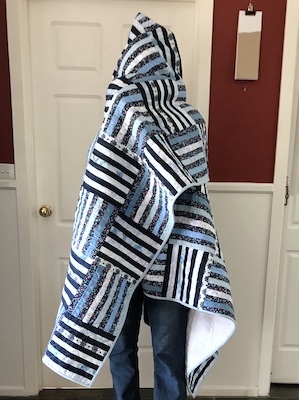
Here’s the back of the quilt:
Here’s another shot of the front:
It’s far from perfect. On the other side of the galaxy from perfect. But I actually finished it, which I doubted more times than I can count. I’m calling it the ‘learner quilt’.
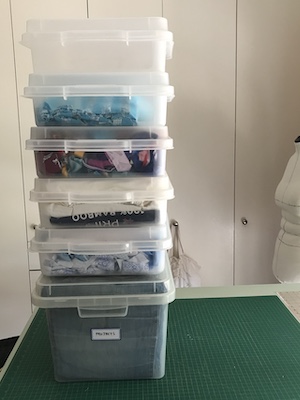
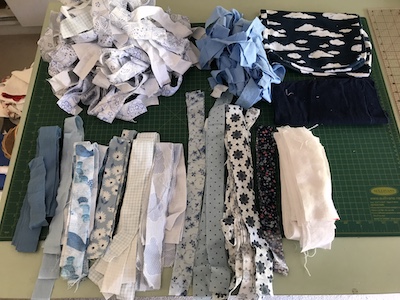
When I started, all these boxes were full of flannelette strips and some uncut fabric:
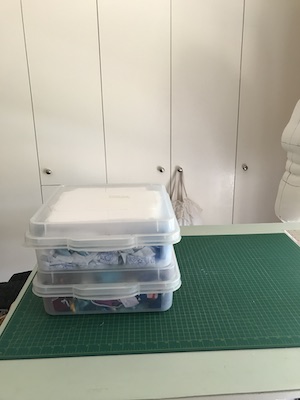
And this is what I have left:
Whatever I do with the leftovers, it’s not going to be quilts. I might make fabric-wrapped rope baskets from it. I might made fabric pompoms. I might use it as stuffing. I might just send it all to fabric recycling.
What I do know, is that a bag of scrap fabric can go a loooooong way. That huge bag of flannelette pieces I bought for $100 in early 2020 became five woven floor rugs and nine quilts from knee to double bed size. And that’s after a third of pieces were culled at the beginning because they weren’t the right size and shape to become strips.
I won’t be buying random bags of fabric again!
I also won’t be making flannelette floor rugs again. There’s too much time spent ironing the strips to conceal the raw edges, and I don’t think my body (or even my loom) is up for the pounding of the beater to get a tight rug. That’s fine, because I have three big rugs in my storage chest ready for when the one I’m using wears out, which is probably a lifetime’s supply considering how good the current one looks.
I might make a flannelette quilt again. The fabric does make a cushy quilt. But it wouldn’t be a big one.
I’d like to try making a ‘normal’ cotton fabric quilt one day. But not for some time, I think. I’ve had enough of quilting. It’s time to get back to the sewing I meant to do before all this started.
But wait, I hear you say. What about the topstitching and binding of all those unfinished quilts? Well, I decided I only had to get the flannelette strips made into quilt tops by the end of summer. My plan after that is to tackle finishing one quilt a month, and hopefully have them all done by the end of the year.
I was a bit fed up with the numerous problems this quilt kept throwing at me, and tempted to pack it away for a while, but I knew I’d probably forget how I was fixing the rows of blocks so I had to get that part done. To preserve my will to live, and because the Sew Mini was old and I didn’t want to overheat it, I also decided to fix no more than one row of blocks at a time. I got distracted by the Purple Quilt top, but once that was done I returned to the blue quilt and finished the last three rows of blocks one hot Sunday when I just wanted easy, brainless sewing to do.
Then I did put it aside. Using a walking foot would make the topstitching much neater, and I didn’t think the one I had would fit the Juno. Instead, I made the Square Cat Quilt and Crayon Quilt.
That left me with this:
The leftovers from the Blue Quilt.
And everything else.
I didn’t want to do anything with the blue leftovers it until I’d finished the blue quilt in case I wanted to add more sashing and patchwork to the sides. The mixed leftovers batch didn’t inspire me. Not even the skull-themed fabric strips. I was almost left with nothing to work on.
But then the Juki was back and working beautifully. I launched into finishing the Blue Quilt. The quilt-as-you-go method is designed to lesson the time you spend wrestling a big, heavy quilt. But the more you add, the bigger it gets and in the final stage you do have a big, heavy quilt to deal with. During the break I’d had an idea to lesson the strain. Instead of just adding rows of blocks and it getting bigger and bigger, I could work from both sides simultaneously, creating two smaller sections that would be joined at the middle. Only when the middle section had to be top-stitched would it be a PITA to handle.
To add the middle section, I sewed it onto one already quilted part, then sewed the other side of the top onto the other already quilted part, then hand stitched the backing in place.
Then I just had to top stitch it. Yeah. What a monster. I had to unpick nearly half of it and sew from the other end to try and smooth it out, but I tell you, if there were quilt exams this one would get an F-.
But it was assembled at last.
And I hadn’t needed to put aside the blue batch of leftover strips. There wasn’t any way I was going to wrestle the monster Blue Quilt a minute longer. Well, except for the binding, but that’s another story.
When I considered what quilt to make next, I considered the leftover strips and asked myself what I would hate to toss out. My eyes went to the crayon and psychedelic fabric, and the uncut pieces of fabric with feathers and cat-in-a-garden designs.
I started playing and found myself making borders around a white square. I’d seen this method of building blocks in videos, and it looked simple and fast. I began matching solid coloured strips and chose three that matched well, and I was ready to start the construction.
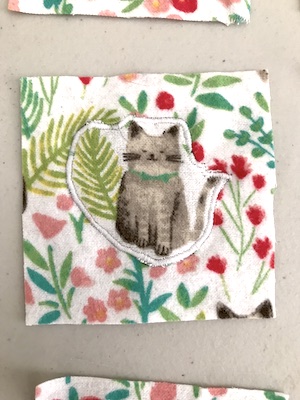
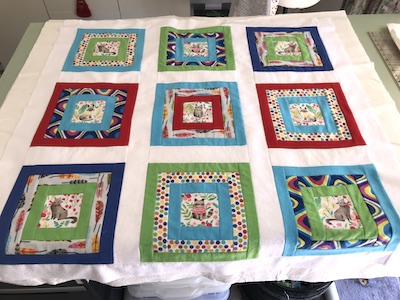
I began with the squares, which I fussy cut. I wasn’t able to get one of the types of cat cut from the fabric and managed 8 squares. But when I laid them out it seemed obvious that a 3×3 grid would work best. So I cut around the cat an appliquéd it to a square cut from a plain garden part of the fabric.
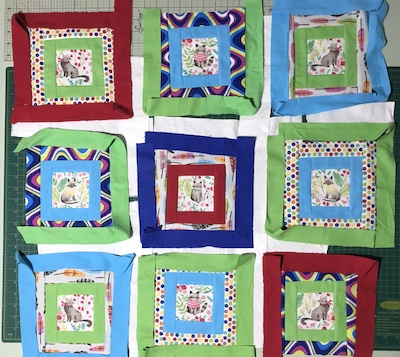
Next I laid out coloured strips for borders. Then I took three of the multicoloured fabrics I liked – feathers, dots and psychedelic stripes – and added the next round of borders. Then more colour, and sashing in white.
And I got sewing.
I’m calling this the Square Cat Quilt
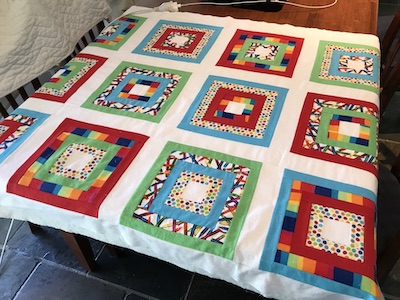
I really enjoyed the patchworking method, so I decided to do another quilt using it. This one used the crayon, dotty and thick stripe rainbow fabric cut across not along the stripes. I was able to make twelve blocks before I ran out of fabric.
This became the Crayon Quilt
At this point, I was also spending time cutting backing, batting and allocating fabric for binding. By the time I finished the second squares and borders quilt, I had five quilt sandwiches ready for top stitching. Add to that the Blue Quilt, which used the quilt-as-you-go method, and I had six quilts to finish.
And one or maybe two more quilt tops to make before I was done for the summer.