Prostashtination & the Crinkle Shirt

Recently I got to feeling quite poorly, and after a bit of gritting my teeth and pressing on, I had to admit I was getting worse and needed to stop and recuperate. So I decided to take a week off. A week of not going out (except one quick lunch with Dad) or attempting to get anything done. And since I was too tired and fog-brained to get anything done anyway, it wasn’t hard to enforce.

For the first four days I poked around in tubs of fabric and patterns and enjoyed refreshing my memory on their contents. I vaguely wished I felt well enough to turn some of it into a thing, but it was nice to not be under any pressure to do anything. Simple, quick things like pattern weights and pressing hams were made.

By the fifth day I’d rallied enough to spread out fabric and patterns to check if there was enough of the former to attempt the latter. I made a few new matches and felt a bit excited by that.

By the sixth day I felt like I could possibly start making a garment, but the push and pull between what I was now excited about making and what I needed to be making before Christmas/New Year was paralysing. Eventually I decided to it was better to do something than nothing, so I took some fabric and cut out the pattern pieces for a shirt.

The fabric is weird. It looks like a cotton crepe, but the back appears to have a looser second layer. While it looks like it should have drape, it doesn’t. I’d attempted to make wide-legged pants but they’d looked like two stiff columns so I’d cut them up in the hopes I’d make something else one day. It is organic cotton, which was rare back in the distant shadows of time that I’d bought it, so I resisted tossing it into the recycling.

Almost every idea I’ve had to use it has been abandoned because the offcuts were too small. But I’d stumbled on a shirt pattern during my prostashtination that fit. Just.

On the seventh day, I sewed it up.

It is kinda see through. Which is less of a problem for a shirt than pants.

Art Room Organisation

Dad stayed over in the reinstated guest room recently and it all seemed to go well. I haven’t used the writing desk but it’s accessible. The textile room has had plenty of use since we put a table top on the loom. When I cut out fabric for clothing I do it on the drawing board in the art room or the dining table, but the loom table is good for pinning pattern pieces, and as a place to rest tubs and their contents when I’m looking through habby, patterns and materials (which I do a lot when planning projects).

That leaves the art room. Corners of it were getting used, like the computer desk and the drawing board for cutting out patterns, but when It comes to art I’ve done nothing but some tweaking of oil paintings, a little sketchbook work, and a bit of framing. No new paintings.

Why not? The truth is, I hadn’t properly started reorganising the contents since the big room reshuffle. My general idea was to store the crafts that require a nearby sink like dyeing and printing in the laundry cupboard, and everything else in the art room wardrobe, but other demands on my time left me feeling too physically tired to do all the moving of stuff too mentally tired for decision-making. But when those other matters started being delayed, art organisation turned out to be a good distraction from the frustration. They also forced me to do it in more manageable stages.

It made sense to tackle the laundry first since I knew what was going there. I moved all the relevant items in and did a ‘cull then organise’. After a few trips to buy storage tubs (it’s amazing how downsizing always requires more buying of stuff) almost everything was packed away neatly, and I was pleased to find I had freed up some space.

The art room wasn’t going to be as straightforward. For a start, I was dealing with three to four times as much stuff, including a ridiculous amount of paper and card and an overly optimistic collection of general stuff to repurpose. (I did wonder how I ended up with so much, but then remembered inheriting art materials, adopting other people’s stashes and that I truly believed, at the time, that thing would be useful one day. And at least it was all free.)

How much I culled would depend on how much space I had, so the opposite approach to the laundry would be better: organise then cull. After considering what there was in different categories, I guessed that I had enough ‘grounds’ to fill the left side of the wardrobe. That included canvasses, card, paper and sketchbooks. It turned out that I was wrong about the quantity so all the books stayed on that side, too, which my back was grateful for. The repurposing matter looked like it would all fit into the middle section of the wardrobe, which is a narrow vertical area of shelves and drawers, so I moved everything that didn’t quality into the right side of the wardrobe, which was mainly art mediums, small stationary, tools, framing supplies, packaging for paintings and finished sketchbooks.

A lot of shuffling and culling later, everything had found a new home but for the small amount I culled or threw away. An extra bonus to all this was that I had to tackle some filing I’d been putting off. Also, I didn’t wind up with a multitude of new projects as I normally do after a tidy up, just a small pile of old Daily Art I want to bind into a book.

So much more could have been culled, but with those other matters sucking up time and energy, I’m content with what I achieved. I did test and reorganise all my inks, and cull jewellery-making supplies, and can tackle other sub-categories more easily knowing how much space I have overall. And if another shift in our lives forces more downsizing any time soon, I won’t go into it expecting it’ll be terribly painful. Just… a little achey.

Cutting Table

Having swapped the drawing board for the Lotas loom, I’ve found the lack of a flat space in the craft room meant I suddenly wasn’t inclined to pick up a sewing project (aside from slow stitching, which I’m doing elsewhere). So I got thinking and found a solution:

The Lotas Loom can now become a table with the simple addition of a board resting on top. The board is a piece of plywood – the lightest material I could find that came in a large enough size. Cork tiles have been glued on the underside to protect the loom (recycling something I already had). My cutting board fits on top leaving a small area at once side that currently has melamine covered mdf on it, but I’m thinking I’ll replace with an ironing pad.

Early versions had fold-down legs that attached to the front beam and castle, raising the board above the beater. Then I put the beater in the front position and discovered it sat at pretty much the same level as the castle, so didn’t bother with the legs.

The removable castle shelf that Paul made now has hinges so its sides can fold away, making it easy to stow when I’m not using the loom.

When I first put the plywood in place to test out the idea, I found myself using the surface to sort scraps of fabric and lay out potential project materials. Of course, I got a nasty splinter under a fingernail because the surface was unfinished, but it did prove that a cutting table was all that was stopping me sewing. As soon as I had added the cork, drawing board and mdf the creative juices began flowing and I had a new project underway and had made several bundles of fabric for future ones.

Shifting

The room rearrangement here is done but for the sofa bed – Lotas loom swap. Most of the large furniture was moved over one weekend, which left me very sore and tired. Then I tried to concentrate on getting a room as organised as possible before moving on to the next.

The Guest Room

This was the first and fastest room to organise (apart from switching the Lotas Loom and sofa bed which had to happen at the end). I moved the smaller zed desk in for my writing computer but it was still quite large for the space, especially with a sit-stand mechanism on top, so I bought a sit-stand desk from IKEA. Only to find it was too big. Somehow communication between the sales person and me got garbled – I think we had different versions in mind when I said I wanted the smallest. Fortunately, disassembly was fast and easy, and IKEA let me exchange it for the right size.

Next up was moving three bookshelves and the contents of a wardrobe. All I can say is, by the end I was determined to re-home a number of books and cull a lot of filing cabinet content.

The Textiles Room

This room had to accommodate the most stuff, and it just didn’t all fit until I’d done a lot of organisation, culling and made another trip to IKEA. The main bit of culling was of project leftovers and materials to repurpose. I keep leftovers from projects in case I need to repair or refashion, but I was able to cull yarn and fabric from things I don’t have any more. I also went through the materials for repurposing projects and asked myself if I actually liked them, and removed two-thirds.

By attaching the sewing table top to an old EXPEDIT unit I was able to remove two table legs blocking access to the shelves, which made a surprising difference in getting stuff to fit.

The Art Room

This was the room I am least sure of. I’ve never had an entire room reserved for art. I didn’t want to get rid of my zed desks, the pine table that my Dad and I restored, or the Lotas loom, but they wouldn’t all fit in there. After watching several art studio makeover videos, one thing an artist said struck me as relevant. She said she liked working on her old glass-topped desk, as it was easy to get the paint off. So I decided both zed desks were staying.

That meant choosing between the pine table or the loom. I was having a hard time picturing how the room would function and decided I need to work in there for a while, trying furniture and lighting configurations. It would be impossible to do that with a huge loom in the way, so it has to go elsewhere, at least for now.

As for worrying about ruining the carpet… in IKEA’s “As Is” room I found a I found a rug made of wool and cotton, in neutral colours so no risk of it influencing paintings, and on sale at a price that means I won’t mind too much if I stain it.

Final Touches

A pegboard and fittings had been sitting in the garage for a while, waiting to be installed… somewhere. Instead, I got Paul to cut it in half and add hanging brackets. I painted them white and hung one in the textile room and one in the art room. I’ve not used a pegboard before, but they feature in plenty of art and craft videos and we had it already, so I’m giving them a try.

I finally had space for the big h-frame easel. Once I’ve had time to get a feel for the room, I might be able to rearrange things so the giant canvasses can be stored in there rather than in the hallway.

It’s been an interesting but exhausting two weeks. I think it’ll be worth it. The test will be working in the rooms. Hopefully that means I’ll have a craft project to post about soon!

Making it Easier – May

One thing I’ve begun to understand about making things easier, is that it’s hard work. It’s the ‘making’ part of that intent – thinking of the change that would make something easier then doing the work and organisation to get that change to happen – that takes all the time and energy. It’s only after you do the ‘making’ that life gets easier. If all goes to plan.

If I’d decided ‘take it easier’ was the motto of the year, things would have been much more relaxed. As it turned out, May was a month in which I worked very hard to make life easier.

For ages now I’ve been looking at the rooms I use for work and play and feeling something had to change. For a start, two were dedicated to activities I wasn’t doing much any more: writing and weaving. It seemed crazy that I was making art in half a laundry while those rooms remained mostly unused. Adding to the pressure was our cat getting old and suddenly refusing to go outside to toilet. Having the litter tray in the bath isn’t fun for cat or humans. The laundry is a better location, but it was full of my art stuff.

The physical roadblocks for change were mostly physical: I couldn’t see where to relocate the Lotas loom, I worried about doing art in a carpeted area, and I didn’t want to ruin the comfortable combination of furniture I had in place for sewing. I hadn’t realised there were mental blocks, too. (Other than simply knowing it would be hard work.) It turned out that changing anything to do with my writing set up was an acknowledgement that a significant era of my life had probably drawn to a close, and I hadn’t been ready for that until now.

What removed these roadblocks was staying overnight at Dad’s place after he’d had a minor procedure with anaesthetic. It was so impractical, compared to having him here, for reasons too long to list. To make staying overnight at our place appeal to Dad, we needed a proper guest room again and a bathroom free of cat toilet smells.

That meant reducing the area I was using for work and play from 3 1/2 rooms down to 2. Or did it? I realised that a pared down set of office furniture and contents could easily exist in the guest room. Guests would only limit my access to them a couple of times a year at most.

While getting 3 1/2 rooms down to 2 1/2 sounded easier, or 2 1/2 rooms dedicated to hobbies down to 2, it was still an intimidating prospect. I reminded myself that I’d had one room for hobbies when we first moved here (ok, I’d painted in a classroom and hadn’t owned a floor loom) and when we eventually downsize I’ll probably have the same. I’d watched The Gentle Art of Swedish Death Cleaning. I could do this.

The strategy was this: the office would become the Textiles Room, the craft room would become the Art Studio, the Loom Room the Guest Room. It only involved moving every piece of furniture. Since I don’t have Illustrator any more and probably wouldn’t remember how to use it, I mapped out a floor plan and made cut outs of the furniture. After working out where most things would go, I did a mock move and found that everything had to be relocated in a particular order to avoid double-handling.

The Lotas loom was never going to fit in the Textiles Room. It might go in the Art Studio, or in another part of the house. I can put that decision off for a while because moving everything else is going to take plenty of time and energy, and moving the sofa bed to where the loom is now is the last item on my list.

May’s making it easier tasks will become June’s. And this is a classic example of how ‘making it easier’ turns out to be hard work, both physically and mentally.

But in the end, easier.

Bazaar Times

So ask I mentioned a few posts ago, I’ve been doing some yarn culling. First there was the big rug yarn/fabric cull last year that triggered the Summer of Quilts, thanks to me thinking it would be easier (ha!) to just sew up all the flannelette strips into quilts. Then in April I culled some dyeing supplies and knitting yarn. As May arrived the rest of the stash got thinned and I figured it all may as well go into the yearly weaving guild sale. I added magazines, a pin loom, a 16 shaft loom I was going to fix up but no longer want, and circular knitting machine to the pile.

And it was quite a pile.

More like a wall.

Estimated total number of items was topping 100. Aside from the possibility it wouldn’t all fit in my car, the thought of filling in ten forms, and deciding on prices, and labelling it all, and carting it to the guild sapped my will to live. It had me wondering if I should just have a studio sale instead. That reminded me that I’ve seen people hire a table at the Bazaar and have their own eftpos machine. Both Paul and a friend have organised such things before so it didn’t intimidate me. Doing it that way would remove the need for filling in forms and I could change prices or put together bundles as the day progressed. I called the guild and asked if I could do that instead.

After a few days they got back to me, and the answer was ‘no’. So I looked at the pile/wall and figured I had to reduce it to a more manageable size. I decided to donate the knitting yarn to op shops and toss the magazines into the recycling (I’d got them for free at the Bazaar two years ago when nobody wanted them). I was all ready to take the rug yarn to the tip when a weaver I know said that friend of hers would take it. Perfect.

That got the items down to just under 70. It took me 4 hours to fill in the forms and write and attach the tags. It and the rug yarn (which I delivered the same day) filled the back of my car.

And, thankfully, most of it sold.

Looking at the Loom Room now, the difference is obvious. Only half of the shelving and little wardrobe contain weaving things. The rest holds either knitting/crochet, embroidery and spinning items, or empty tubs. I’m not sure what my next move is, but it might involve even bigger changes.

As I always remind myself: nothing in life is more sure than change.

The Leftovers

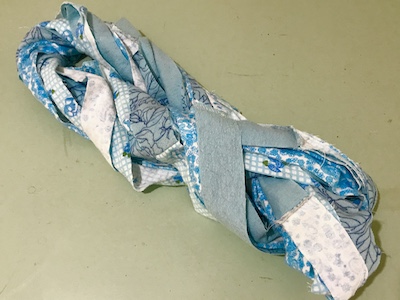
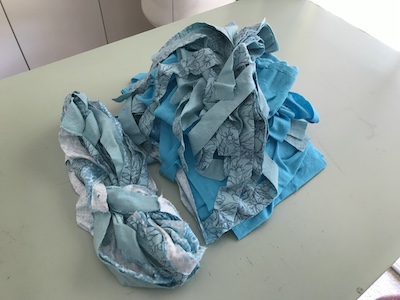
With the Blue Quilt and Rainbow Cat quilt in limbo it seemed a good time to assess the remaining flannelette strips. I didn’t want a quilt with fire engines, monkeys, frogs, princesses and other themes for children, so I removed those. I put aside some black and red skull themed strips to make a lap blanket with because I like them. The remaining strip stash was made up of solid colours, strips of multicolour striped fabric, quite a bit of purple, and leftovers from the Blue Quilt.

I’d had an idea for a quilt that looked like a watercolour paint box, but multicolour fabric wouldn’t work for that and I didn’t have enough variety of single colour fabric in green, yellow and orange fabric. The fact that the fabric I had was limiting my creativity was a good thing: it meant the quantity of strips had reduced significantly. If I wasn’t going to buy more fabric I had to work with what I had. So what could I make?

Idea 1: a purple quilt

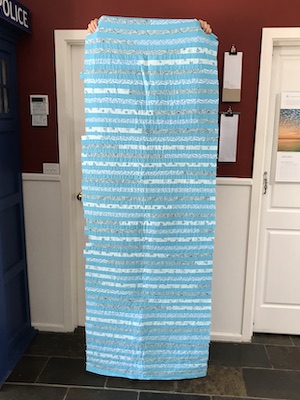
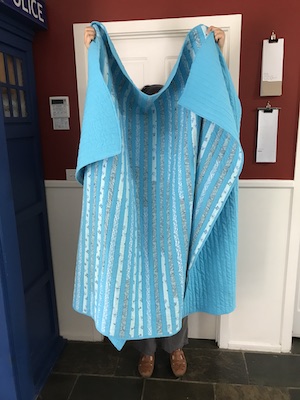
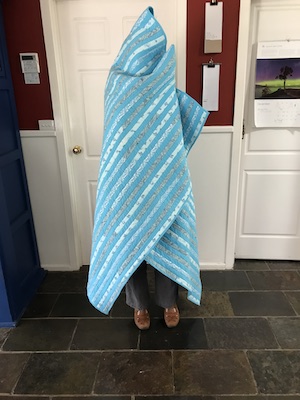
Idea 2: another blue quilt (but using an easier technique)

Idea 3: a graduated solid colour quilt – perhaps with alternating white stripes

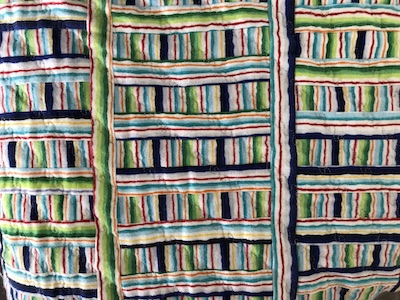
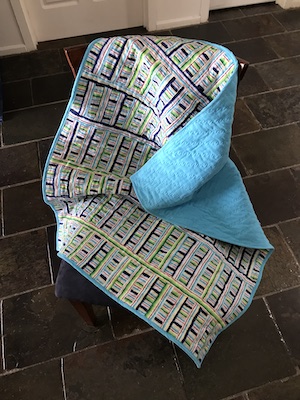
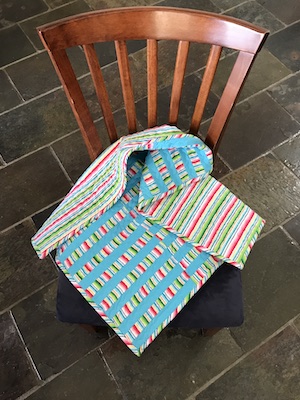
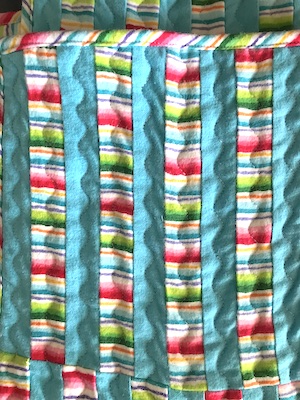
Idea 4: a quilt from all the leftover striped fabric

Idea 5: a skull-themed lap quilt

So not so plenty to keep me entertained for a while. However, this was supposed to be the Summer of Quilts, not the Summer and Autumn of Quilts. I wanted to be finished and done with flannelette strips by the end of February so I could go back to sewing clothing in March, even if it meant tossing the remainder into the recycling.

If I couldn’t get all the quilts made by then, what should I aim to complete?

The answer was this: as many tops as possible. My aim was to use as many of the strips as possible. I didn’t need the topstitching part done to achieve that. The Rainbow Cat Quilt, Blue Quilt and anything else I made could be quilted another time.

Could I get the above five quilt tops made in less than a month? Perhaps, if I worked fast and smart. No fancy block designs. No paper piecing of blocks that changed shape after the blocks were sewn together. Just strip quilts, like the aqua quilt, or very basic blocks.

The tail end of the Summer of Quilts was going to me a race against the calendar.

Making it Easier – January

In my summary of craft for 2023 I noted that I seemed to get into a culling frame of mind after getting Covid, but when I think back, I reckon the urge was already simmering in the background. It started after Mum went into care, but not in a ‘you can’t take it when you go’ sort of way. Instead it was in reaction to seeing how bad Dad’s hoarding was getting. I know when he passes away I’m going to have a lot of stuff to get rid of, but I’ll want to keep some things too so I feel the need to ‘make room’ at home to make those decisions easier.

So I tried again to pass on the Passap, and this time was successful thanks to a very helpful person at the Machine Knitters Association. Honestly, I was almost as excited to find it a good home as I was when I bought it, ten years ago. Our ironing board now occupies the space. Not particularly exciting, but I am sewing more often now and it’s been set up in one room or another, always in the way, for most of the last few months. Now it has a permanent home, and that makes one small part of domestic life easier. It even led to Paul ironing the button bands of his shirts!

In non-crafty areas of the house… well, this is the tenth year we’ve been here and our usage of the house has changed quite a bit. When we first moved in we had big parties. Our friends had young kids, and people often stayed over. Now our friends are exhausted from wrangling teens and ageing parents simultaneously, and for the first time nobody stayed over on NYE. So in the days after, I culled a lot of things related to entertaining that are too much trouble, we don’t use now or we are just tired of.

More recently, we watched The Gentle Art of Death Cleaning on tv, then I read the book, which were fun and enlightening. The tv show takes the concept much further than the book, especially in regard to my new favourite term “reverse robbery”. Since I don’t have kids or nieces/nephews, if I die it’s going to fall to friends or even a stranger to sort out my possessions and I’d rather they didn’t have a huge mess to clean up. And since we do plan to downsize eventually, it’d be less of a shock if we don’t have to cut back our possessions all at once.

Well, that’s what I tell myself anyway.

I hesitated to add ‘January’ to this blog post title. It makes it feel like I’m setting myself a challenge to do at least one thing to make life easier each month, which actually makes life harder. My intention is just to remind myself of this year’s motto at the end of each month, and note any new ideas I’ve implemented.

The Rainbow Cat Quilt – Part One

At last I got to the quilt that had inspired me to return to making quilts. As with the previous two, I started by ironing the strips then laying them on my cutting board to see if they were straight and the correct width. Unfortunately, the answer was pretty much ‘no’ to both. I think by the time I cut them, during lockdown back in 2020, I was well tired of making strips. Or maybe the cutting machine was getting blunt. Either way, they were very wonky.

So when I saw a video showing how to sew strips on a 45 degree angle onto squares of paper, I realised it was the perfect method for this quilt. With this technique it doesn’t matter if the strips are of different widths or are a bit crooked. You just sew each strip down and fold it flat, and the wonkiness gets hidden in the seams.

However, I essentially had only two fabrics. One was the stripe, cut in two directions, and the other was the cat faces. What I needed was another fabric so I could vary the order of the fabrics. Preferably purple since there wasn’t any of that colour in the stripe fabric (and you don’t have a full rainbow without purple!). Even better if it had cats on it. And if I was going to buy fabric I may as well make it the backing fabric, too.

So I went shopping. No luck getting purple cats. I could get plain purple at Spotlight, but there wasn’t enough left for backing. I found a nice purply-blue fabric with multicolour ovals on it at a patchwork shop, but there wasn’t enough of that either. Hunting on the internet when I got home, I found another Spotlight store had white fabric with multicoloured dots on it and decided to go get it the next day to use as the backing fabric – and if it wouldn’t work on the front I’d get a little bit of plain purple to use for that.

The next morning I remembered that box of leftover strips from projects I’d woven and sewn, so I decided to have a dig around to see if there were any purple strips in it. And what did I find?

Purple fabric with cats on it.

Seriously.

The Snakes & Ladders Quilt

The second and larger batch of wiggly stripe fabric was a mix of red, blue, black and green, and had been cut both vertically and horizontally. I also had a good sized piece of uncut fabric to play with. I took inspiration from a video showing ways to use striped fabric in blocks to find a design that looked good. Though I tried a few plain colours mixed in with the fabric, in the end I decided I liked it all made from the same fabric.

I started as I had with the Cat Quilt, pairing up the already cut strips – one vertical, one horizontal. Then I considered what length to cut them to use most of the fabric. This time I had two lengths that worked, so I embraced that and made columns of alternating widths. The columns were separated with one long strip.

I like how the design I settled on looks like ladders. It was a pity, I thought, that I’d already used serpentine stitch for the top stitching of the last quilt. When I looked at the next stitch in the list, it was also very snake-like:

So that’s what inspired the name of the quilt.

For the backing and binding I used the fabric I’d set aside for the Aqua Quilt leftovers. It turned out to have a small rip in it, but I was able to use it for this quilt instead.

The Snakes & Ladders quilt is a bit small for a couch blanket and too big for a cat quilt, but makes a generous lap rug. By the time I’d finished it, I had already done a test block for the next quilt – the Rainbow Cat Quilt. Now that one is going to be fun!