Work in Progress – Recycled Foam Stamps

I’ve been wanting to try making some simple stamps out of foam since seeing several crafty bloggers doing it. The trouble was, most of those bloggers lived overseas and Aussie manufacturers don’t appear to use the same kinds of foam in our packaging here. I tried a polystyrene meat tray, but it didn’t work very well.

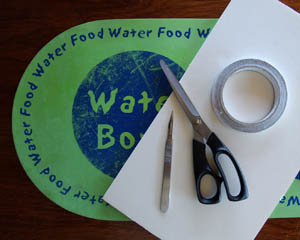
Recently I replaced this cat feeding mat when the old one started looking a bit worn and tired. I decided to see if it would be a suitable material

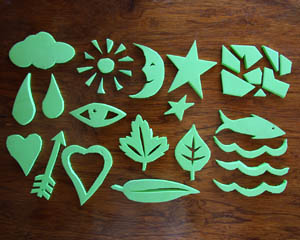
It turned out to be rather nice to work with. I could cut out rough shapes with scissors, then add detail with a scalpel.

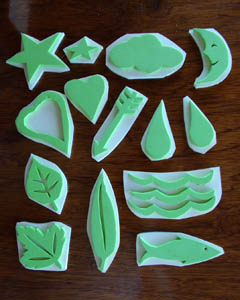
I stuck the pieces onto an old sheet of foam core and cut them out.

Now I just need to try printing with them.

Workroom Tidy-Up Stage 1

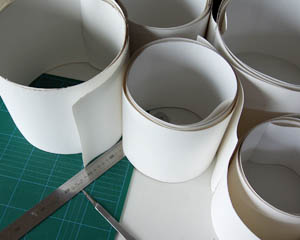
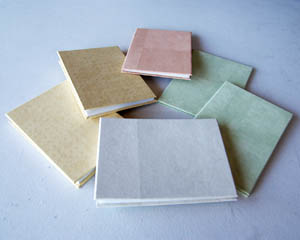
I’ve been getting stuck into some bookbinding projects that use up some of the materials I’ve collected, in order to make space in the workroom.

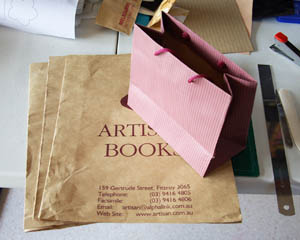
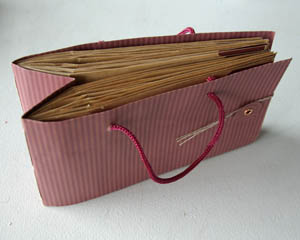
What to make out of paper shopping bags?

A two single signature bound doodle book or journal:

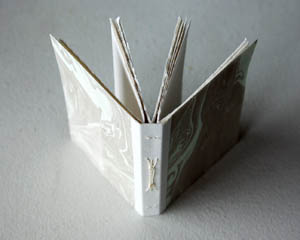
Some excess signatures left over from a project? Bound with longstitch into a cover of marbled watercolour paper reinforced with cloth tape:

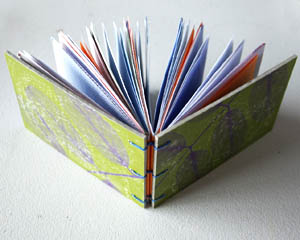
A Discovery Channel bag and security envelopes? A chain stitch book:

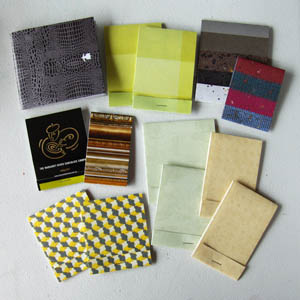
All those bits of card from packaging, interior design and yarn colour cards, and leftover scraps of wall paper from the concertina sketchbooks? More notebooks:

I have at least another four bookbinding projects like these, and two more complicated ones, to go. Then all the leftover materials have to fit onto the shelves somewhere.

And then there’s the weaving…

Spring Cleaning

The other day I cleaned my workroom. It was as much to do with avoiding work as finally being bothered by the dust and mess enough to want to do something about it. If the amount of dust was anything to go by, I’ve been procrastinating over cleaning for a LOT longer than I’d been procrastinating over work.
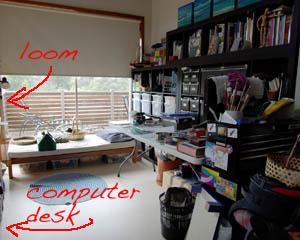
I got things as tidy as I could, but I wasn’t completely satisfied. That folding table is supposed to be used occasionally, not constantly. I don’t like that the loom is tucked away in the corner, where I can’t easily get to the back of it for warping and I have to keep the blinds down all morning to protect it from the harsh Aussie sunlight.
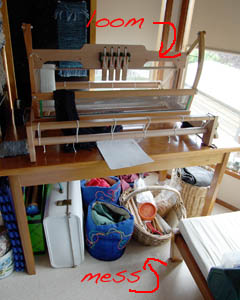
There’s too much stuff living permanently on the floor under the loom and on top of the folding table. The reason for both is that the focus of my crafting has been shifting so much that I’m accumulating and buying materials and tools faster than I can find easily accessible places to store them.

It may be odd to say I think the solution is to have less furniture, but it kind of is. I’m going to remove the folding table put the loom in that position instead, on a stand that Paul is going to make. (I’d buy the nifty folding stand Ashford makes for the loom, but I have doubts that it’ll be sturdy enough for rug weaving.) The table the loom currently sits on will be where I do bookbinding, paper craft, sewing, knitting machine-ing, etc.. The light coming in won’t be a problem: it’ll be a benefit (except in summer, when it’ll just make the room incredibly hot.)

As for the excess stuff currently on the table… well I’m going to either make things out of it, find a place to store it, or get rid of it.
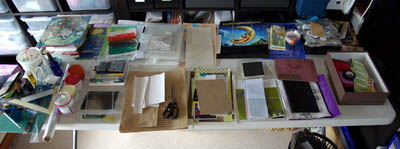
Above: the stuff on the table, spread out. At least half of it wants to be made into books or notebooks.
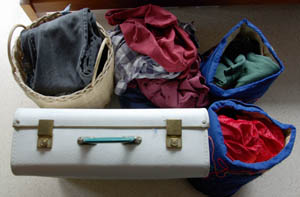
Above: the stuff under the loom. All of it for rag rugs, though the basket of jeans is full of leftovers from the two denim rugs I’ve already made, which could also be used for non-weaving projects.

There are a couple of other projects that, if they were done, would reduce the clutter in there, too. But it looks like I have a lot of mainly bookbinding, paper craft and rug weaving projects to do.

Turns out doing a spring clean can lead to more creativity. Can’t complain about that!

Fob Watch Project

I’ve been exploring art journal and collage blogs and sites, and recently bought a copy of Cloth Paper Scissors magazine. It’s all the different mixed media techniques for colouring and texturing paper that are fascinating me. So when the mag site offered a free eBook featuring four methods, on signing up to their newsletter, I grabbed the opportunity. One method in particular gave me one of those ‘of course!’ moments. Print with acrylic paint on watercolour paper and you can paint over it with watercolour washes without it dissolving or bleeding.

I wanted to try it straight away, of course. But I’ve been feeling overwhelmed by all the things I want to make or try lately. I’m in danger of starting too many projects and end up feeling pulled in too many directions. Then it occurred to me that maybe I can combine some ideas. I had another WIP going that this printing method might suit.

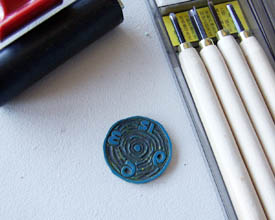
So I carved a stamp of a clock face:

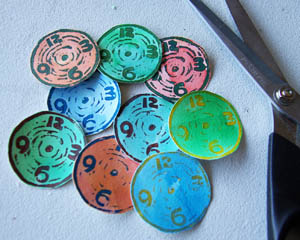
Printed with acrylic on a scrap of watercolour paper, then coloured the paper with watercolour washes:

Cut them out:

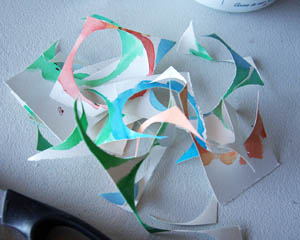
Even the offcuts looked pretty:

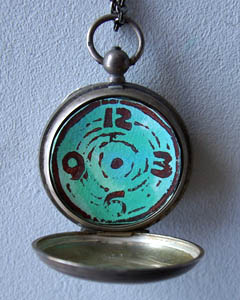
Then I stacked some of them up inside this:

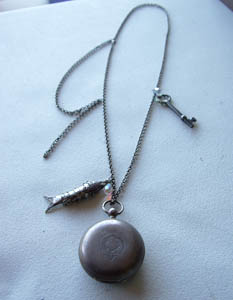
It’s an empty fob watch shell that I’d strung onto a chain with some bits and pieces, but didn’t seem like it would be a finished piece until I put something inside it:

The little circles could be like calling cards. Maybe I’ll write something like “chocolatetrudi dropped by today” on the other side, then draw in the clock hands at the time. Or maybe I’ll just leave them in the fob watch as a quirky souvenir for anyone who asks what’s inside.

This Art Journaling Thing

So for a while now I thought I might have a go at this art journaling thing, inspired by artists like Teesha Moore and Roz Stendahl. Teesha’s multi-layered style reminds me of Dave McKean‘s art, but more colourful and contemplative (and obviously less ghoulish). Roz’s journals are more sketchbooky – full of drawings and text. When I found I had one more concertina of watercolour paper than covers for the sketchbooks (due to those measuring errors) I decided to use it to try out some art journaling myself. Instead of hard cardboard covers, I glued on some heavy watercolour paper.

I pondered what approach to take for some days. While I like Roz’s spare approach, it’s not different enough from how I use my sketchbooks already. It would be more challenging to me to do something outside my experience – like Teesha’s multi-layered build up of elements. Though I didn’t do it in quite the same order as she suggests in her video tutorials.

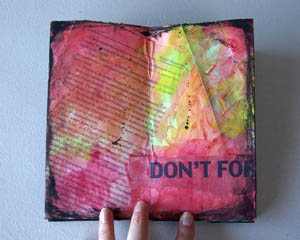
First I stuck down a whole lot of ‘background’ material: maps, pages of books, labels, offcuts of marbled paper, stamps, scraps of security envelopes, handwritten lists, pages from notebooks printed to look like money, etc. with watered down PVA glue.

Then I painted over the top with gouache. Watercolour may have been better, but I have heaps of gouache that I bought at a garage sale, and I wanted to be sure the background matter would be covered enough to not show up too strongly.

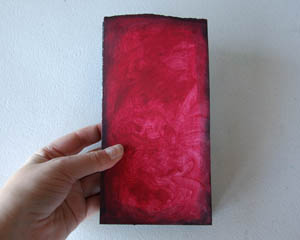
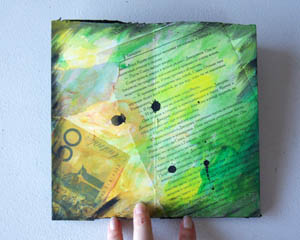
Next I went around the edges of the pages with black gouache to create a vignette effect, and dripped and spattered a little black on here and there. Here are the back and front covers:

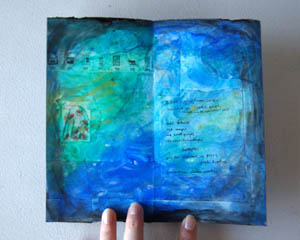
And some internal pages:


The back of the watercolour paper is smoother and probably not meant to be painted. I filled it in with more black gouache.

Now I’m waiting for inspiration to lead me in the next direction. I’m thinking of going around the edges in gold paint to cover where the white underneath the paint is showing. After that I’ll be ready to start working on individual pages. This is the part I was least certain about. I love the idea of making the book, but I’m not sure what to fill it with. Should I stick more material down to make up pictures, like Teesha does? I rather like the idea of drawing over each page instead. Should I add text? I like the look of text in art journals, but I’m not sure what to write about. I’ve not been much of a diary keeper since my teens (though I do like blogging), which is ironic, since ‘art journaling’ does contain the word ‘journal’.

The weird thing is, most of the stuff that I stuck into the book wound up relating, so it kind of has a theme going. That theme is money and work. I’m wondering if I should go with that, but it seems like a rather dry and serious subject for an art journal.

Concertina Sketchbooks

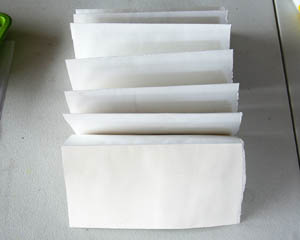
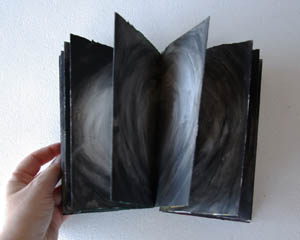
One of the projects I started when I should have been finishing old ones was making concertina style sketchbooks. Having seen sketchbook artists using them over at Urban Sketchers, I wanted to give the format a try. It just happens that I have a roll of watercolour paper, inherited from Paul’s dad, which meant I could make a concertina book with no joins.

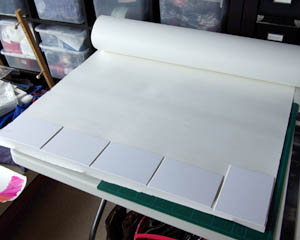
The paper was old and though still in good condition, it had been rolled up for a long time and was very disinclined to uncurl. I rolled it out as far as I could in my workroom, cut it and then rolled it up the other way and left it for a few weeks. This was enough to make it flexible again.

Then I worked out how many books I’d make and what size. I decided to use the mount board cut outs I got from Reverse Garbage.

I cut the paper into strips. The last one I left with the ragged edge at the top.

The next part was to score and fold them. I tried a couple of different methods. One involved marking every second fold, then just folding the middle section in half. I thought this might help to line the pages up accurately, but it didn’t.

So I marked every section on the next one… and made mistakes so I and had to cut two sections off. Finally, I settled on making myself a measuring device by marking the correct spacing on a strip of paper and using that as my ‘ruler’.

Keeping to the theme of using stuff I bought at Reverse Garbage, I decided to give the wallpaper samples a try:

The up side to using wallpaper is that you’re meant to be able to wipe spills off it, so I could wipe off any excess glue. But the down side is that PVA struggled to stick it down. I made sure that I squished the covers overnight under some heavy books, and then the finished books for several days.

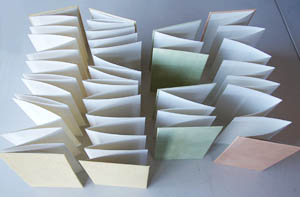
The pinkish one is the one I had to cut sections off. The green ones are the cut off sections. The yellow ones are the two full length vertical ones…

… the grey book is a horizontal one.

And the one with the rough edges along the top side…

… has heavy watercolour paper glued on for covers. I decided I was going to have a go at making an art journal-ish thing with it. Playing with it has been keeping me sane while our kitchen is being renovated. Details in the next post.

Map Cards & Envelopes

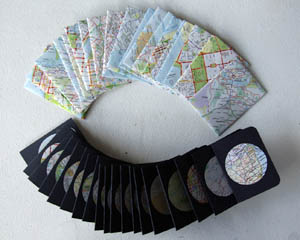
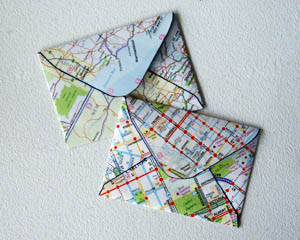
Somehow I’ve ended up with a lot of projects on the go lately, so at the moment I’m trying to stick with finishing them off, rather than staring new ones. I’ve not been entirely successful at that, but here’s one I did manage to complete:

I started with making little envelopes out of some map pages I saved from an old directory.

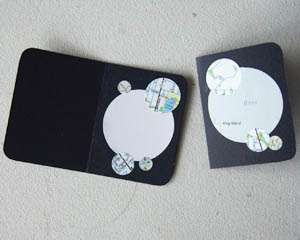
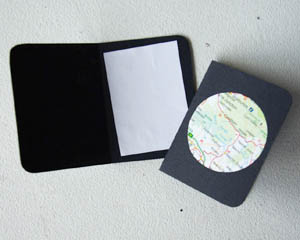
They’re fun to make, but a bit small to be useful as they were. So I made some gift cards to go with them.

I made two with lots of circles, but this was very fiddly and the large circle cutter was playing up. So for the rest I just glued one circle to the front and a square of white paper on the inside to write on.

Brown Paper Sketchbook

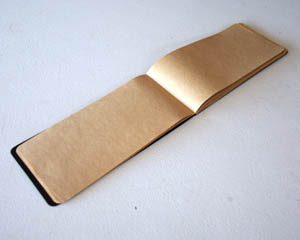
Inspired by sketchbook artists like Pete Scully and Christian Tribastone, who do the most amazing drawings with white and black ink on brown paper, I made this sketchbook:

The cover is recycled ‘leather look’ card and with clear plastic on top, both from the cover of an A4 course handout booklet. I was going to use a different sort of binding, but there were little holes in the cover material that suggested coptic binding to me.

I used a corner cutter to round off the edges. I like how this, and the shiny cover, makes the book look a bit slick and iPod-ish, yet the insides are humble brown paper.

The paper is from the roll I bought at Reverse Art Truck. It didn’t use much of the roll!
Reverse Art Truck

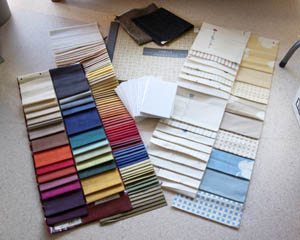
This week Paul and I went to Reverse Art Truck in Ringwood. As always, we went there looking for one thing and didn’t find it, but came away with lots of other goodies:

I got some fabric samples, a book of wallpaper samples, and mount board cut outs from a framing shop. Most of these are for bookbinding projects. The mount board cut outs make great book cover card. The fabric would make great bookcloth, though I picked up the two samplers on the right and the two grey swatches at the top for possible sewing projects.

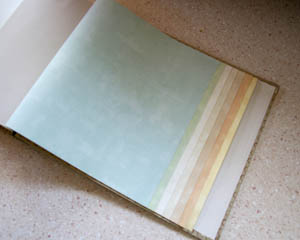
The wallpaper sampler has lots of potential. The wallpaper isn’t coated in glue, and could be useful as both the pages or cover of books. It could even be used to make greeting cards or gift tags.

Some is subtle.

Some is bolder.

Some has interesting patterning, like this one, which has marks like water droplets on watercolour paper. But the paper isn’t the only part that I can use. The book itself has potential.

Once the wallpaper sample pages are removed, there’ll be a handful of divider pages left. I’ll cut them off, leaving a strip, and onto that strip I’ll attach new pages. I’ll use heavy watercolour paper, or a thick card. It’ll either be a sketchbook, a photo album, or both.

As always, there was something that I nearly bought, but didn’t, then regretted it later. So the next day I went back and got it.

I keep seeing amazing work by sketchbook artists done with black and white pens on brown paper. It seemed a bit excessive to buy a whole roll of brown paper just to try this out, but heck, it was only $8. I also found some sheets of thin white plastic, which will be great to stick between pages to protect them from glue as it’s drying, or protect my table.

Purchases

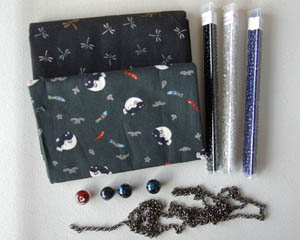
Here’s what I bought at the Craft Fair:

The fat quarters are for making small table cloths, the beads in tubes are the ideal size for adding to knitting or weaving, the other beads are handmade glass and though I have no plans for them yet they were too beautiful to leave, and the chain is for another jewellery project.

And, of course, there is the ‘Lifestyle Bag‘. (I went hunting for it on the BH&G site hoping there’s be a shot of the contents, since most of what was in mine has been given away, eaten or stowed in the fridge.)

Aside from the Craft Fair, I also received these:

Which are very cute, but not quite what I was expecting. The trouble with the internet is that you sometimes get no sense of scale. These shapes are confetti-sized, which is a bit small for what I had planned. But the punches were much cheaper than those in the shops, and I know I’ll put them to other uses.

Any suggestions?