Hail to the Neighbours

Last week I wrote a long post about the garden. It’s looking pretty good and I’d been inspired by a book and a visit to a famous garden. All I needed to do was take some photos and I’d be ready to publish.

Then the storm came.

The laserlite roof of our deck is full of holes, and there’s a mysterious leak in the toilet ceiling. Those are both being handled by the insurance. But the flood of water runoff from the neighbour’s tennis court that washed out part of the embankment and flooded the kitchen garden and studio is another matter.

We’ve soaked up all the water in the studio with old towels and ran the aircon for a day to dry it out, and there doesn’t appear to be any damage. But preventing this happening again isn’t easy. Water runoff from the neighbour’s tennis court has caused problems before. The main event happened a few weeks after we moved in, over three years agao, washing mud and mulch into our pool. We paid for a pile of drainage work to be done in to prevent it happening again, and that seemed to be working. But dirt has washed down from the neighbour’s place and silted up the drain.

I called the neighbour on the night, an they came over with extra old towels and looked at everything. They’ve promised to get advice and a quote to fix things on their side. They want to wait until we get permission to connect to the sewer, so whatever needs doing can be done at the same time.

We’ve dug and raked back the silty dirt that’s washed down (which has given us a pile of free soil to use elsewhere, so there’s a small up side at least). I’m considering putting a second retaining wall in to try to draw away the water. But there’s no guarantee anything we do on our side will work if the neighbour doesn’t sort out their drainage. If it doesn’t and we’re not at home, it’s bad news for our studio. Paul is raising the cupboards and filing cabinets up on pavers.

I can’t help thinking we should just brick up the back door, where the water came in, and raise the level of the floor, but it’d be expensive and mean emptying the studio. We’ll just have to see what, if anything, the neighbours end up doing. And hope we’re home next time we have a big storm.

Laundry Re-do

A laundry renovation was in our future from the moment we bought this house. The old one contained a wall of cabinets on one side, and just a rusty old sink, water outlets for the machine and a shirt airing rail on the other.

For storage we made do with second hand wire shelving and the cabinet we had to remove from the kitchen because our fridge was 5cm too tall. I asked the kitchen and bathroom company that did our ensuite if they did laundries, and they said no – and suggested we’d use cheaper DIY cabinets than their expensive high-end ones. I asked the plumber if he’d do it, and he said “put in DIY cabinets and then call me for the plumbing”.

In the last couple of years I had played around in Illustrator making plans and elevations so we could discuss the layout. We wanted a decent length of bench space so I can do wet crafts like papermaking and dyeing, and Paul could lay out photo processing chemicals when he used the laundry as a dark room. So this was to be a laundry used for more than washing clothes and storing cat food.

A couple of months ago we decided it was time. We had a layout we liked, and found a brand of flat-pack cabinets from Bunnings that would fit the space. The cabinets were easy enough to construct – similar to IKEA ones. Getting the heavy wall cabinets up onto the wall was a challenge, but we came up with a way that didn’t strain our backs. The plumber came over to sort out the pipes, install the benchtop and glue on the cement sheet for the tiling. I painted the wall, Paul added kickboards and I did the tiling and caulking.

And it was done:

I’m pretty chuffed that we managed to do most of it ourselves. The tiling was the most challenging, but only because space I was tiling was about 5mm off the tile size, and it’s really hard to cut a strip that small from a tile.

I’ve done some dyeing in there since. Paul has tackled most of the tasks he needs to do to use the laundry as a darkroom. He’s removed a set of wall cabinets on the other side, which meant I had to patch the plaster and help him repaint the area. He just needs to find a neat way to cover the window when he needs to and block the light leakage around the doors.

It’s a Bar. It’s an Organ. Barorgan.

I suspect one of the defining elements of my relationship with Paul is that he finds junk to buy and I find something to do with it. When he was doing his Batchelor of Photography last year he bought a whole lot of stuff on eBay that might work with his alternative Australia steampunk theme. Like an old typewriter and sewing machine.

He didn’t mention the organ. I have no idea how he got it home and buried in the new garage without me noticing. I spotted it a month or two ago and after sighing and shaking my head at the discovery an idea came to me. I’d been not-seriously looking at second hand bars for sale on eBay. Some of them had been made from repurposed objects. Could we turn this organ into a bar?

Some brainstorming followed, then a satisfying bout of dismantling, then more brainstorming, then buying and cutting of mdf, a bit of painting and varnishing, hinges added, glass ordered, led lights attached… and we have this:

creativefidget828

It was surprisingly easy to modify the organ. A minimal amount of alternation to the outer framework was done. Only the flap that covers the keys and central fill of the lower part of the back were removed. Most of the innards are gone. The hidden ends of the keys were cut off to make more room inside. The visible part was lowered then we had glass cut to cover them. Paul added a strip of coloured led lights that reflect nicely in the glass.

creativefidget829

The back has become the preparation area, with the fold down access flap becoming a preparation shelf. The lower area is open and empty right now, but we’ve bought wood to turn into sliding doors because and it’ll become the storage space for spirits and mixers.

creativefidget830

I’ve seen quite a few piano or organ to bar conversions on Google since we made ours, but none that were designed for a bartender to stand behind it. I figure we need to have a bar warming party.

But first I may need to weave some bar mats.

Yet Another Kind of Weaving

When I was a child my mother added basket-making to the seemingly endless list of crafts she had tried. My Dad took one of her cute garlic baskets to work and came home with an order for 99 of them. By the end Mum’s hands were a painful mess and the gloss had thoroughly worn off basketry as a hobby.

It was the first warning I had not to turn hobbies into work. Not that I listened, having worked as an illustrator and now earning a living as a writer.

When I saw that the Handweavers and Spinners Guild had a one-day basketry class in their summer school schedule, I decided to sign up. I’ve been a bit wary of cane basketry, because I’ve heard it’s a bit hard on the hands. But these were coiled baskets, which involves stitching materials into place not wrestling them into a weave. I like the idea that I could use plant materials from the garden rather than much harder cane.

Well, it was great fun. We started with polymer clay bases, as starting is the hardest and slowest part. We used cordyline (cabbage tree) leaves, which I have the red version of in the garden, and stitched it all together with waxed linen thread.

creativefidget811

I finished it by leaving some leaves sprouting from the rim, adding another bunch and sewed around to the opposite side before finishing off, leaving another tuft of leaves.

You can use this method with other long, flexible materials, like rags and rope. I have a pile of old garden hoses. I’m thinking of using a plant pot drip tray as the base, and sewing it all together with wire or heavy plastic twine.

But I do love the idea of using plants from the garden. I’ve already got some of the recommended plants growing here: cordyline, lomandra longifolia, dianella, lavender and aram lily. I already planned to grow red hot poker. Maybe I can find a place for New Zealand flax and canna lilies as well.

The Photo Album Project

Some years back, when I was on Pinterest, I followed a pin to a website with sensible suggestions for getting photos organised and into albums. I thought I’d managed the first step: getting all photos into one spot. After that I got busy, and the enormity of the task overwhelmed me every time I thought about tackling the next step. Especially this last year, when I had to start limiting my time on the computer. Making photo books was never going to rise high enough on the computer time priority list to ever happen.

As January arrived, I got all enthused again after I got some photos printed to use as photo references. It hit me that if I gave up on the idea of photo books and just had photos printed and slotted into album, the albums might actually happen.

Then I had a look at my old albums, and saw that some of the photos from my childhood are fading. I really ought to scan those or get a hold of the negatives and print replacements that’ll last longer. They’re in one of the old photo corner style albums, and I still haven’t got around to adding the corners for the last third of the album – the photos are just slotted loose between the pages where I intended to put them. So there was that to do. I started a list:

Photo project #1: finish first album

Once that album had filled up, I had kept the rest of my photos in plastic envelopes and a couple of albums for specific holidays. I really ought to put the photos in the envelopes into albums, so that went onto the list:

Photo project #1: finish first album

Photo project #2: put photos in envelopes in albums

Most of my holiday pics from the late 80s to 00s and are slides, because I used to take pics with Lonely Planet books in mind (employees and ex-employees were encouraged to, but eventually they started an image library and became very fussy about the style of photos accepted). Getting them scanned to print as photos was too cost-prohibitive in those days, but a friend scans slides for a modest fee so I recently had her do all mine. I just needed to select what I want printed. That became a task all of its own:

Photo project #1: finish first album

Photo project #2: put photos in envelopes in albums

Photo project #3: select, scan and print slides and put in albums

It occurred to me that my photos really fit in three categories: birth to independence, independence to Paul, Paul onwards. The Photo Album Project was growing rapidly larger, so this division seemed a good way to break a big project into smaller chunks. I also decided that the holidays from the ‘Independence to Paul’ era would be combined, chronologically, with photos of friends, family and events, but holiday photos from Paul onwards would be in separate albums since we’d already made a few photo books. So the list suddenly became more complicated:

Photo project – Birth to Independence

#1: scan and print fading photos

#2: add corners and insert rest of photos

Photo project – Independence to Paul

#1: move post-independence photos from first album to new one

#2: select, scan and print slides

#3: select photos from envelopes

#4: fill albums with #2 & #3 plus holiday album contents, chronologically

Photo project – Paul Onward

#1: select images of non-holiday subjects (family, friends, pets and events) from 2002 onwards, print and place in albums

#2: select images from holidays not yet in albums and either make albums or photo books

I could break the last task into the separate albums, too, but for now the list is intimidating enough! Of course, a lot of the work involved requires using a computer, so I’m delegating as much of that as possible to Paul.

I’d like to concentrate on one chunk of the project at a time, but so far I’ve wound up concentrating on bits of all them. I can’t do much on the Birth to Independence album because Dad is looking into whether he has negatives of the early photos. I’d start moving later photos from that album to the Independence to Paul albums, except we don’t yet have albums. I’ve found some nice-looking acid-free ‘slip-in’ photo albums online, but the shop doesn’t open until mid-January.

So I’ve been tackling the slides. This had me going through old diaries to date them, going through holiday diaries to caption them, renaming files and sorting them into folders (so much for avoiding the computer!), and I’ve just started selecting what I want to print.

As for the Paul Onwards albums, I’ve selected all my non-holiday photos. Once Paul chooses his we can print everything and start filling albums. It might end up being the easiest of the projects chunks to finish.

Deadlines, Lists & Tidying Up

The last couple of months have been a bit trying. I came back from overseas expecting an edit of my current book to arrive soon after, but it was delayed by a few weeks. Every day I’d wake up, check the internet and see it hadn’t arrived, and then decide what I wanted to do with the day. Which was nice, but had me constantly on edge, unable to plan anything.

Then the edit arrived and, oh boy, was it a mess! It took me a week just to go through and work out if there was a problem, and what that problem actually was. Then it took until last Wednesday to finish tackling them and submit the corrected manuscript.

Aside from the difficult format the edit was in and the number of issues to tackle, the main reason it took so long is that I still can’t work for more than an hour or two a day. I learned this the hard way when, a few days before finishing, my neck problem flared up again and I wound up in so much pain that over-the-counter pain killers didn’t work, and I resorted to vodka. (It was a Sunday, so no chance of seeing my doctor.)

As you can imagine, there has been almost no crafting for most of this time. Nothing to blog about, except maybe whinging that I couldn’t do any craft, and then my one to two hour limit meant I couldn’t type that anyway. The blog post I did make were mostly pre-written or constructed in several small sessions, eked out as long as possible.

Well, the edit is done and manuscript submitted. The next day we went present shopping. The day after I walked through the house and make a list of everything we needed to do to tidy up before Christmas and New Year’s Eve, and we spend the rest of the day tackling three quarters of that, and the rest all but one item (tidy the craft room) by yesterday. On Sunday I made a list of things to tidy up outside, but it’s going to take longer. A couple of trips to the tip are involved, and one major sewing project.

So not much craft has happened since I submitted the ms either! But last night I sewed together several squares of the Gampa blanket, and today is rainy so I’m thinking a tidy-up of the craft room is in order. Perhaps I’ll soon have something craft to post about.

The List of Lists

Holidays can be like punctuation marks in the flow of daily routine. Sometimes they’re a like a comma – a small interruption after which life continues in the same vein. Sometimes they’re like full stops – things begin anew but on the same or similar subject. Sometimes they’re like paragraph returns – a shift in direction. And sometimes it’s like an entire chapter finishes and another begins.

The new problem with my neck that began at the beginning of this year forced me to find a new routine. I had to work out what I could and couldn’t continue to do by trial and error, and found that I needed to restrict sitting and typing/weaving/whatever to an hour at a time, once or twice a day.

Since what I do for a living involves sitting and typing, that meant lots of changes. But I had a deadline, which kept moving as I discovered my limits. Eventually I knew I’d finish just before going overseas, and a lot of things I needed or wanted to do were pushed onto the ‘when we get back’ list.

Now that we’re back, I’ve been considering all those things, and all my to-do lists. Last week I divided everything into six categories that fit across my computer screen: work, general, house, garden, art and craft. (I use a program called Stickies.) It allows me to not just prioritise within a category, but across them. And when one task is held up, I can consider spending my time on high priority tasks in other categories as well as in the same one.

It’s been working really well. When bad weather meant I couldn’t tackle many of the more important tasks, or items further down, I moved across the lists until I found something I could do. That turned out to be renovating a loom I’d rescued from the Guild. Knowing I really couldn’t do those other things means I could work on it guilt-free. I didn’t stuff around wasting time in the house or on the internet.

As a result I’ve got the loom finished in time to put it up for sale at the Guild’s Textile Bazaar next Saturday. I’ll be bringing in the Ashford Table Loom on the homemade stand as well as the Dyer & Phillips loom. Hopefully they’ll find new homes and I’ll make back the money I spent on them with a little extra for my time… to spend at the bazaar!

Crazy Loom Lady

Our dining table looked like this until last weekend.

creativefidget644

Paul found the small loom on a hard rubbish pile last week, destined for the tip. He lugged it home on the train. I have warned him that looms are like cats. People hear you’ve adopted strays, or ones that the owners couldn’t look after any more, and suddenly you have a house full of them.

creativefidget645

It has two shafts and is a countermarch loom, operated by pushing or pulling the dowel on the top to raise and lower the shafts. After much googling, I found two similar looms: the Brio and the Peacock. The Brio is Sweedish, made of pale wood and collapsible. The Peacock is from the US, made of darker wood and not collapsible. I found a manual for the Peacock, and there are a few differences between it and the one Paul brought home, but it’s the closest match so that’s what I’m calling it.

Of course, there’s no such thing as a free loom. Looking closer, I reckon it was fixed up by someone many years ago as there are holes where bands have been replaced and the project on it had faded quite a bit. It was dusty, and the reed had rusted.

The shed was small, and I had to hold the dowel firmly forward or back to keep it open. Seeking the source of resistance, I eventually concluded that the problem was the string heddles. They were made of a sticky yarn, which created friction against the warp. After removing the project the heddles moved more freely, so I figured all it needed was new Texsolv ones. Nice and slippery.

Which was what the bigger loom needed, too:

creativefidget646

It belongs to my Canberran friend, Donna. It has levers for raising and lowering the shafts, and a nifty back brake release cord that I wish I had on my table loom.

creativefidget647

There’s no sign of a maker’s mark, and I’ve had no luck finding a similar loom on the internet. Anyone know what this mystery loom’s maker is?

Being another ‘free’ loom, the first cost Donna had to bear was an expensive new reed to replace the rusty old one. That was a couple of years ago. I flew up to Canberra help her clean it up and teach her how to warp and weave on it. We removed a whole lot of rusty heddles, which left her with only enough for narrow projects. They’re an odd size, and she’d had no luck finding additional ones. Nothing fit – not even Texsolv heddles. After a bad run in with a shop, she had almost given up, so when she came down to join us for New Year’s Eve I suggested she bring the loom and we’d see about finding a solution.

And we have, as it turns out Paul can drill new threaded holes into metal. I ordered some shorter Texsolv heddles and we changed the frames to fit. And I worked out that the old reed must have been taller, so I raised the new one so the reed doesn’t lean on the warp. It was very satisfying fixing up this loom, as this is a great design.

In the meantime, I’ve been slowly warping up my Ashford table loom for a shawl.

creativefidget648

Once again, I’ve run out of heddles and had to attach a bazillon string ones. Since I was already ordering heddles (from the lovely Glenora Weaving and Wool) I figured I may as well order another 200 for it. And some new bungy cords. So once I’m done with the shawl my loom is getting a bit of renovating, too.

Of course, Donna’s loom will be heading back to her soon. I will try out the Peacock loom out of curiosity because I’ve not used a countermarch loom before, but then I’ll probably find a home for it. Then this can go back to being a three loom household, and my dining table can be used for, you know, eating off, again.

Projects of 2015

January:

First project finished in 2015 was the Bunny Mink Scarf with inlay.

creativefidget472

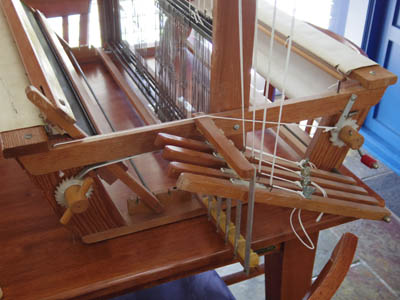
It was a good month for weaving. We finally got the pedals on the table loom, which made weaving much faster.
However, the next rigid heddle project, the Memory Scarf, was tortuous to weave.

February:

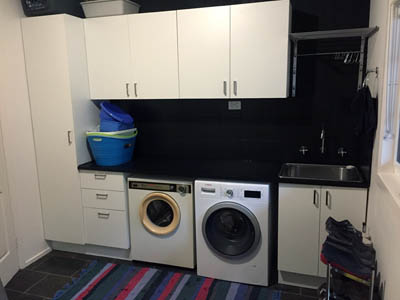
Paul and I put together a pair of Bedside Bookcases.

creativefidget471

Not a project, but it felt like one: I left Pinterest. And never looked back except with relief.

March:

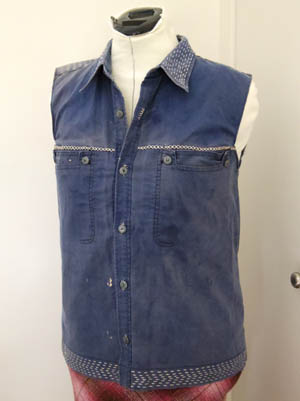
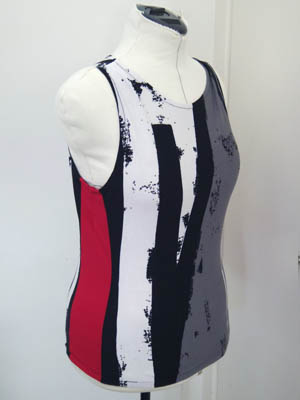
I twisted my ankle badly, which is probably why the only project I managed for the month was the Stitchy Shirt.

creativefidget486

April:

I made a Shoe Modification ready for my trip to Europe.
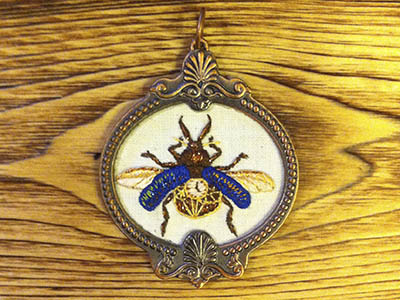
A little less work and more down time on this trip, so I managed to stitch a
Beetle Pendant while I was travelling.

beetlependant

May:

I made a Flamingo Pendant as a thank you present for a friend.
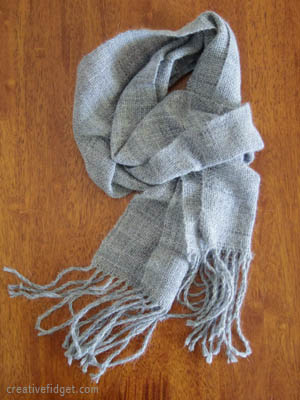
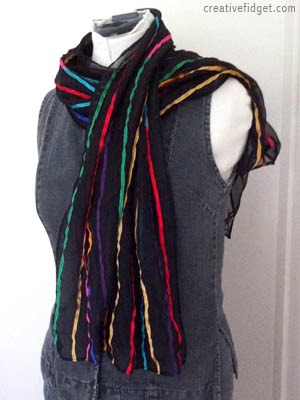
A post-trip bout of finishitis took hold, where I finished the Ribbon Scarf

creativefidget489

Fair Isle Beanie
… and Paua Ruanna Collar.

June:

A simple tweak turned my stiff I-cord Scarf into a relaxed, loopy scarf.

creativefidget502

I finished the Silk Stripe Placemats.
Some knitwear and scarves were spruced up on Overdyeing Day.
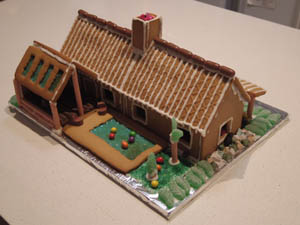
I went a little overboard making a Gingerbread House.

house2

July:

Giving up on altering it yet again, I turned the Origami Bolero into the Origami Bolero Scarf and the sleeves of the Gift Yarn Jacket into the Gift Yarn Scarf.
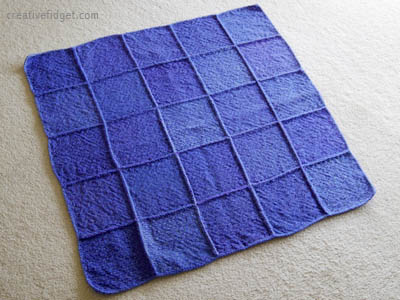
After a sudden and intense love affair with a pin loom, the Neon Blue Blanket was born.

creativefidget545

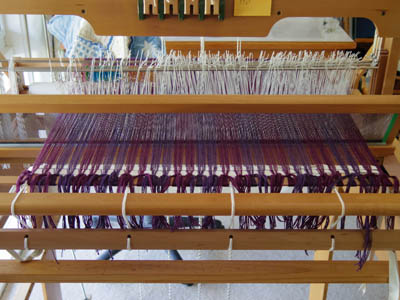
More weaving produced the Silksation Scarf.
And I replaced the sleeves of the Gift Yarn Jacket to make it the Blue Sleeves Jacket.

August:

Craft Day among friends was Refashioning Day (dress & two tops) for me.

creativefidget566

I tried a little simple knitting to make Capucine.

September:

With the leftovers I made a Capucine Cowl.
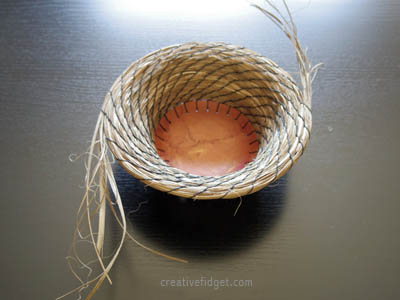
An experiment with circular weaving resulted in the Tapestry Hat.
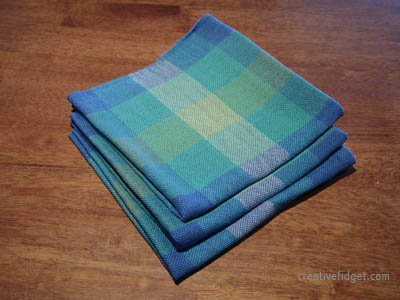
And my determination to try weaving with fine yarn meant I finally produced the Scary Tea Towels for my Mum.

creativefidget584

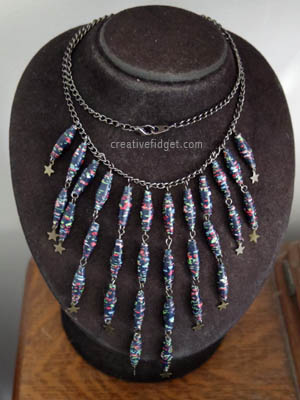
Then I lived up to my blog name and, perhaps triggered by all the landscaping preparations, became a little obsessed with jewellery-making, refashioning old pieces to make the Washer Necklace and Tiger Tail Bracelet.

October:

I finally used some paper beads to make Paper bead jewellery.

creativefidget591

But the weaving continued, with another pin loom project, the Hunky Hank Shawl.
Colourful beads suggested to me a Tinkle Bracelet for a friend.
While for myself I made Seed Bead earrings & necklace, though by then the landscaping was nearing its end and the jewellery-making obsession had run it’s course.

November:

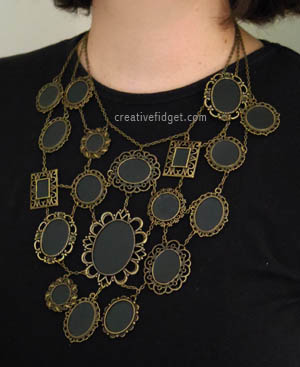
A simple solution led to me finally finishing the Art Necklace.

creativefidget604

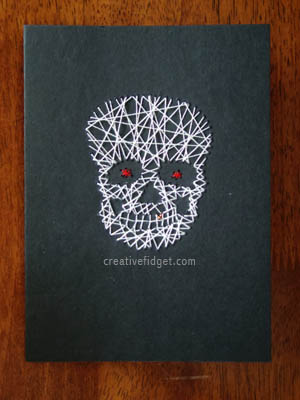
I started 50 Cards by Christmas 1, 2, 3, 4, 5, 6, 7, 8-9, 9-10.

creativefidget598

December:

While way on a solo writing retreat, escaping the beginning of the new garage foundations work, I made some Inkle bands.
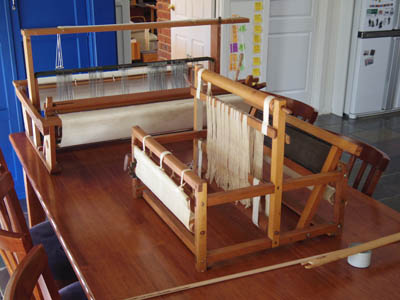
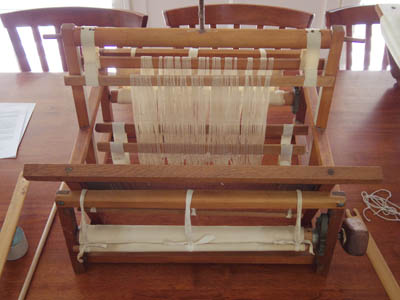
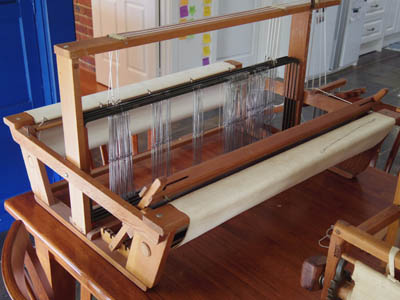
For the New Year, I bought myself a Katie Loom!
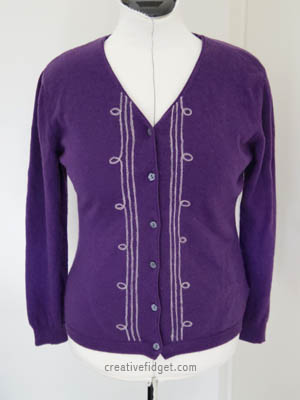
And I embellished a cardigan:

creativefidget630

Overall, it feels like I got less craft done this year than usual. RSI and a sprained ankle held me back in February and March, and I was away for most of April and part of November. Then there was all the landscaping and garage preparations and ongoing tasks that ate up mornings and weekends.

Thanks to the latter, I was exhausted by the middle of November and behind schedule with work. I reconnected with both writing and craft during my solo writing retreat week. In fact, I learned something useful. Because I wanted to avoid a sudden increase of typing, which would lead to RSI, I did craft in the mornings – weaving and card-making which didn’t work my hands too much. By the afternoon I was relaxed and my mind had been working over the story while I crafted, so the writing went well. Since I’ve been home, I’ve been doing the same, with varied success. I can’t help that the garage build and various chores are a distraction, but I can avoid spending mornings stuffing around on the internet – which just adds to the wear and tear on my hands and back. It is hard to switch into work mode, however, when the craft project sucks me in and I don’t want to stop.

A lot of refashioning, modification and reusing of materials were part of projects in 2015. When I did try something new, it was in weaving mostly, and also a few jewellery projects. In both I finally tackled and/or finished a few very long term projects – the scary tea towels and art necklace.

I only finished one portrait this year thanks to starting classes two months late, though the second is close to finished. That’s disappointing, as I was aiming to do four.

This year’s aim with the house was to take a break from big projects and stick to small ones while the pool fence, landscaping and garage preparations were done. The pool fence was ridiculously stressful and complicated. The actual landscaping was fast and stress-free, but the preparations before and pre-mulch preparations afterwards took up far more time than I’d expected.

The garage project is slow and ongoing, but mostly Paul’s task so I’m free to chase the work deadline and craft in 2016. I’m in a much more optimistic frame of mind than I was six weeks ago. In fact, the silly season, which I usually find distracting, stressful and a bit lonely, felt like a welcome break and opportunity to get everything back on track.

Happy New Year!

Hibernation

I’m not sure what to make of this winter. Normally I like winter. Yet while it was the warmest June on record, but it didn’t seem like it – perhaps because there were some very cold nights and frosty mornings either side of the unseasonably warm days, perhaps also because we’re discovering how hard it is to keep warm a house with no insulation. Thankfully, we have insulation installers booked to fix that this week, so the house may get more comfortable soon.

July has felt unbearably wintery. The head cold didn’t help. I was well enough to go on an interstate trip the weekend before last, but came home exhausted. It was followed by a week with two social outings I couldn’t really cancel, so I skipped art class in order to be rested enough for the first, and cancelled all plans for last weekend so I had time to get over the second.

I’m feeling a lot better for the rest, too. I read a while back that we’ve lost the art of convalescense. That we dive back into the demands of everyday life before we’ve truly got over an illness, instead of easing back into our full routine.

Though I feel like I need to hibernate for the rest of the year, I’m setting my sights on spending the weekends of August convalescing. I’ll be curling up in sunbeams like a cat, reading books, and doing a little weaving or stitching or sewing when I have the energy.

Until I can’t stand the sight of the weeds any more, that is.