
I’ve done the last of the mosaic patches in the smaller ventilation holes for the old central heating.
My first idea had been to make something in slate, since the floor was slate. I bought a couple of tiles and did some experiments, and was mostly confident that I could make it work. However, when I sat down to actually put together a mosaic, I found I hated the material. There is absolutely no control over how it breaks, so I wound up with a whole lot of pieces nibbled into shape with my tile nippers, and it looked crap. Even then, I couldn’t be sure they’d stay in that shape, as they kept crumbling.
So I brought out some of the smooth-edged tiles I’d worked with already, fiddled around a bit and either didn’t like anything I came up with or worked out I’d have to buy more tiles. When I considered how much trouble I had buying enough of the right colour of these tiles in the past, I just didn’t have the energy to pursue them.
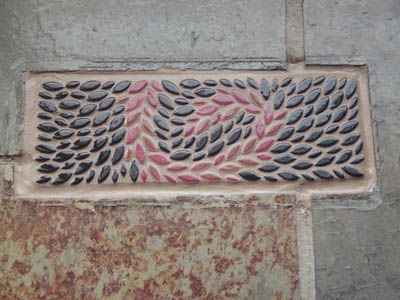
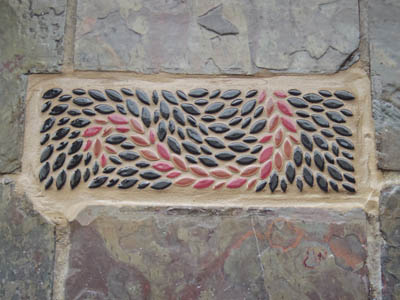
But I’d have to buy something. And I realised that if I wasn’t going to use anything I had already, that freed me up to use any tile that took my fancy and was available. I recalled how I’d seen simple leaf shaped tiles on a mosaic shop website, and loved the sinuous pattern they formed en mass.
I wasn’t going to spent a pile of money without working out if I liked the effect in person, and I didn’t want to discover I hadn’t bought enough tiles only to find they weren’t available any more. I’ve learned that you have to work quickly from concept to finished piece, to make sure the latter doesn’t happen.
So I mocked up a tile in Illustrator, printed it out and confirmed that I’d probably like the effect. I counted the tiles and bought what I thought was enough. However, the tiles I wanted came in batches of two colours. I couldn’t be sure how much of each colour I’d get. I paid extra for fast shipping and when they got here I discovered there were less burgundy tiles than black. I simply reversed the pattern I’d come up with. Then I divided the tiles into three equal sets for the three patches. Laying out the pattern on a cement sheet backing, I worked out that I needed more black tiles, and ordered those straight away.
When they arrived I got to glueing. After a couple of sessions over a few days, I had my patches ready to insert. Then it was just a matter of filling the holes with layers of mdf to get them to the right height, glueing down the mosaics, grouting and sealing.
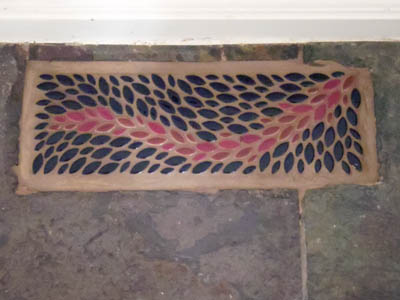
Another lesson I’d learned from previous mosaics was that I should test the grout colour beforehand. It always dries lighter than I expect. It was worth doing. This time I got it spot on.
There’s one more possible floor mosaic to do: the larger patch when the intake grille for the central heating was. It’s quite a big area, and needs more than a simple filler. But before I do that I have the clock to finish, and I want to do a glass mosaic bowl.