
The first week of the workshop was entirely taken up by scouring. This is one of those necessary steps that isn’t particularly entertaining or difficult, but since I’ve never scoured before there was definitely value in the doing of it.
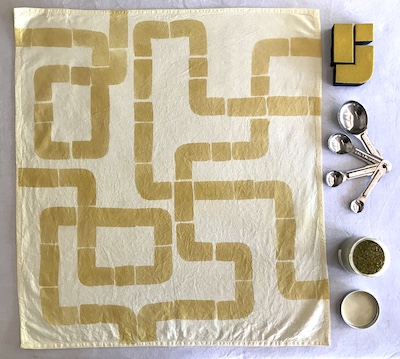
The second week’s process involved making a mordant paste, applying it and then immersion dyeing. That was rather fun and a good introduction to the various methods of application. I’d already decided that I wanted to do all the processes as demonstrated, but rather than copy everything exactly I’d try to come up with a different design and find additional ways to apply the dye pastes.
One of the methods in the class was to stick adhesive-backed velour onto foam blocks. I thought I only had a few scraps of velour Contact from the 70s, but it turns out it’s fashionable again for lining drawers so I had a roll of black as well. It turned out to have just the right amount of dye-holding capacity and gave good crisp edges.
I had picked up some men-shaped makeup sponges from Daiso a few years back thinking they’d make great stamps. And they were.

They used Indian hand-carved wood stamps in the class. I had a couple of those and gave it a try. Not my favourite method, but effective.

They used multiple sponge brushes in the classes. I couldn’t find them sold singly, so for every one in a useful size I got two to three extra large ones. So I cut nicks out of one to make one that made parallel lines.

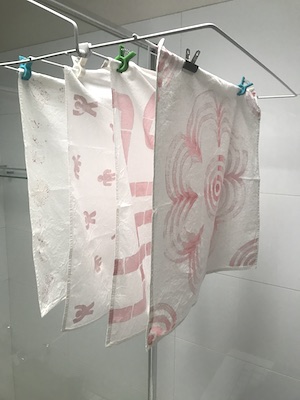
These are all napkins, which came in the kit. A nice size for playing around with, but ultimately I’m not sure what I’ll use them for. In Australia napkins are generally only used, if at all, at formal dinner parties. These are too informal for that. Maybe I can sew them into throw pillow covers, or drawstring bags. Or use them as furoshiki. Whatever they turn into, they were fun to paint and print and had me eager for the next class.