This blog’s former incarnation was a knitting blog, and at this time of year I used to do a bit of an overview of the projects I’d finished the previous year. I thought it might be interesting to do an overview of everything I completed last year, not just the knitwear.
First, for old times sake, the knitting (and crochet):
Knitting & Crochet:

Josh Socks (gift)
Cherie Amour (op shopped)
Bean’s Monkeys (gift)
Safire
Pussy Cat
Origami Bolero
Beky’s Socks (gift)
Argyle Vest (winner)
Bramblewood (op shop)
Emma’s Socks (gift)

Mossy Mobius Scarf (winner)
Donna’s Socks (gift)
Possum Mobius Scarf (winner)
Lion Jacket (winner)
Alison’s Socks (gift)
Piper Hat
Dad’s Socks (gift)
Purple Jumper
Glitzy Mobius Scarf
Toast Wristwarmers

Leafy Wristwarmers
Slinky Ribs
Argyle Vest #2 (winner)
Touch Yarn Socks
Sideways Stripe Vest (op shop)
Loom ends scarf (gift)
Dad’s brown socks (gift)
Owls Hat (gift)
Navy Crochet Hat (gift)
I did a second Socks For Others Club last year. That, for new visitors, was a sock ‘club’ in which I knit socks for other people rather than myself, because I now have not just an overflowing sock drawer but a growing stockpile. It was great fun and by having people put their hands up for socks I ensured my knitting had an appreciative recipient. A win for everyone!
The other challenge I set myself was the Bernardathon. I love the designs of Wendy Bernard, but though I’d had her first book, Custom Knits, for a while, I hadn’t knit anything from it. So I picked three projects and spent the winter knitting them. The Lion Jacket was a real winner – I wore it many, many times.
It was also a year of unintended stash reduction. I hadn’t put myself on a stash diet, but found I didn’t want to buy more. At first I just wanted to reduce the yarn so it all fit in the storage I have for it. And then I just kept going, only buying yarn late in the year when I had to buy some for a gift. I also culled the stash a few times, giving kilos of it away. The stash is now about 2/3 the size it was at the start of the year, and though I do now feel the occasional twinge of yarn acquisition temptation, I still want to continue using up what I’ve got.
Weaving:

Mt Pisa woven scarf (gift)
Red & White hand towels (winner)
Black & Grey ruffle scarf (gift)
Bamboo Scarf #1 (gift)
Twill Blanket #1 (gift) (winner)
Bamboo Scarf #2 (gift)
Twill Blanket #2
Denim Floor Rug #2 (winner)
I hadn’t noticed how much of my weaving I’ve given away this year. I don’t mind the giving, but I am noticing that a lot of my weaving is done to use up leftover yarn, in particular because I found it unsuitable to knit or crochet. The weaving yarn stash is growing, mainly because of this occasional overflow from the yarn stash. I don’t mind this too much, except that I’d like to be weaving yarn I selected for a weaving project more often. Or, in the case of rag rugs, weaving with something other than yarn.
Book Binding & Paper Craft:

Concertina Badge Booklet (winner)
Chain Stitch Sketch Book
Panorama Sketch Book
Bookbinding Class Book
Matchbook Notebooks (winner)
Doodle Book #1
Birthday Album (winner)
Test Book (now diary)
Fused Plastic Book

Palm Leaf Holiday Memory Book (winner)
Coptic Bound Travel Journal (gift) (winner)
Podcast Journal (art journal)
Denim Notebook (winner)
NZ Photo Album (winner)
Apple & Pear Book Sculptures (winner)
Dimensional Circle Ornaments (winner)
Mini Book

Smartie Book
Underground Book (winner)
Knitter’s Journal
Doodle Book #2
Book Pages Paper Jewellery (winner)
Security Envelope Paper Jewellery
Masquerade Book Mask
Brown Paper Sketchbook
Map Cards & Envelopes
Concertina Sketchbooks
Shopping Bag Booklet
Marbled Paper book
Discovery Channel Book
Oh, I had so much fun with book binding, paper craft and repurposing books this year! I particularly had fun using recycled materials in these projects. However, I’ve been doing less of it lately, mainly because I got all inspired by refashioning clothes.
Refashioning/Repurposing:

Russian Book Bags (winner)
Mannequin Legs plant stand (winner)
Solar Dyed singlet top
Rusty Nail Dyed T-shirt (winner)
Mirror Frames from Junk (winner)
Portable Oil Painting Kit
Instant Scarf
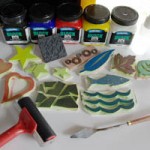
Homemade Paint Box (winner)
London Tea Towel Pillows (winner)

Impromptu Skirt (op shop)
Blue Motto Top
Gauzy Motto Top
Doodle Shoes #1 (winner)
Not-Boring iPhone Cover
Motto dress to a top (winner)
Red skirt to a top
Cheesecloth top
Black & grey skivvies to tops

Black skirt slim down
Black skirt to a top (winner)
Fob Watch Necklace
Doodle Shoes #2
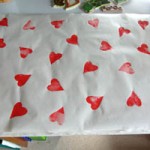
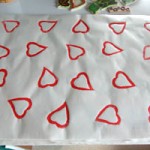
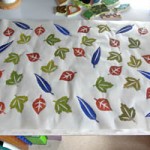
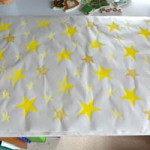
Foam Stamps
Denim shorts into skirt
Striped shorts into miniskirt
Oversized Shirt into Sleeveless Top (winner)
T-shirt into skirt (winner)
T-shirts into tube headscarves
Man’s shirt into a dress (winner)
Painted iPhone cover
Dress Form (winner)
2010 was a year of recycling and refashioning for me. Many of the projects I finished used recycled materials, or supplies I already had, or involved sprucing up something new. Even the duct tape dress form was stuffed with bubble wrap left over from mail-order parcels. I became addicted to New Dress A Day and went from tweaking a few garments I already had to buying them from the op shop or giving new life to Paul’s culled shirts.
Another challenge was Projects for 2010, which I’ve covered in a recent post.
It was also a year for sketching. I tried to do a sketch a week and succeeded (with a few catch-ups), posting them under the Sketch Sunday category. Looking over the year’s sketches, I’ve moved from pencil and charcoal to pen and watercolour as my preferred medium.
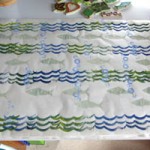
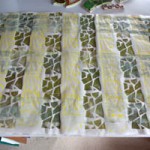
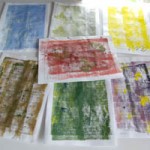
I finished the year with a growing interest in simple printing methods and painting. This year I have plans to return to art classes. Looking back on last year, I’m pretty chuffed at how much I made and all the new paths of creativity I discovered and explored. Who knows what other creative inspirations will come my way this year!