Printing Day

Saturday before last was Printing Day. The projects on my to-do list weren’t the usual stamp carving, wrapping paper making kind, but the fabric printing kind, and there were just two:

Cook Islands T-shirt replica
Try solar dyeing

I decided I liked these small to-do lists that allow me to defeat a category in one day. Well, if all goes to plan…

I didn’t have a particular solar dyeing project in mind at first, but ideas soon came to me. One was to make gifts to take os. At first I wanted to print on thin cotton shawls, but I didn’t want to get stuck with lots of time-consuming hemming to do. Shawls would be bulky, too, taking up space in my suitcase. But what if I printed on silk? Silk painting was an obsession of mine back in my 20s. I knew you could buy pre-hemmed scarves. I still have some scraps of silk, so I decided to test the solar dye on one. I used a scrap of plastic lace for the stencil:
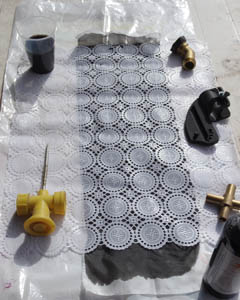
After iron to set the dye and a wash to test the colourfastness and I had this:
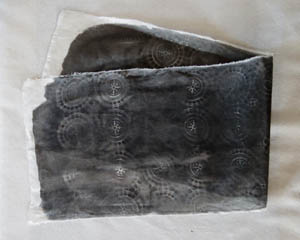
The lace pattern wasn’t as distinct as I’d like, but that wasn’t unexpected as the silk didn’t want to sit flat and there was a bit of a breeze stirring things. The lace pattern was rather fine, too. I figured I’d iron the scarves, pin them to rubber foam interlocking squares to stretch the fabric out a little, and cover and weigh down the stencils with a sheet of clear plastic on top.

A trip to Zart later and I had more solar dye and some pre-hemmed silk scarves. I gathered together some possible stencils and did test prints on more scraps. I tried feathers, punched out paper shapes, string, white board markers scribbled on the plastic sheet and a fan. Unfortunately, where the wet cloth touched the plastic strong blotches resulted and most of the stencils didn’t work:
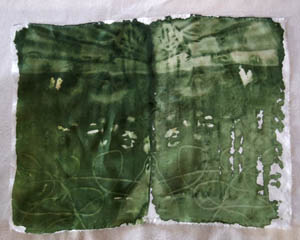
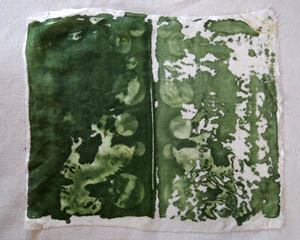
I decided to try another plastic lace piece with larger holes. I was all out of scraps, so I tried a scarf:
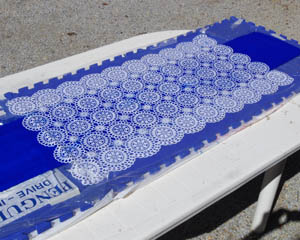
It looked great, but the dye was shiny and sticky and even after ironing and washing it the scarf kept sticking to itself. I put it through a hot wash cycle but that didn’t fix it.
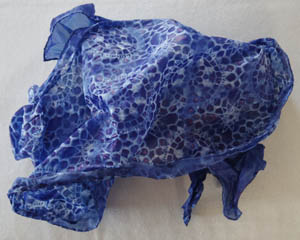
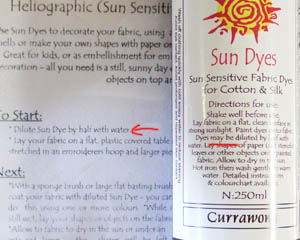
So I looked at the instruction sheet I’d picked up when I bought the first bottle of dye. It says ink is meant to be diluted 50/50 with water. But I’d read the instructions on the bottle and was sure it said the dye ‘may be diluted up to’ 50/50, so I had figured no dilution would mean a strong colour. Turns out I was right:
The next scarf I dyed I wanted a paler blue so I had diluted it anyway. I used lots of metal rings to make pale circles. By then there was enough wind that, despite weighing things down, the rings moved. I tried spritzing the scarf with more diluted dye and got more rings but less contrast.
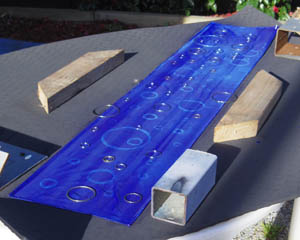
I didn’t love with the result so I decided I’d overdye it.

By then the sun was getting too low in the sky so I packed up. I was pretty disappointed that I hadn’t finished one project on my to-do lists that weekend (the flanelette blanket fix wasn’t on any). But I figured I’d started my weekend halfway through Friday, so I could spend the next morning doing more solar dyeing… if it was sunny enough.

As it turned out, it was. I started early and I put what I’d learned to good use, deciding to stick to the lace as my stencil. I did a red scarf, another blue one, a grey one and I overdyed the rings scarf from the previous day. I had quite the process line going, ironing, washing and hanging the previous scarf while the next one ‘developed’. Here are some photos of them on the line:
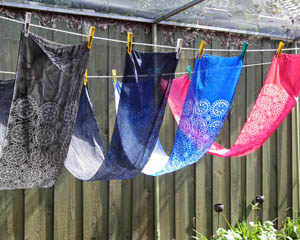
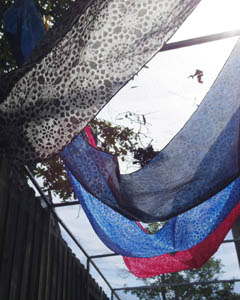
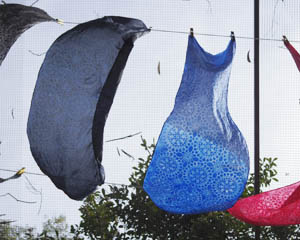
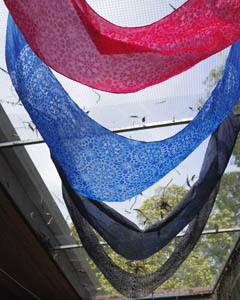
Yeah, I was pretty pleased with the result. Here’s a close up of the overdyed scarf:
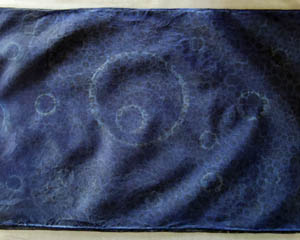
You can still see the rings, but the way the blue and black interacted looks fabulous. I put a lot of effort into smoothing the first three scarves when painting the dye on, but I let the grey one stay wrinkly.
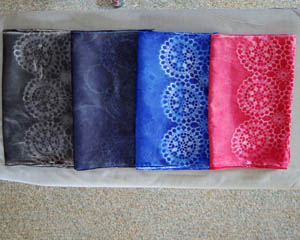
However, the red dye, though diluted at 1:1, is still a teensy bit sticky. A little of the silkiness of the scarves has been lost at that ratio. The grey scarf, dyed at 1:4 dye to water has come out the softest.

So it seems that if I want to dye silk, the stronger the colour the more detrimental it is to the fibre. I should aim for a diluted effect. I don’t mind this too much – I like how the blue scarf almost looks like denim that’s had a pattern bleached into it. I’m going to get a few more silk scarves and make a few more lace print scarves. Perhaps in purple, green and brown – and see how pale a blue I can get, too.

As for the Cook Islands tshirt? Well, that turned out to be a fizzer. I tackled it the following weekend, but found the fabric ink just didn’t coat the stamps thickly enough to make a good print.
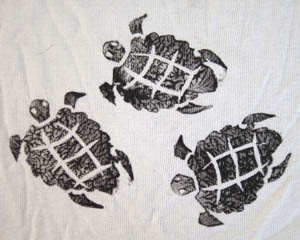
I figure it would be easier to take a photo and have it printed at Cafe Press or some similar site.

So with that project abandoned and solar dying well and truly tried out, I could declare the Printing category defeated.

Short & Sweet

Over January I did slip in a couple of very quick crafty projects. The sort that take less than an hour. So quick I forgot to blog about them.

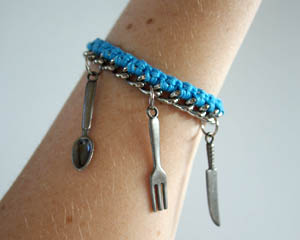
These bracelets, following the little tutorial over on Honestly WTF:

Then another inspired by a different tutorial at the same blog:

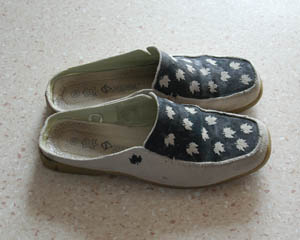
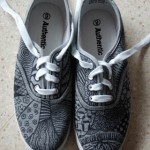
And then I dug out these shoes, which I vaguely remember buying while on holiday after getting blisters on my heels from the shoes I took with me. I always found them rather boring and ‘beige’.

Some acrylic paint, a leaf-shaped cutter and some address labels later, they weren’t so boring any more.

I also tried solar dyeing with flowers from our flame tree, but all they did was make the cloth slightly pinker.

I’m Dyeing Here

Trying not to use my hands is driving me a little batty here, and it’s about to get worse. I’ve finally received the first round of editing to do on the book. There isn’t much to do and it has a deadline of the 31st January, so I’ve been able to plan 3-4 weeks of rest. It’s a minor miracle that I have the opportunity at all, so I really need to make sure I don’t spoil it, and not use my hands any more than strictly necessary.

I may go completely bonkers.

While the “Knitwear Alteration and Repair” item on my projects list is going to have to wait until February, last week I was able to fit in the “Dyeing Day”. Unfortunately I couldn’t get the crock pot working. It appears to have the wrong plug/cord, which is strange. Perhaps it got swapped accidentally on the last dyeing day organised by the knitting group I used to hang out with, but that happened years ago and I’m amazed I didn’t notice earlier.

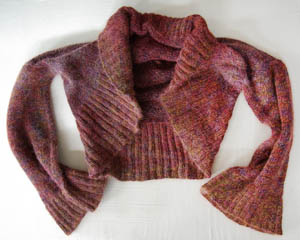
I started with the “Circular Vest With Sleeves” from 2009:

The colour was always a problem, since I look terrible in and avoid anything too yellowy. So I overdyed with red:

I wove “The Drapey Scarf” back in 2008 out of some $1 balls of yarn I bought at Dimmeys that has a percentage of cashmere in it so small that it only counts on a psychological level. I knit a top out of it that, despite being knit very loosely, shrank to about 3/4 it’s original size and I recently felted it to make a vest. But it does weave up beautifully.

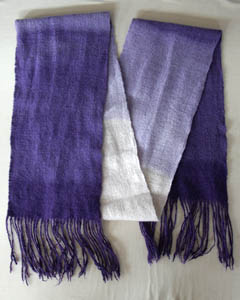
I dyed it purple, with a dip-dye method to get an ‘ombre’ effect:

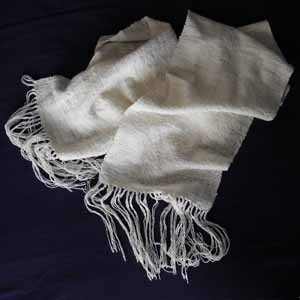
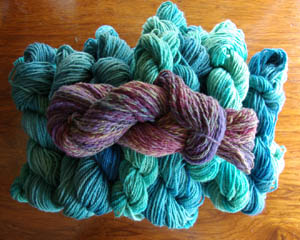
Finally, I dyed a scarf woven from undyed handspun leftover from a big charity scarf weaving binge in 2009.

It went straight into the purple dye bath and came out much improved, and still gloriously soft.

A few nights ago I tried weaving on the knitters loom while watching tv. It only gave me a little flash of heat in my wrist – much less than typing this blog post does. Perhaps if I start to go a little mad from lack of creative activity, I’ll do just a little bit of weaving. While wearing my wrist brace, to make sure.

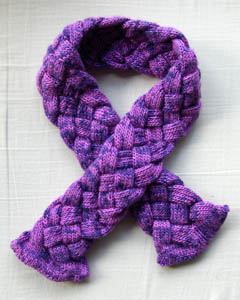
Braided Scarf

Another WIP done:

Pattern: Made it up as I went, inspired by ‘Lane’ from Vogue Knitting Holiday 2006
Yarn: Debbie Bliss Pure silk, purple overdyed with navy silk painting yarn

The pattern this was based on was on the front cover of that issue of VK, but I got rid of my collection of VK a while ago because I found I didn’t tend to knit much from them, and the few patterns I’d used were often badly written and full of errors. But I didn’t really need a pattern. The idea is very simple: knit tubes, braid them.

I had only two skeins of the yarn so I aimed to knit a smaller scarf anyway. I knit them into a 10 stitch tube then divided it into five lengths, leaving a little extra for the end sections. I put the stitches of one end of each tube onto needles and knit the end section, using kitchener to bind off. Then I braided the tubes before finishing the other end in the same way.

I’d read the comments on the pattern from other knitters who’d made this project, so I was pre-warned about how boring it was to knit. It is mostly a lot of i-cord knitting. I probably spent six or seven nights just knitting i-cord – 3 to 4 hours a night. But by the time it started to get tedious I had a head cold and wasn’t capable of anything more complicated. I don’t think I could have endured much more i-cord knitting by the time it was done, however, so I’m glad I only had the two skeins of the yarn.
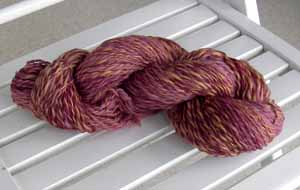
Braiding shortens the tubes considerably. I wound up with a fairly short scarf, but long enough to go around the neck and cross ends. But that’s made up for by it being thick and cushy. Being 100% silk, it’s soft and feels lovely on the skin.

It’s a pity the pattern is so boring to knit, really. I like how it looks and would like to make a wider, longer one out of wool or alpaca. Or attach a lot of tubes without braiding, then make another long one and weave it. But you’d want to have an i-cord maker so you could churn out the tubes quickly.

Sketch Sunday 62

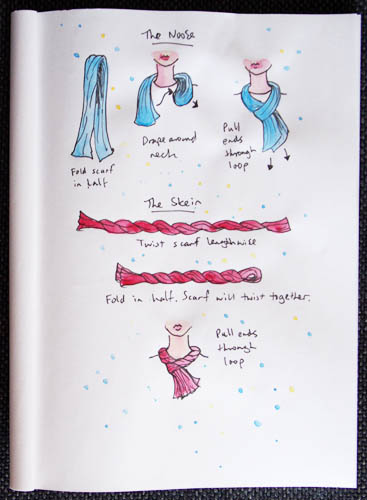
I’m deliberately late posting this, because it really needed to come after the silk dyeing and scarf tying posts. I was inspired by the brochures to sketch my favourite way to wear a scarf – The Noose. There was also a variation of it in one of the brochures which involved twisting the scarf rather like making a skein, so I called it The Skein.

Year in Craft – 2010

This blog’s former incarnation was a knitting blog, and at this time of year I used to do a bit of an overview of the projects I’d finished the previous year. I thought it might be interesting to do an overview of everything I completed last year, not just the knitwear.

First, for old times sake, the knitting (and crochet):

Knitting & Crochet:
Josh Socks (gift)
Cherie Amour (op shopped)
Bean’s Monkeys (gift)
Safire
Pussy Cat
Origami Bolero
Beky’s Socks (gift)
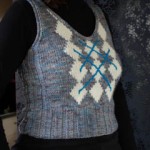
Argyle Vest (winner)
Bramblewood (op shop)
Emma’s Socks (gift)
Mossy Mobius Scarf (winner)
Donna’s Socks (gift)
Possum Mobius Scarf (winner)
Lion Jacket (winner)
Alison’s Socks (gift)
Piper Hat
Dad’s Socks (gift)
Purple Jumper
Glitzy Mobius Scarf
Toast Wristwarmers
Leafy Wristwarmers
Slinky Ribs
Argyle Vest #2 (winner)
Touch Yarn Socks
Sideways Stripe Vest (op shop)
Loom ends scarf (gift)
Dad’s brown socks (gift)
Owls Hat (gift)
Navy Crochet Hat (gift)

I did a second Socks For Others Club last year. That, for new visitors, was a sock ‘club’ in which I knit socks for other people rather than myself, because I now have not just an overflowing sock drawer but a growing stockpile. It was great fun and by having people put their hands up for socks I ensured my knitting had an appreciative recipient. A win for everyone!

The other challenge I set myself was the Bernardathon. I love the designs of Wendy Bernard, but though I’d had her first book, Custom Knits, for a while, I hadn’t knit anything from it. So I picked three projects and spent the winter knitting them. The Lion Jacket was a real winner – I wore it many, many times.

It was also a year of unintended stash reduction. I hadn’t put myself on a stash diet, but found I didn’t want to buy more. At first I just wanted to reduce the yarn so it all fit in the storage I have for it. And then I just kept going, only buying yarn late in the year when I had to buy some for a gift. I also culled the stash a few times, giving kilos of it away. The stash is now about 2/3 the size it was at the start of the year, and though I do now feel the occasional twinge of yarn acquisition temptation, I still want to continue using up what I’ve got.

Weaving:
Mt Pisa woven scarf (gift)
Red & White hand towels (winner)
Black & Grey ruffle scarf (gift)
Bamboo Scarf #1 (gift)
Twill Blanket #1 (gift) (winner)
Bamboo Scarf #2 (gift)
Twill Blanket #2
Denim Floor Rug #2 (winner)

I hadn’t noticed how much of my weaving I’ve given away this year. I don’t mind the giving, but I am noticing that a lot of my weaving is done to use up leftover yarn, in particular because I found it unsuitable to knit or crochet. The weaving yarn stash is growing, mainly because of this occasional overflow from the yarn stash. I don’t mind this too much, except that I’d like to be weaving yarn I selected for a weaving project more often. Or, in the case of rag rugs, weaving with something other than yarn.

Book Binding & Paper Craft:
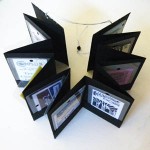
Concertina Badge Booklet (winner)
Chain Stitch Sketch Book
Panorama Sketch Book
Bookbinding Class Book
Matchbook Notebooks (winner)
Doodle Book #1
Birthday Album (winner)
Test Book (now diary)
Fused Plastic Book
Palm Leaf Holiday Memory Book (winner)
Coptic Bound Travel Journal (gift) (winner)
Podcast Journal (art journal)
Denim Notebook (winner)
NZ Photo Album (winner)
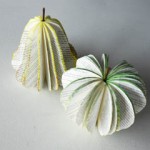
Apple & Pear Book Sculptures (winner)
Dimensional Circle Ornaments (winner)
Mini Book
Smartie Book
Underground Book (winner)
Knitter’s Journal
Doodle Book #2
Book Pages Paper Jewellery (winner)
Security Envelope Paper Jewellery
Masquerade Book Mask
Brown Paper Sketchbook
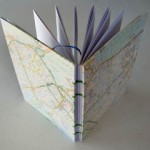
Map Cards & Envelopes
Concertina Sketchbooks
Shopping Bag Booklet
Marbled Paper book
Discovery Channel Book

Oh, I had so much fun with book binding, paper craft and repurposing books this year! I particularly had fun using recycled materials in these projects. However, I’ve been doing less of it lately, mainly because I got all inspired by refashioning clothes.

Refashioning/Repurposing:
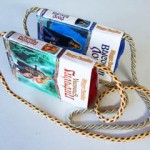
Russian Book Bags (winner)
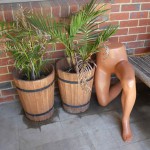
Mannequin Legs plant stand (winner)
Solar Dyed singlet top
Rusty Nail Dyed T-shirt (winner)
Mirror Frames from Junk (winner)
Portable Oil Painting Kit
Instant Scarf
Homemade Paint Box (winner)
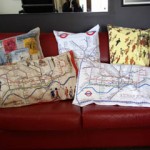
London Tea Towel Pillows (winner)
Impromptu Skirt (op shop)
Blue Motto Top
Gauzy Motto Top
Doodle Shoes #1 (winner)
Not-Boring iPhone Cover
Motto dress to a top (winner)
Red skirt to a top
Cheesecloth top
Black & grey skivvies to tops
Black skirt slim down
Black skirt to a top (winner)
Fob Watch Necklace
Doodle Shoes #2
Foam Stamps
Denim shorts into skirt
Striped shorts into miniskirt
Oversized Shirt into Sleeveless Top (winner)
T-shirt into skirt (winner)
T-shirts into tube headscarves
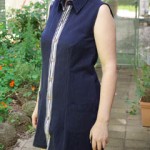
Man’s shirt into a dress (winner)
Painted iPhone cover
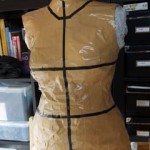
Dress Form (winner)

2010 was a year of recycling and refashioning for me. Many of the projects I finished used recycled materials, or supplies I already had, or involved sprucing up something new. Even the duct tape dress form was stuffed with bubble wrap left over from mail-order parcels. I became addicted to New Dress A Day and went from tweaking a few garments I already had to buying them from the op shop or giving new life to Paul’s culled shirts.

Another challenge was Projects for 2010, which I’ve covered in a recent post.

It was also a year for sketching. I tried to do a sketch a week and succeeded (with a few catch-ups), posting them under the Sketch Sunday category. Looking over the year’s sketches, I’ve moved from pencil and charcoal to pen and watercolour as my preferred medium.

I finished the year with a growing interest in simple printing methods and painting. This year I have plans to return to art classes. Looking back on last year, I’m pretty chuffed at how much I made and all the new paths of creativity I discovered and explored. Who knows what other creative inspirations will come my way this year!
Secret Crafting & T-shirt Refashioning

There’s been a bit of crafting going on this last week, but most of it I can’t show because I’m making presents. There’s been some knitting. There’s been some weaving:

There was some dyeing, too. I over-dyed an olive green skirt black (sorry, no pics) and this yarn:

Over-dyed blue:

There was also some more wardrobe culling. When the weather warms up I switch the position of my skivvies and long sleeve cotton knits with my t-shirts for better accessibility, and I finally got around to this last week. I seemed to have an awful lot of t-shirsts, so I sorted and counted them. I was a bit shocked. Somehow I’d managed to end up with 51 – not counting sleeveless ones and singlet tops.

I say ‘somehow’, but I know the source of my t-shirt excesses: conventions and holidays. I always pick up a couple in either situation. I’ve learned to be fussy about holiday t-shirts. I won’t buy them unless I really like them. I’m learning to be picky with con t-shirts, but the pile of ugly, oversized con shirts I don’t wear is evidence that I was once an easy victim to the ‘had a good time so must buy the shirt’ compulsion.

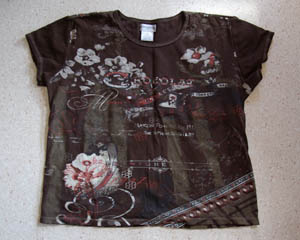
Most of the con t-shirts ended up in the gym/painting pile. Of the holiday shirts culled, this one had potential. I’m a sucker for anything chocolate themed. I’d bought a 1XL size because it was the smallest they had, but though I didn’t mind the bagginess, the material was surprisingly thick, which made it a bit hot for summer.

After searching the internet for ideas, I realised that the thicker material made it good skirt material. So I got chopping:

Side seams done, I considered how to do the waist. Unfortunately, my overlocker doesn’t do hems and my sewing machine’s stretch stitch makes horribly puckered seams. I usually get around this by overlocking on a tubular waistband of ribbing. But I didn’t have any ribbing. Looking around at the other culled clothes, I spotted the solution: a too-small-over-the-boobs sleeveless top I was going to cut up for rags:

Waistband added, and I haz new skirtz.

Since I had the overlocker out, I decided to attack another stretchy fabric project. I had one of Paul’s old t-shirts:

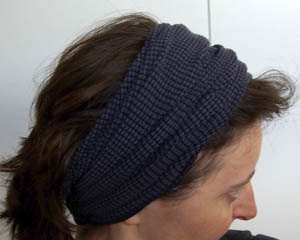
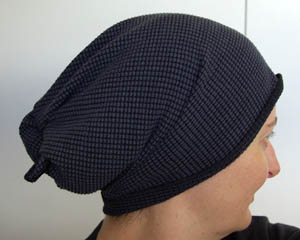
I’d put it aside thinking I’d make it into one of those tube head band thingys you get at camping/adventuring stores. Nothing fancy here, I just cut a rectangle of cloth from the shirt’s back, overlocked the top and bottom edges and then seamed up the sides. You can wear it scrunched together as a headband:

Or stretch it out over your head like a sock hat.

I do this to protect my hair when painting, or make sure none of my hair gets into the food when cooking. Not flattering, but practical. Having succeeded at that, I realised there was something I could do with old con t-shirts:

This one yielded two tube head bands. I nearly chopped up another t-shirt, but decided not to when I realised it involved changing the overlocker thread to white. It takes a much more important project to motivate me to tackle re-threading an overlocker!

Inspirational Blogs

It’s been nine months since we arrived home from Canada. I’m noting this because it was about then that I noticed I wasn’t as obsessed with knitting and was looking for new inspiration and creative outlets. It led to me starting this blog – a fresh start and a place to record my explorations of new crafts and interests.

As time has passed the types of blogs I’ve been reading have changed to reflect that exploration. So I thought I’d stop and write about this, because when the list in the sidebar changes, a copy of the old arrangement doesn’t remain on old blog entries. Not that I want to record this in detail. Just to note the general trends.

When I started out, most of the blogs in the sidebar were knitting and weaving blogs that didn’t come up under the ‘friends’ list in Ravelry. (I still read knitting blogs in Ravelry, because it’s a more efficient system.) A lot of those bloggers weren’t posting much since Rav came along, so I removed them from the list. It also turned out that many of the weavers who blog tend to do complicated work that takes a long time, so their posts were either too technical or a long time in coming, or both. I’d decided I didn’t want to do complex weaving yet, so I culled some of those, too.

Then I added the blogs of two friends: Konstant Kaos and Pivotal Xpressions. Exploring the blogs that they listed introduced me to a whole new world of craft. The kind that involved simple, sweet little creations you could whip up in an afternoon. That really appealed. I reckon knitting caught my interest partly because my job involves working hard for a year or so before the satisfaction of finishing, and knitting gets me that satisfaction a lot quicker. Now perhaps the appeal of these quick crafts was I could get a hit of finishing satisfaction even faster.

So a lot of crafty blogs and a couple of magazines got added. But then something strange and annoying kept happening. It seemed every time I found a vibrant, often-updated blog, within a few weeks the blogger decided they’d had enough and stopped blogging.

However, I found I really liked blogs and sites about recycling and reusing stuff. Especially the sort of stuff I’ve had hanging around for years: paper and art materials. And that led me to bookbinding. Okay, I’d already had a go at this, but badly and in a simple form. I started buying books on bookbinding. I did a class. I started adding bookbinders’ blogs to my sidebar. Some of these bookbinders produce art, or art books…

At the same time as all this, I’ve slowly been gravitating back to art. I’ve been struggling with this for a few years now. Usually I get inspired to do a certain kind of art, and it occupies me for a couple of years until something else catches my interest. But for a couple of reasons I stopped painting a few years back, and since then nothing has caught my interest. All I know is I don’t want to do the sort of art I used to do.

Then I found the An Illustrated Life podcast and book, and decided that sketching would be a way to incorporate a little art into my life. This is now complimented by the bookbinding – I can make my own sketchbooks! So recently I went looking for artist blogs, particularly those who keep sketchbooks, and found plenty to inspire me. (I’m just waiting for half of them to decide they’ve had enough and stop blogging.)

So that’s where my blog explorations have taken me over the last nine months. I now read blogs about knitting, weaving, tapestry weaving, painting, dyeing, jewellery making, paper craft, sewing, home decorating, design, recycling, bookbinding, photography and sketching. It certainly makes for interesting and inspiring reading!

Dyeing Day

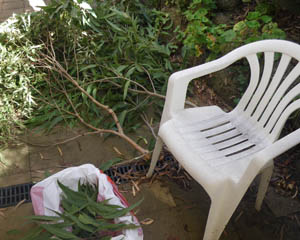
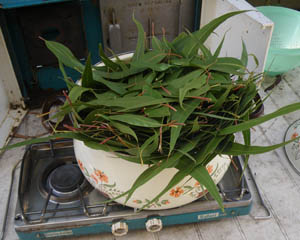
After the storm last week I kept finding myself eyeing downed branches from eucalyptus trees and thinking about dyeing. Near to home there was one particular branch that wasn’t cleared up by Saturday, so in the afternoon I went for a walk to get it. Unfortunately it had gone quite dry, though it is still possible to dye with dried leaves. While dragging it home, I discovered that the gardener for the block of flats across the road had been trimming trees, and there was some fresh gum tree branches on the pile. So I nabbed them as well. It made for quite a pile in the cat run:

craftyblog436

The fresh leaves were nicer to touch, so I started ripping off leaves. It turned out that it took only one of the smaller fresh branches to make up a kilo of leaves. (According to my book, Eco Colour, you need around the same weight as the textile you’re dyeing.) So my green waste bin is now half full of gum branches and leaves.

craftyblog437

Then it turned out that my pot wasn’t big enough – something I’d forgotten since the last dyeing experiment. I only got a little under half the leaves in.

craftyblog438

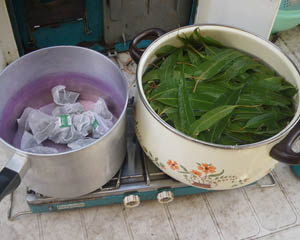
I set the leaves simmering, and in the meantime set up another pot to dye a t-shirt. I’d tried solar dyeing it before and only managed to darken a stain. This time I had some green tea that Paul had accidentally bought instead of peppermint tea. To add an extra bit of experimentation to the mix, I wrapped the t-shirt around some rusty nails.

craftyblog439

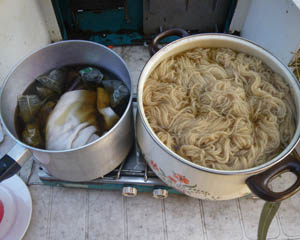
Once the leaves had simmered long enough I took them out, then introduced half the yarn (Cleckheaton Country 8ply) and kept stirring to make sure the dye bath never went beyond steaming to actual boiling. I poured a kettle full of boiling water over the tea bags and t-shirt, and decided to leave it at that rather than risk I’d run out of gas for the camp stove.

craftyblog440

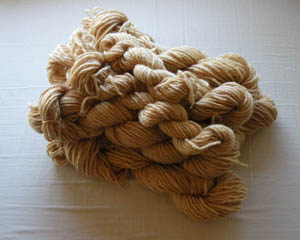
After the yarn had steeped for the right time, I turned the heat off and left it to cool in the pot overnight. This morning I repeated the steps with the second half of the leaves and yarn. As you can see, the yarn is now a honey colour. Which is nice, but not very ‘me’. I’m thinking of getting one of those really big soup kitchen pots and more leaves to overdye the yarn, and see if I can get the kakhi green the book says you get if you dye in an aluminium pot.

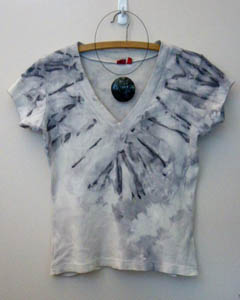
The t-shirt, however, was a great success:

craftyblog441

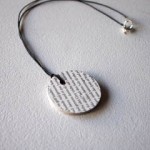
The tea made very little difference, but the nails left a blue-grey imprint that is fabulous. And it goes perfectly with the porcelain pendant necklace I bought at the Northside Makers Market that morning.

On Sunday I went to a bookbinding class, but I’ll save that for another post…

Solar Dyeing

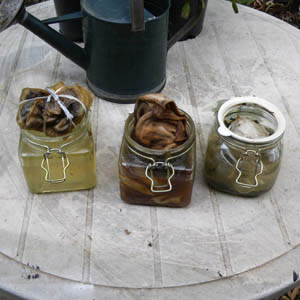
Before heading off to Adelaide for New Years Eve last year I set up some solar dyeing jars, using an old singlet top and some silk scarves. The idea was they’d be something for me to open after a month of travelling.

craftyblog375

The jars had been sitting on the west side of the house, getting the afternoon sun. They’d obviously had plenty of heat, as one of the rubber seals was all cracked and stuck shut.

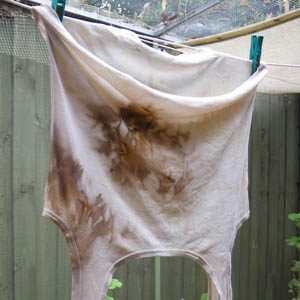
When I took the singlet top out it smelled like tea and lemons – quite nice. I’d wrapped it around some lemon gum leaves and seeds and the result was pretty good:

craftyblog376

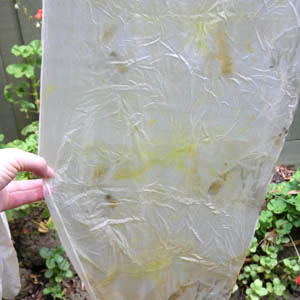
When I took the silk scarves out of the other jars, however, they stank rather badly. The nasturtium leaves and flowers worked quite well but smelled of rotten vegetation:

craftyblog377

But the camelia and flame tree leaves stank of vomit and didn’t dye particularly well. This is fine – I can overdye with something else.

craftyblog378
craftyblog379

I washed everything thoroughly and hung it out to dry. Unfortunately, the stink has got into the skin of my hands, and I’m regretting pouring the dye water out in the garden near the kitchen window. Next time I’ll definitely be using gloves, and emptying the jars a looong way from the house!