Having realised I had as much fabric left over for the Aqua Quilt as what I started with, I decided to use up as much of that fabric as possible before sewing anything else. I had:
A short bit from the end of the Aqua Quilt top, cut off because the batting was 254cm but the top was around 300.
A 1.5ish metre length of the aqua flannelette I’d intended to make into bias binding.
A bundle of remaining original strips.
The remaining strips from Mum’s pyjamas
Offcuts of the aqua flannelette backing.
I decided to make a lap blanket. The first thing I did was cut the offcut of the top in half. The new width was just right for a lap blanket… and once sewn together it would be a good length for one too. That wasn’t going to use up much leftover fabric, so I decided to make two lap blankets, using the same method as for the quilt.
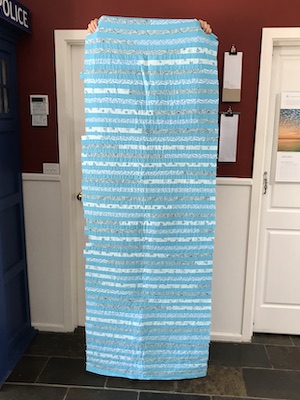
I cut up most of the offcuts of plain aqua backing fabric to use as the alternating strip against the mixed, paler fabrics. Once they were all sewn together and added to the offcuts from the quilt top, I had this.
This would make a lot more than two lap blankets.
This presented a dilemma that I haven’t yet solved.
So the blue quilt needed to be more interesting than the aqua quilt. I had an idea how to achieve that: a design that echoed the log cabin structure in weaving. For that I needed the same amount of dark blue fabric as light blue, and while I had a piece of dark blue floral fabric I’d found in an op shop that would work, I didn’t have enough of it to make the queen sized quilt I had in mind. I also had a small piece of navy flannelette I’d bought to add variety to the mix, which I decided to buy more of.
The navy worked best with patterned fabrics, the dark blue floral with plain. Lots of sewing later, I had one set of four blocks sewn together…
… and about 22 more blocks. I did some math and drew a plan, and realised I needed 99 blocks.
It was at this point I put everything aside so I could finish the Aqua Quilt by the end of the year. With that time to think, I came to the realisation that I wasn’t enjoying the process of making the Blue Quilt. And maybe even making quilts at all. I didn’t hate it, but I wasn’t having fun.
Life’s too short for crafts you don’t enjoy.
This dissatisfaction was compounded by the fact that I hadn’t reduced my flannelette fabric stash at all when making the Aqua Quilt. The offcuts of the backing fabric were about equal to the strips I started with. Thinking about all the fabric I had bought fabric in order to make the Blue Quilt work, I felt a sinking feeling.
I don’t wanting to waste the fabric or the work I’ve already put in, so I’ve been considering my options. I haven’t cut all of the dark floral and navy flannelette into strips yet, and I have some small batches of untouched plain light blue. I could…
Use the blocks I’ve already made to construct a small piece, like a lap rug
Then make a pair of pyjamas with the uncut fabric, assuming there is enough
Then make another strip quilt or a few small ones with the remaining strips
Or try making fabric-wrapped rope baskets
Or save the strips to use as stuffing
Or send all the strips to fabric recycling
Whatever I do, I need to stick to my new rule of only making things I want, not just to use up stash. Trouble is, I don’t need more pyjamas, or a fabric-wrapped rope basket. But I could do with more cat quilts (small blankets for protecting my clothes and legs from claws).
This year I’ve been all over the place creatively and, well, so has life in general. I didn’t seem to get much done at times, but when I look closer that was because I tackled single projects that took up a lot of time. I did a bit of sewing, a bit of weaving, delved into some occasional crafts like jewellery-making and air-dry clay, finished some long-term WIPs and culled several kinds of hobby supplies. It feels like my mind began to jump from hobby to hobby in the latter months of the year, new shiny things taking my attention before I’d finished with whatever had last attracted me, as if Covid 19 gave me some king of creative ADHD.
January & February:
The Print & Paint With Natural Dyes workshop took up all of my creative energy at the beginning of the year, partly because so much else were going on, including having Dad and his very naughty cat staying with us.
March:
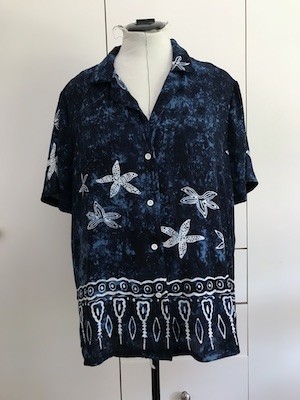
Using the knowledge I’d gained in the workshop, I painted/dyed three tops and a scarf. I also sewed a shirt out of a sarong.
April:
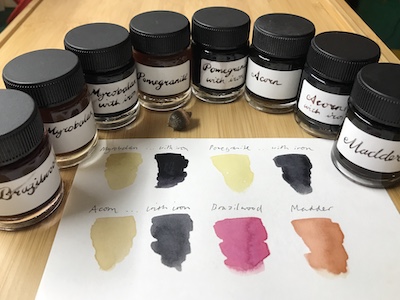
I didn’t include the Ink-Making workshop in my 2022 summary, but I think I should have. Six months after, I made some more inks as some sources dependant on season became available.
May:
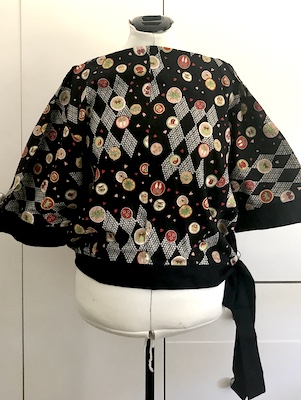
A bit more sewing happened, first when I turned Motto Skirt into a top…
… and made a Chambray Dress.
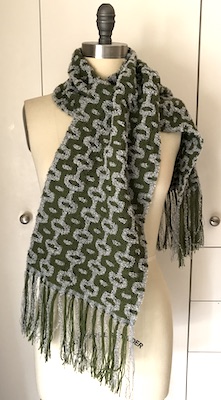
And I returned to the loom to finish the Bouclé Chains Scarf.
June:
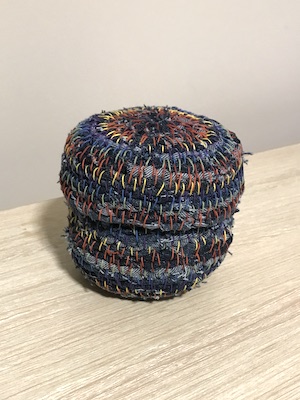
I finished a coiling fabric basket, made while visiting Mum.
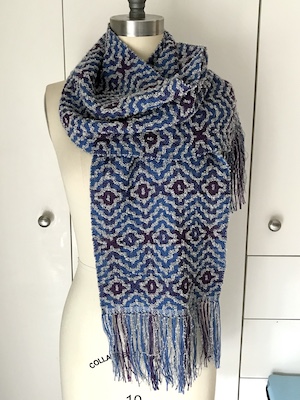
More exploration of Deflected Doubleweave with bouclé yarn happened with the Baroque Scarf.
I also culled my mosaic supplies and did an illustration commission.
July:
And another DDW project finally using a design I drafted a few years ago: the Electricity Scarf.
August:
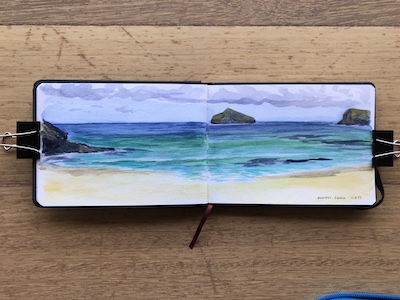
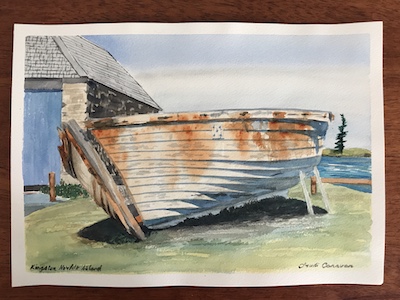
We went to Lord Howe Island, and I did some sketches.
September:
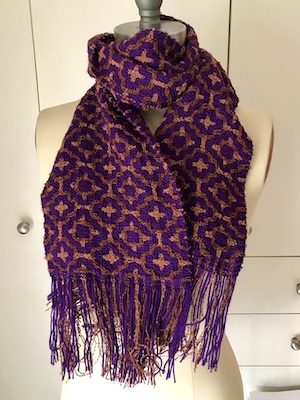
The fourth and favourite DDW bouclé scarf: Copper Roses.
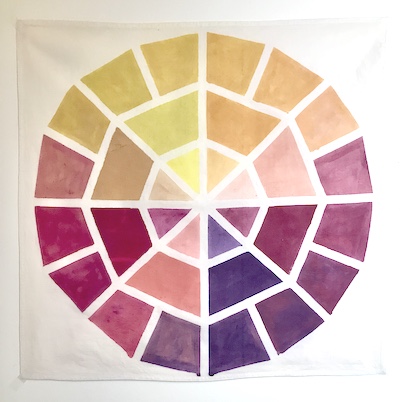
I tried making watercolour paint, and felt a bit ‘meh’ about it.
October:
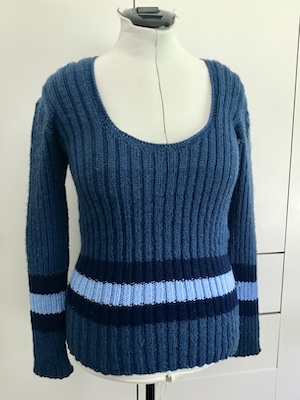
A bout of finishitis set in. I lengthened Slinky Ribs and made it all rib:
We went to Norfolk Island on an artist holiday.
A bout of Covid 19 somehow led to me culling things. First my jewellery collection, which led to jewellery-making.
November:
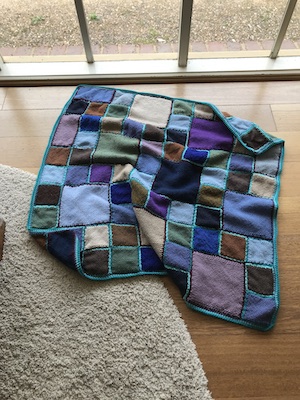
I finally, at long last, finished the Pin Loom Blanket.
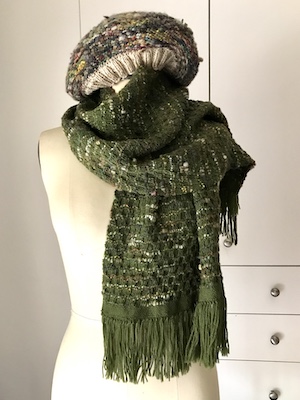
I wove a Honeycomb Scarf and Tapestry Beret.
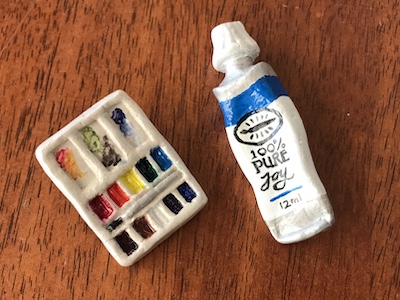
The jewellery-making also included a dive into air dry clay.
I finally, at long last, finished the dishcloths that had been on the Jane loom for a year.
December:
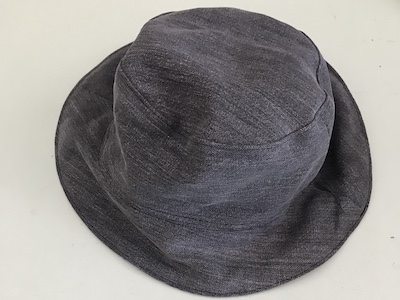
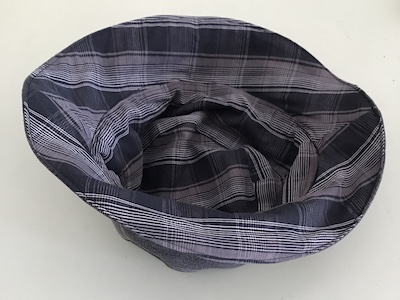
Watching Project Runway and The Great British Sewing Bee had me itching to sew. After culling my sewing materials, I made Paul a bucket hat and me some shorts.
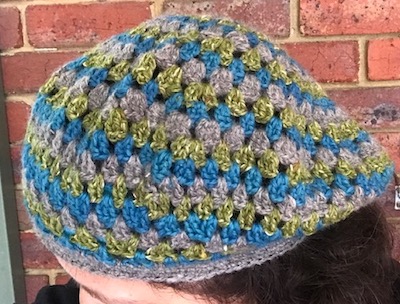
And then got the itch to crochet. This Granny Beret seemed a good warm up to something bigger.
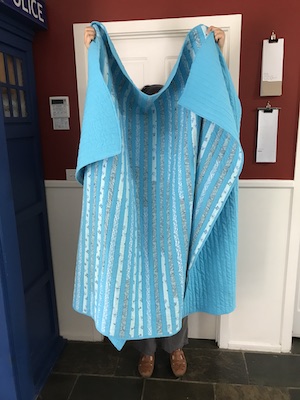
A big yarn cull moved the flannelette strips meant for rag rugs into the fabric stash intended for quilts. I sewed a single bed sized quilt.
Also:
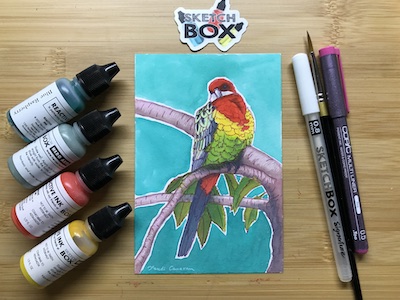
This year was also the year of the artist subscription box. I tried one Paletteful Pack but decided against signing up because the postage was too expensive, then gave SketchBox a go and stuck with it. They proved to be a very entertaining and interesting monthly treat. It allowed me to try some art supplies I’ve never encountered before. It’s likely after a year I’ll stop the subscription because there are only so many kinds of art supply so the rewards will eventually diminish, but it has been fun and I suspect I’ll miss it if I do.
I also did a lot of oil painting, mostly in the plein air group but also lots of still life both at the art society and at home. I decided to stop posting pictures of my art, however, until it was clearer how plagiarism software (AI) was going to affect everything.
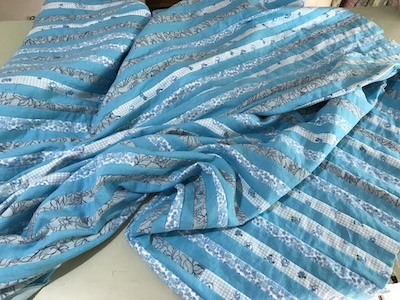
I’ve only quilted a larger quilt once before, and it must have been quite a while ago because I’d forgotten what it was like. Which is like wrestling a big, fuzzy, floppy mattress. I had to put my sewing machine in the middle of the cutting table to have enough room to handle it. I’m certain my stitching would have been far neater if I hadn’t been constantly pulling, pushing and manipulating it.
The plan was to use ‘serpentine’ stitch, which sews a wavy line, but when I selected the number for the wavy line shown in my machine’s manual I got a completely different stitch. The manual had no other info – just a chart – so I gave up and did the ‘stitch in the ditch’ method instead. Though this does make it look a bit like a puffer jacket (which I loathe) the bamboo batting makes it feel appealingly cushy rather than full of air.
Even though this is possibly the plainest quilting topstitch patten, it still ate up four and a half reels of thread. I had two in the right colour already, and I’d already bought more, but it turns out the number on the edge of the Gütermann thread reel is the same on all reels, and the actual colour number is the ends of the reels. So I made a fourth trip to Spotty in as many weeks only to find that every colour in that thread was in stock except the one I needed. I asked a staff member and they said the shelf had been restocked the previous day.
Fortunately, there was a thread in the same colour in another brand.
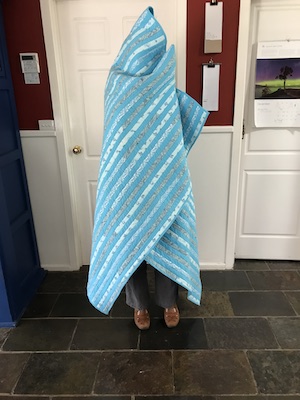
I wanted to bind it with the same fabric as the backing, but flannelette probably doesn’t make the most robust of fabrics. Unfortunately, the quilting cotton was nearly twice as expensive and the only colour that came close to matching was too dark. Then I remembered a friend’s method of finishing: just turn over the edge of the backing to the front. This wouldn’t be any less robust than making bias binding out of the backing, and it’s much faster. So that’s what I did.
I like it. The colour lifts my mood.
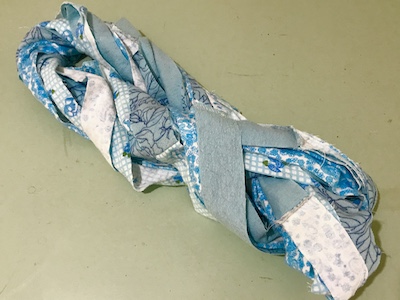
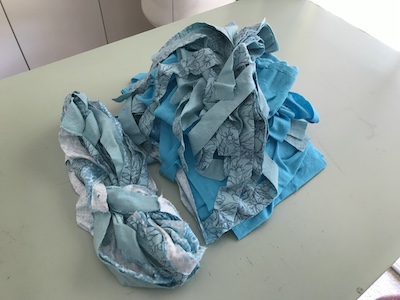
However, when I looked at the leftover fabric a hard truth settled over me: I did not succeed in reducing my stash. I started with three of these bundles:
And now I have probably more mass of fabric left:
I did add Mum’s pyjamas to the initial bundles, but that just means I’ve ended up with as much unused fabric as I started with.
At least one piece isn’t cut into strips – the piece I was going to make bias binding out of. The options for using that are much broader.
Yes. Quilting. I know. Where is the real Creative Fidget and who is this imposter?
Well, I had to do something with all the flannelette strips I culled from the weaving yarn stash. I could have just tossed it all into the fabric recycling box, but I decided to give strip quilting a try. There are batches of aqua, light blue, red, purple, rainbow and a rather large accumulation of leftover strips from the spectrum rugs.
Fortunately, not many of the strips had edges turned in and ironed, so it wasn’t much work to iron them flat again. The red batch is the only one still to be cut into strips, so it may become a non-strip type of quilt. I chose the light blue batch to begin with, and soon hit at snag.
When weaving fabric into rugs not a lot of the pattern shows, just a general impression of colour. You can mix up prints of monkeys with prints of flowers and nobody would know. It also isn’t immediately apparent when the same fabric is sewn to itself. But when quilting, both of these things are obvious. A large proportion of the blue batch was the same pale, Japanese inspired print of fans along with a subtle gingham print, a few flower patterns and a single plain blue… with the occasional glaring length of cartoony characters or bold stripes. Once I cut out the latter, I had very little variation in fabric. That meant a trip to the fabric store to buy more flannelette and, well, we were having the sort of weather that didn’t make shopping trips appealing so I didn’t want to do that yet.
I did consider mixing the aqua batch in with the blue, but the combo didn’t excite me and I really wanted to have a aqua-only quilt because I had a pair of pjs of my Mum’s I wanted to include. Nope. Until I had more fabric, the blue quilt would have to be put aside.
So I switched to the aqua quilt. That batch of fabric didn’t have any unharmonious prints to remove and it was already sewn into three long strips alternating between two prints. Trouble was, even after I cut up and spliced in the fabric from Mum’s pjs, having only three different prints meant there was no way they could align without too much of the same print lying next to itself.
The simplest solution I could think of was to do every second strip in a single, new fabric. So gave in and I headed to the fabric store, where bought three meters of plain aqua fabric.
This worked beautifully.
It took me four days to sew the strips together, working a few hours each day in the hope my back wouldn’t seize up in protest. I didn’t love the endless sewing together of strips. I didn’t hate it either.
But I did decide that sewing the blue quilt needed to be a little bit more interesting.
During my fabric, pattern and habby cull, I got to thinking about how different my attitude to fabric stash is to yarn stash. With sewing, I have a limited time I can spend on the machine before my back complains, so I don’t waste it on making items I don’t want or aren’t fun to make.My fabric collection isn’t overly large. It fits in four plastic filing boxes and one tub.
With weaving, I often make things I don’t particularly want to keep in order to use up stash or learn something new. The weaving yarn stash is seven or eight times larger than the fabric stash. Which is sobering, but not unexpected. It’s been my main hobby for quite a few years now, and until recently I was on quite a learning drive.
I’d like to weave with the same attitude as sewing, so having a weaving yarn stash as practical as the sewing stash appeals. However, to get to that point I’d have to cull quite a bit of yarn. The thought was rather intimidating, but on a free day recently, I girded my loins and got stuck in. What I found surprised me.
Since it was a large task, I broke it into smaller ones. My cones of yarn are stored separately to the skein, ball and hanks, and I left them for another time.
Out: a few cones I knew I’d never weave.
The balls, skeins and hanks of yarn made up about half the yarn. I was surprised to find they were mostly knitting and crochet yarn. Not that I don’t weave knitting yarn, just not as often these day. Some is intended for machine knitting projects, so it turns out this is also a machine knitting stash. And possibly hand knitting and crocheting, but I’ll get to that later.
Out: a bag of yarn I wasn’t keen on.
Below the knitting yarns were eight tubs of fabric for rag rugs. Am I going to weave more rag rugs? Probably not. While I like rag rugs, the oldest ones I have I made 13 years ago, and I plan to replace them with the flannelette ones I have in storage.
Out: ALL of the fabric for weaving.
When I’d estimated the amount of weaving yarn I had, I was waaaay out, because I forgot the wool rug stash.
Yikes.
Out: about half of it.
Having decided that this was also a machine knitting stash, I moved the circular knitting machines in from the craft room. In order to do that I had to move the embroidery and macramé yarn stash. You know what happened next.
Out: er, nothing. I meant to get rid of most of it, but there’s now plenty of room on the yarn stash shelves and I have a few ideas I’d like to try. At least removing it from the same cupboard as the sewing supplies gives me a some room for all that ex-fabric-for-weaving, which may become quilts and chair covers.
I’ve come up with a couple of crochet projects for the knitting yarn, too. All things I want and will be fun to make. Next time I have the urge to downsize, the cone yarns will be in the firing line. Hopefully before the next Guild bazaar.
The urge to cull and create fell upon the fabric stash, haberdashery and patterns last week. Culling was mostly for the same reasons I remove and refashion clothes: they feel dated, are not natural fibres, aren’t practical for my ageing bod, or I find myself thinking “why the heck did I buy THAT?”.
Then I spent one morning making two t-shirts patterns and an evening going through all my knits to work out if the leftovers from old projects were large enough to make anything. I matched up fabric and patterns, adding two new skirts to my to-do list, and at the end of the week I bought some fabric for the one of them.
I was looking forward to a weekend of sewing. On the Saturday, after a bit of mending to warm up, I tackled a bucket hat for Paul from an old shirt and pair of jeans.
Then I moved on to another familiar pattern: lounge shorts. The fabric was a leftover piece of a charcoal grey tablecloth I’d made into a pair of pants. Hopping around the internet for ideas the night before, I’d noted that Bermuda-length shorts were supposed to be in fashion this summer, so I decided to add as much length to the legs as the leftover allowed. That turned out to be a bit more than I really needed, but I just turned up the hems, pressed and slip stitched them in place
That filled the Saturday. On the Sunday I woke with a frozen shoulder and painful neck, so didn’t do much more than long to be well enough to tackle those skirts.
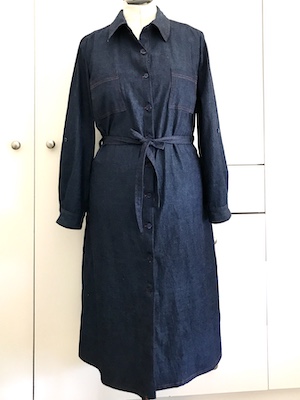
A year or so ago I saw a woman wearing a denim dress and found myself fancying a garment like that. It was essentially a shirt dress made with chambray, and I had some of that from a destash sale. I went looking for patterns and settled on Simplicity 8014, which had been voted best pattern of the year on a sewing pattern review site.
Having made the mistake of buying a pattern in US sizes that were too small for me, I took care to check the eBay seller’s information carefully and there was no indication it was in US sizings. So of course, only when it turned up was it possible to see it was was. I had to buy it again, and by the time it arrived I’d moved on to other projects so this one got put aside.
Recently I got around to making it.
I have to admit, I wondered how the pattern managed to be voted Best of the Year. The version I happened to want to make involved so many switches back and forth in the instructions that I eventually had to scan and print it so I could cut them up and put them in the right order. Even then, I had to tweak the order on the fly as well because I was top stitching in another colour and didn’t want to be changing the thread constantly.
Then there were some oddities with the collar instruction. The only time the seam allowance is mentioned on the pattern pieces but not on the instruction sheets is for the collar. The collar is the last part to be sewn, and the instructions are incomplete and in one place don’t match up with the diagram. Also, there is no mention of overlocking edges to prevent fraying, and the number of buttons for the view I did was two short of what was needed.
It seems like the manufacturer has decided to truncate the instructions so they took up less pages, and whoever got that job really didn’t care how they got it to fit.
This was originally a dress that I grew out of and turned into a skirt. Recently I tried it on and found it a bit snug. I love the fabric but redoing the waist would shorten the skirt, and I’m favouring long skirts these days. There was a skirt to top refashion I’d wanted to try for years, so this seemed like the perfect time to try it.
The ideas is, you turn the shirt upside down, unpick the side seams enough to create armholes, then join the hem at the shoulder line. If the skirt fits you can leave the waist as it is, but mine was not just too snug but also a bit long for that. So I cut off the waistband and added a new one that was also a tie. And I added a black band around the sleeves to match the waistband.
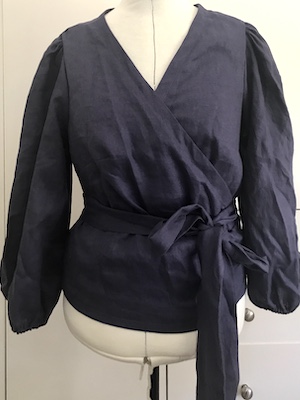
A more recent purchase was this wrap top I bought online with a voucher from sending fabric and clothes to be recycled. The shoulders were very wide, and with all the gathering at the top of the sleeve it made my head look too small for my shoulders. So off came the sleeves and a few finger-widths of fabric came off each shoulder before I reattached them. I found the gathering was rather haphazard so now it also has the same amount in the same position each side.
There has been more sewing, but that can wait for another post.
It was a test of a vintage pattern and I wasn’t all that impressed with it. The shirt came out okay, but when I went to wear it I found the facing fabric in the button band and collar was much too stiff and uncomfortable, so I cut off the buttons and sent it off to a clothing recycling company.
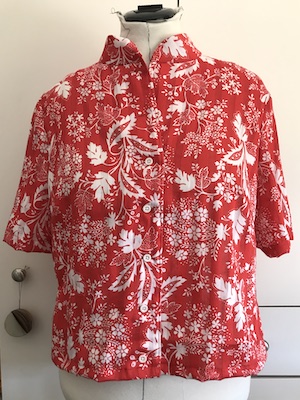
Just about that time, Tessuti released a similar shaped shirt with a collar, so I bought it, and recently did a test version:
The fabric is a rayon sarong I bought in an op shop. I used a very light facing in the collar and under the buttonholes. It’s very wearable, though the weather here has suddenly grown too cold for short sleeves and single layers. The pattern has some annoyances like teeny tiny photos of very busy cloth that you can’t make out the seams on, and the collar method seemed needlessly fussy.
Nothing bad enough that I wouldn’t use it to make the shirt I was testing patterns for. That one will be made from a piece of fabric I painted in the Maiwa class, plus some black and white linen I bought to go with it. I’d have probably started that project this week if I hadn’t come down with a bug that had me sleeping half of most afternoons. Not Covid, but probably the one spreading among friends with sinusitis as the main symptom.
I’ll get to it soon enough. And I’ve thought a lot about art and hobbies, how much of my time I want to dedicate to either, and how the reality is the opposite. I decided to try limiting hobbies to weekends and art to weekdays. This will be helped by finally getting a workable set up in the new studio side of the laundry. The last piece of the puzzle was a still life “box” that controls the direction of light on the subject.
I was happy with how the trial artwork went. Maybe tomorrow I’ll squeeze in another piece.