Stamping Cheap & Dirty

After my little evening session of wrapping paper printing I had lots of ideas for making more stamps. As well as using what I already had, I wanted to try making stamps from some materials I’d seen used online.

Rubber Carving Block:

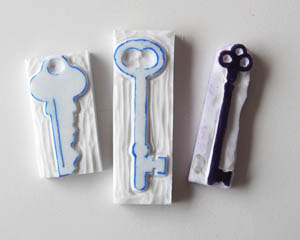
The old-fashioned key I’d made needed companions, so I carved two more:

Bottle Tops

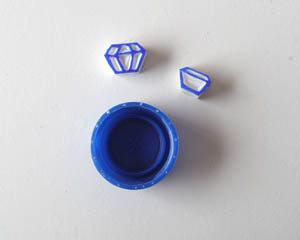
I’d also seen a stamp of two interlocking rings, one with a diamond, and figured I could do that with a bottle top and some scraps of carving block:

Foam Core:

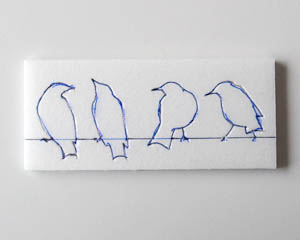
In this tutorial foam core is recommended as a cheap stamp material. You peel off one side and draw or carve into it. I tried drawing first:

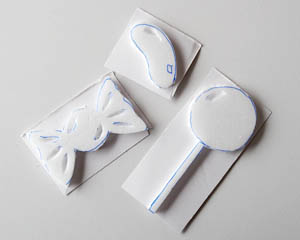
Then I carved these lolly stamps:

Meat Tray Polystyrene:

I try very hard to avoid buying polystyrene, because it’s supposed to take a billionty years to break down, but occasionally we end up with a meat tray. So when I saw a tutorial on using it as a printing material I really hoped it worked as well as it appeared to.

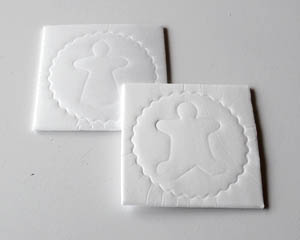
To make these gingerbread people stamps I pressed cookie cutters into the surface:

Elastic Bands

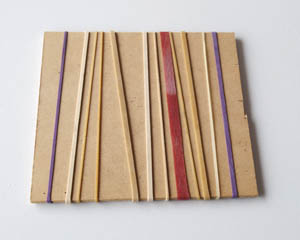
I’d seen stamps made by winding yarn or elastic bands around a block of wood. I figured elastic bands would give a cleaner edge, so I rustled up a few and stretched them around a piece of particle board:

Erasers:

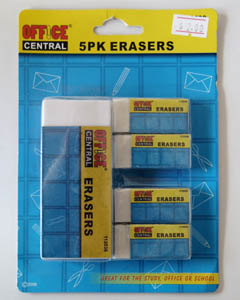
The softer rubber stamp carving blocks are similar in texture to erasers, which are often recommended for stamp material. I bought this cheap pack from a $2 shop:

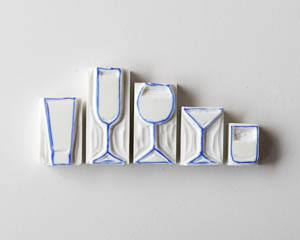
And they carved like a dream! I like them better than the carving block, so I’ll buy these whenever I’m making small stamps. This lot became cup and glasses stamps:

Silicone Stamps:

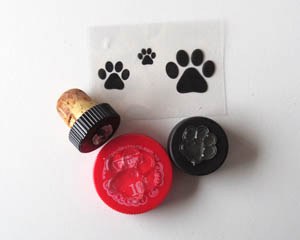
Venturing closer to the commercial stamp world, I saw these paw print stamps at Lincraft and couldn’t resist buying them. Only when I looked closer later did I discover you have to buy plastic blocks to stick them to. Being impatient, and frugal, I ‘stuck’ them to bottle caps instead:

By ‘stuck’ I mean that they come attached to a sheet of plastic, and the instructions say to peel them off and press onto the block, but they have no glue on them. I suspect they stick like suction cups.

Once I’d made these stamps I moved on to printing wrapping paper. But I’ll save that for another post.

Wrapping Paper: Batch #1

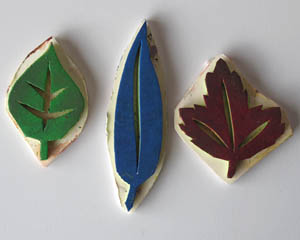
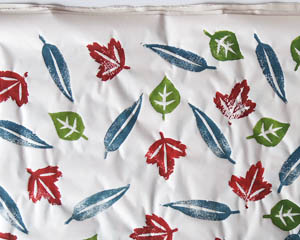
So, having made some stamps I got stuck into printing wrapping paper. First up I grabbed these leaf stamps that I used for the last batch of paper:

I had a few sheets left over that I’d never liked which I planned to cover in leaves, but I found all it needed was some blue ones:

Then I reproduced the leaf paper that had worked so well before:

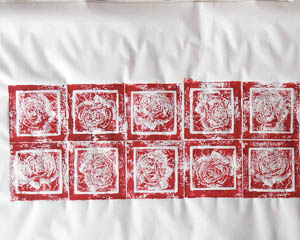
There was some red ink left, so I used it up with this old rose printing block:

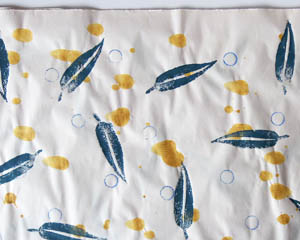
I tried the tree stamps:

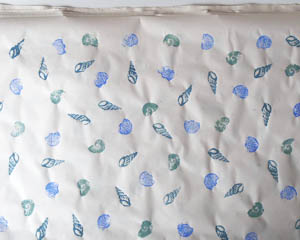
And the sea shells:

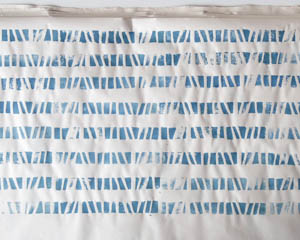
Then used up the blue paint making stripes:

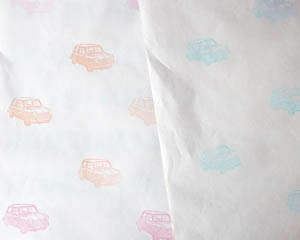
And finally, tried a Mini stamp I’d bought in the UK with some coloured stamp block ink. Which looks cute, but looks a bit wishy-washy next to the previous wrapping paper sheets.

Next I’d like to try the key, and reproduce the star themed wrapping paper I made previously. I have a few more stamps to try that I didn’t get around to printing with last time, too. And there are many, many more stamps I want to carve, as well as some materials to experiment with.

Stamping Down & Dirty

Some years ago I bought a few alphabet stamps from a friend selling Stamping Up products, so when one of the crafters at Craft Day turned out to be selling the same thing I was curious to see how the it had developed.

As before, I found that the quality was excellent and there were some really nifty effects you could get (and cookie stamps!) and they have a great range of stamp colours, but the stamps themselves don’t get me excited. I suspect it’s because I like things a bit more rough and bold and messy. The sort of project that requires a smock and washing up afterwards. I guess it would be best described as ‘Stamping Down & Dirty’.

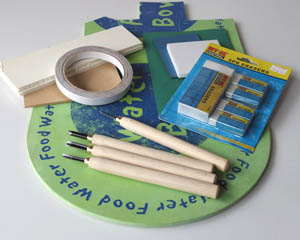
Still, looking at the catalogues got me thinking about the stamping I like and got me inspired to dragged out my stamping supplies:

The stamps I’ve generally liked the most have been simply cut out of these old foam pet dish mats with scissors then stuck with double sided tape to a chunk of foam core or particle board. I also like the print block sheets, both the harder green variety and the soft white stuff that’s the texture of erasers. I’ve made stamps out of floor tiles before and it was really tough to carve, so I don’t recommend it.

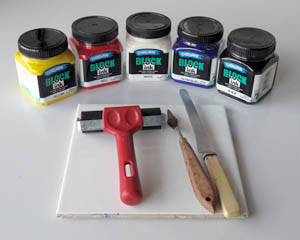
The ink shown here is specifically for printing, but I’ve also used plain old acrylic paint with great results. You could also use fabric paint. Anything sticky enough to coat a roller and transfer to the stamp works just fine. And, of course, is water soluble for easy clean up.

Last time I made foam stamps I used them to make a batch of wrapping paper out of some newsprint from the craft store for life drawing classes that turned out to be too shiny to hold charcoal. I’ve just about used that up, so I decided to make some more.

Some of those wrapping papers were used pretty quickly but others weren’t at all because they didn’t suit any occasion. I still have some lovely paper covered in red hearts, but the only person I’d use it to wrap gifts for is Paul and we don’t bother with wrapping paper. So I reviewed the stamps I’ve made and wanted to make with this in mind.

The first stamps I made were cut from a cloud and two rain drops I’d made before, but never used (’cause what would you use wrapping paper of rain clouds for – a funeral?). I turned them into trees:

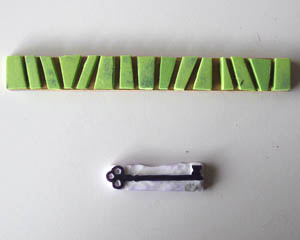
I used up some foam scraps to make a strip stamp for borders or stripes, using an offcut of particle board for the backing, then I got more creative and carved a key:

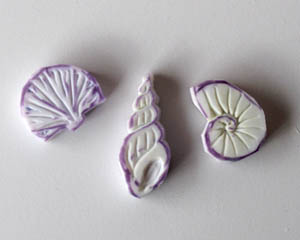
By then I was getting the feel for carving and made some shell stamps out of white rubber for a happy non-event specific theme:

I find keeping them simple works best. My back and hands won’t cope with long hours carving stamps anyway. For inspiration I trawl Pinterest and Etsy, though I suspect this is going to lead to me buying hand carved stamps because some of the artists have a wonderful, distinctive style. But for me half the fun of stamping is making the stamps.

Here’s a great tutorial on making stamps from free or cheap materials.

Alisa Burke has a mini online workshop if you’d like more guidance and inspiration.

Some handcarved stamp artists on Etsy to admire:
Enchanting Stamps
MemiTheRainbow
talktothesun
skullandcrossbuns

And these stamps aren’t hand carved, but I included them because they’re adorable:
Norajane

Stars of Pinterest

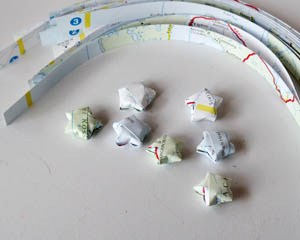
After making paper beads I was left with way more strips of the map pages than I really wanted to turn into beads, so I tried a little folded paper stars tutorial I found on Pinterest:

Cute – and rather addictive! Perhaps something to decorate the house with at Christmas.

Paper Beads

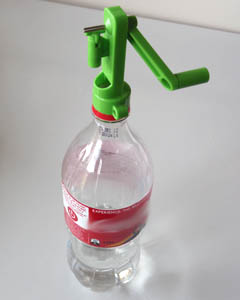
I’ve given the doovy a whirl. In fact, a couple of whirls. I can tell you, on its own this thing requires three hands: one to hold the doovy, one to turn the handle, and one to guide the paper strip so it rolls up straight. Fortunately, the designers got around this by making it possible to screw it onto the top of a plastic bottle. They suggest using an empty bottle and storing the beads inside – there’s a little hole you can feed them through – but I found the bottle needed weight for stability so I half filled it with water.

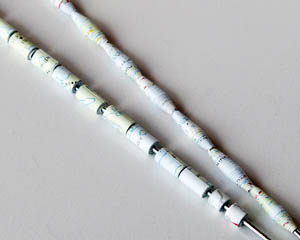
The first batches I made using maps from an old road atlas:

The straight beads were simple enough, though I wished for a guide to help the strip of paper stay straight. The lozenge shaped beads were slower as they had to be glued all along the strip of paper, and wound carefully so the point stayed roughly central.

Next I tried some Japanese paper:

I tried making longer straight beads and then cutting them shorter, to save time. The paper wasn’t as suited to this as the book page beads I worked on later, as it tended to tear a little at the centre. It’s also a bit of a waste of nice paper, as the only bit that’s visible in the end is the last few centimetres. I also found that what is so nice about Japanese paper – the design – was lost when wound into lozenge beads as you only see a tiny bit of the edge.

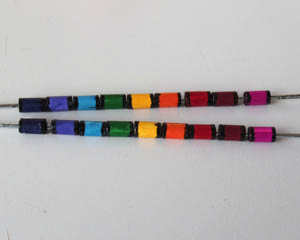
Next I tried coloured paper:

They were a little plain, though colourful, so I painted the ends with black nail polish then finished them with clear nail polish. I also made some double the length of these, that I’m thinking of drawing on with a permanent pen before varnishing.

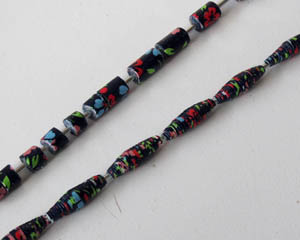
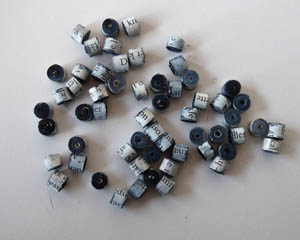
Lastly, I cut down a batch of book page beads I made previously into shorter beads and then used watercolour paint to give them a different look:

I rather like how they turned out. They’d also look great done in colour, I reckon.

So I now have a couple of batches of paper beads to try making into jewellery. I suspect that paper beads are best made by recycling paper, because if you want a coloured bead you may as well get an existing wooden bead and paint it, and nice paper like the Japanese paper I used is mostly wasted since the pattern is either obscured or only the last bit of the strip of paper is visible. Beads made of sheet music or magazine pages would work well. Perhaps even old comic book pages. I can see more paper bead making in my future, but it’s also made me want to find some beads I can paint or simply glue paper on to.

Of course, bead making may prove to be like spinning – just creates an even bigger stash to use up.

A Flick of the Wrist

Craftwise, I’ve been mostly playing with the knitting machine lately (pics soon!). And soaking off stamps – but that’s a whole other story. I got to wondering if the jewellery making bug had passed, which would be a bit sad since I’d had a few projects I’d been enthusiastic about but hadn’t tracked down all the material for. For some of the projects I’m still waiting on the online shop to send me the items that weren’t in stock at the time. Had all the waiting stalled my creative drive?

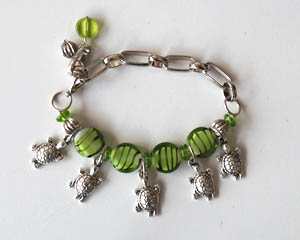
Perhaps not. All it took was sitting down and looking over everything to get fired up again. It turned out that one project was not meant to be a necklace, but a bracelet – with turtles:

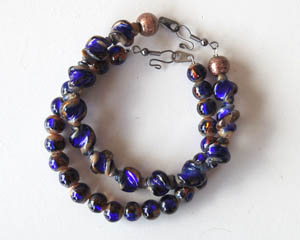
And I decided that these beads needed to be bracelets too, and converted some earring hooks to make the clasps:

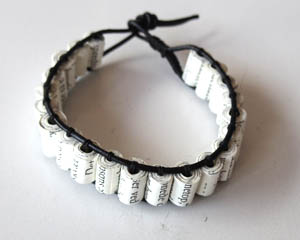
And then a bracelet I saw on Pinterest inspired me to use these leftover paper beads from a necklace:

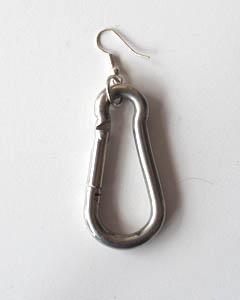
I also whipped up a bracelet helper. It’s just something you hang on to the end of your bracelet draped over the top of your wrist to weigh it down, making it easier to bring it in reach of the clasp. All you need is a hook and something heavy – but not heavy enough to damage the bracelet of course. I used this old belt clip:

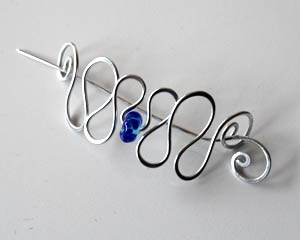
And lastly, do you remember this shawl pin I bought at the Bendy Show and intended to use as a hair pin?

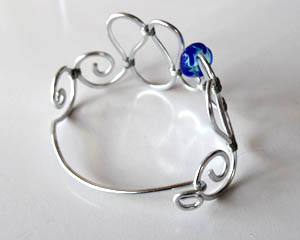
Well it turned out to be made of such weak, floppy wire that I couldn’t see it holding up the weight of a shawl or my hair. Just holding the pin made it bend. So disappointing. Having seen lots of wire wrapped jewellery on Pinterest recently, I wondered if that might make it a bit more stable. So I gave it a go, and it did help a lot. I still don’t want to rely on it to hold the weight of a shawl or my hair so it became…

Yep, another bracelet:

I used the pin to complete the circle, joined it with more wire wrapping and bent the end into a hook:

So I don’t think the jewellery-making bug has gone quiet yet. In fact, I’ve had to add more hooks to the wall of my dressing table nook to accommodate all these new bracelets. And I have more ideas waiting to be tried.

Craftonomicon, part two

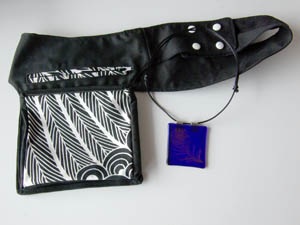
The weaving demo I did at the convention was part of the Craft Market. I did manage to sneak away from my looms twice to look at the other tables and do a little shopping.

The belt bag instantly suggested itself as a handy place to tuck shuttles if I have two or more on the go. And the glass necklace with the feather is the sort of bold jewellery I love.

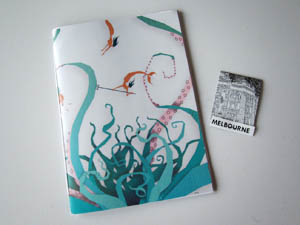
The previous day I did a workshop called Con Bag Craft, in which I planned to show how you could turn the contents of the con bag that you don’t want – usually brochures and promotional bookmarks – into useful items. I had expected to have two hours and was a little caught out to discover it only went for an hour. We only got through making a matchbook notepad and sewn notebook before we ran out of time.

But the six participants were happy to stick around through the lunch break and do the t-shirt refashion. They chose the more complicated backpack design and it wound up taking two hours, but nobody wanted to leave as they said they were having too much fun.

Eventually we had to go as the next panel was about to start. Later one of the participants proudly showed me her finished backpack – on her back. No better compliment!

Certificate Portfolio

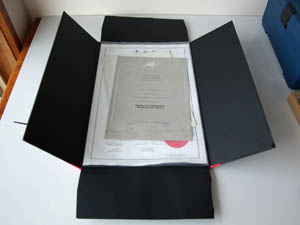
Paul and I have several certificates, both ours and his late parents’. Mine were framed but the rest weren’t. We were going to get them all put into matching frames at one stage, but we have so much art, photographs, vintage/retro stuff competing for space on our walls that the certificates really can’t compete. So I came up with the idea of a portfolio to hold them, that could be kept with photo albums, and it became one of my Projects for 2011. This week I finished it:

Most of the materials I used for it were from my stores. The black japanese paper is nearly 20 years old. Only the black card on the inside was new. I wanted to make sure it was acid free, since that part would be in contact with the certificates.

When I finished this one, I thought I’d crossed one of my Projects for 2011 off the list, but I was wrong. Turns out one of the certificates to go in it, which was tightly rolled up, is actually larger than this portfolio. So I’m going to have to make another one.

Looking at the rest of the Projects for 2011, I’m wondering how I’ll ever get the time to do them all. But it’s only August, right?

Year in Craft – 2010

This blog’s former incarnation was a knitting blog, and at this time of year I used to do a bit of an overview of the projects I’d finished the previous year. I thought it might be interesting to do an overview of everything I completed last year, not just the knitwear.

First, for old times sake, the knitting (and crochet):

Knitting & Crochet:
Josh Socks (gift)
Cherie Amour (op shopped)
Bean’s Monkeys (gift)
Safire
Pussy Cat
Origami Bolero
Beky’s Socks (gift)
Argyle Vest (winner)
Bramblewood (op shop)
Emma’s Socks (gift)
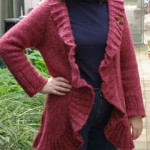
Mossy Mobius Scarf (winner)
Donna’s Socks (gift)
Possum Mobius Scarf (winner)
Lion Jacket (winner)
Alison’s Socks (gift)
Piper Hat
Dad’s Socks (gift)
Purple Jumper
Glitzy Mobius Scarf
Toast Wristwarmers
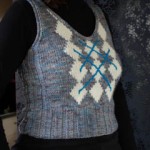
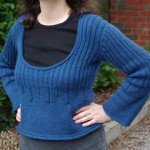
Leafy Wristwarmers
Slinky Ribs
Argyle Vest #2 (winner)
Touch Yarn Socks
Sideways Stripe Vest (op shop)
Loom ends scarf (gift)
Dad’s brown socks (gift)
Owls Hat (gift)
Navy Crochet Hat (gift)

I did a second Socks For Others Club last year. That, for new visitors, was a sock ‘club’ in which I knit socks for other people rather than myself, because I now have not just an overflowing sock drawer but a growing stockpile. It was great fun and by having people put their hands up for socks I ensured my knitting had an appreciative recipient. A win for everyone!

The other challenge I set myself was the Bernardathon. I love the designs of Wendy Bernard, but though I’d had her first book, Custom Knits, for a while, I hadn’t knit anything from it. So I picked three projects and spent the winter knitting them. The Lion Jacket was a real winner – I wore it many, many times.

It was also a year of unintended stash reduction. I hadn’t put myself on a stash diet, but found I didn’t want to buy more. At first I just wanted to reduce the yarn so it all fit in the storage I have for it. And then I just kept going, only buying yarn late in the year when I had to buy some for a gift. I also culled the stash a few times, giving kilos of it away. The stash is now about 2/3 the size it was at the start of the year, and though I do now feel the occasional twinge of yarn acquisition temptation, I still want to continue using up what I’ve got.

Weaving:
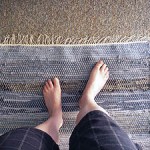
Mt Pisa woven scarf (gift)
Red & White hand towels (winner)
Black & Grey ruffle scarf (gift)
Bamboo Scarf #1 (gift)
Twill Blanket #1 (gift) (winner)
Bamboo Scarf #2 (gift)
Twill Blanket #2
Denim Floor Rug #2 (winner)

I hadn’t noticed how much of my weaving I’ve given away this year. I don’t mind the giving, but I am noticing that a lot of my weaving is done to use up leftover yarn, in particular because I found it unsuitable to knit or crochet. The weaving yarn stash is growing, mainly because of this occasional overflow from the yarn stash. I don’t mind this too much, except that I’d like to be weaving yarn I selected for a weaving project more often. Or, in the case of rag rugs, weaving with something other than yarn.

Book Binding & Paper Craft:
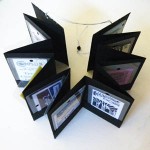
Concertina Badge Booklet (winner)
Chain Stitch Sketch Book
Panorama Sketch Book
Bookbinding Class Book
Matchbook Notebooks (winner)
Doodle Book #1
Birthday Album (winner)
Test Book (now diary)
Fused Plastic Book
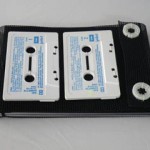
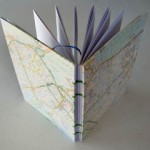
Palm Leaf Holiday Memory Book (winner)
Coptic Bound Travel Journal (gift) (winner)
Podcast Journal (art journal)
Denim Notebook (winner)
NZ Photo Album (winner)
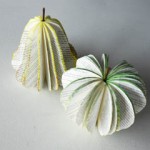
Apple & Pear Book Sculptures (winner)
Dimensional Circle Ornaments (winner)
Mini Book
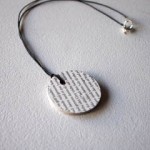
Smartie Book
Underground Book (winner)
Knitter’s Journal
Doodle Book #2
Book Pages Paper Jewellery (winner)
Security Envelope Paper Jewellery
Masquerade Book Mask
Brown Paper Sketchbook
Map Cards & Envelopes
Concertina Sketchbooks
Shopping Bag Booklet
Marbled Paper book
Discovery Channel Book

Oh, I had so much fun with book binding, paper craft and repurposing books this year! I particularly had fun using recycled materials in these projects. However, I’ve been doing less of it lately, mainly because I got all inspired by refashioning clothes.

Refashioning/Repurposing:
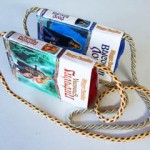
Russian Book Bags (winner)
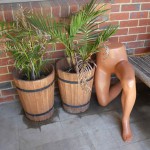
Mannequin Legs plant stand (winner)
Solar Dyed singlet top
Rusty Nail Dyed T-shirt (winner)
Mirror Frames from Junk (winner)
Portable Oil Painting Kit
Instant Scarf
Homemade Paint Box (winner)
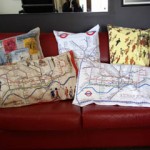
London Tea Towel Pillows (winner)
Impromptu Skirt (op shop)
Blue Motto Top
Gauzy Motto Top
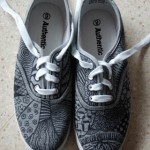
Doodle Shoes #1 (winner)
Not-Boring iPhone Cover
Motto dress to a top (winner)
Red skirt to a top
Cheesecloth top
Black & grey skivvies to tops
Black skirt slim down
Black skirt to a top (winner)
Fob Watch Necklace
Doodle Shoes #2
Foam Stamps
Denim shorts into skirt
Striped shorts into miniskirt
Oversized Shirt into Sleeveless Top (winner)
T-shirt into skirt (winner)
T-shirts into tube headscarves
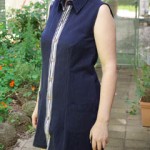
Man’s shirt into a dress (winner)
Painted iPhone cover
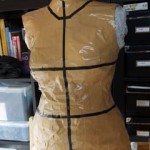
Dress Form (winner)

2010 was a year of recycling and refashioning for me. Many of the projects I finished used recycled materials, or supplies I already had, or involved sprucing up something new. Even the duct tape dress form was stuffed with bubble wrap left over from mail-order parcels. I became addicted to New Dress A Day and went from tweaking a few garments I already had to buying them from the op shop or giving new life to Paul’s culled shirts.

Another challenge was Projects for 2010, which I’ve covered in a recent post.

It was also a year for sketching. I tried to do a sketch a week and succeeded (with a few catch-ups), posting them under the Sketch Sunday category. Looking over the year’s sketches, I’ve moved from pencil and charcoal to pen and watercolour as my preferred medium.

I finished the year with a growing interest in simple printing methods and painting. This year I have plans to return to art classes. Looking back on last year, I’m pretty chuffed at how much I made and all the new paths of creativity I discovered and explored. Who knows what other creative inspirations will come my way this year!
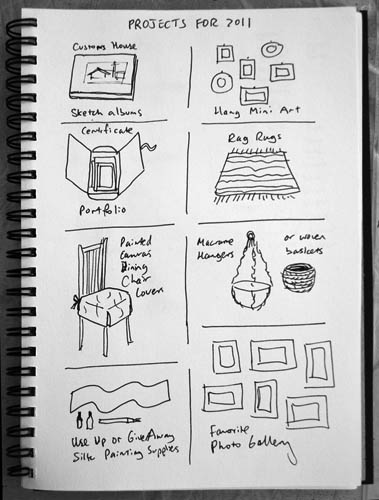
Projects for 2011

1. Customs House Sketch Albums
Left over from Projects of 2010. I have a huge box of line drawings done by Paul’s late father. They need sorting through, a lot of preparatory material removed (except some of the sketches, which are lovely in themselves) and the drawings to be bound together in an attractive and accessible way.

2. Mini Art
I have a box of tiny framed artworks – with many the frame is decorated and as much a part of the piece as the art it frames. They need to be hung somewhere with room to add to the collection.

3. Certificate Portfolio/s
We have a collection of certificates. Some are mine, some are Paul’s, some belonged to Paul’s parents. Since I’m an artist, Paul is a photographer, and we’re both collectors of art, photography and ephemera, there’s not much space left on our walls. Solution: a portfolio in which to keep and/or display the certificates together – much like a photo album. Which can be added to, as well.

4. Rag Rugs – DONE!
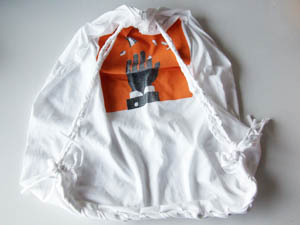
I left the number unspecified. I’ve managed to gather together quite a collection of fabric and old clothing to recycle into rag rugs, that I really need to get stuck into making them in order to make more floor space in the workroom.

5. Painted Canvas Dining Chair Covers
A project for fun, not for using up something or displaying things we already have. Using the methods in Canvas Remix, I want to paint some canvas and sew it up into seat covers for our dining chairs.

6. Use Up Macrame Supplies
A few years back I set myself a challenge to try out some crafts I hadn’t done in years. One was macrame, and I made a little pot hanger. It was fun, but macrame didn’t stick. However, I’d bought supplies for more projects. I want to either make the projects or find another use for the materials.

7. Use Up or Get Rid of Silk Painting Supplies – DONE!
There are two big plastic tubs full of leftover fabric, tools and inks from the craft I was obsessed with in my 20s. When I revisited silk painting during the same challenge, I worked out a fast, attractive scrunching method for dyeing scarves. Getting them steamed was always a problem, but I tried steaming a scarf scrunched into a ball and it only enhanced the effect. So either I’m going to spend a day using up all the ink I have then keep the resulting scarves to give as gifts, or have a craft day with friends and let them keep the scarves they make. What’s left over will be donated… somewhere.

8. Favourite Photo Gallery
Paul has always been very keen on photography and is now doing a course, and I’m a keen dabbler as well. Yet we have no photos on the walls. I want to make a space somewhere in the house and fill it with our work. Paul already has a stack of small frames that would be ideal for it. This project may get very big, actually. We have a wall that goes most of the length of our house that is covered in wood panelling which isn’t great for hanging things against, and lately I’ve been thinking we could have it replaced with plasterboard. Maybe I’ll get a quote and see how much it’ll cost…