
When I did the mosaic workshop earlier this year I came away full of enthusiasm. But I did wonder if, like basketry, that enthusiasm would wane. With basketry, I thought the difficulty getting materials was part of the reason my focus shifted away. But I’ve had enough troubles getting supplies for mosaics that I don’t believe that any more.
I certainly have a lot of tiles now, bought for projects then rejected as unsuitable when they arrived. I learned quickly to get a sample pack before investing in lots of colours. I’m sure I’ll use all the rejected tiles, though. I have projects in mind that they’ll work fine with.
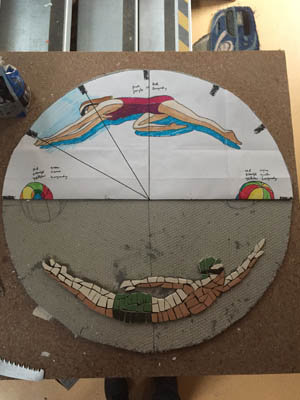
The swimmers clock has been sitting out in the garage untouched, because it’s been too cold to work out there. That’s fine. I’m happy to wait for warmer weather.
Instead I’ve been working on ‘inside’ mosaics – ones that don’t require breaking tiles. That brings me to the ventilation patch project…
When we replaced the old ducted heating here, we wound up with lots of redundant floor vents. Even when shut, they let in cold drafts (and mosquitoes, I suspect). Paul blocked them all off earlier this year. We’ve left the covers on the ones in carpeted areas, which is just the four bedrooms. The rest I want to patch with mosaics.
They need to use a material without sharp edges to cut socks or bare feet. They need to be tough enough to survive being walked on. That means no tesserae, stained glass or broken ceramic. Fortunately there are other options.
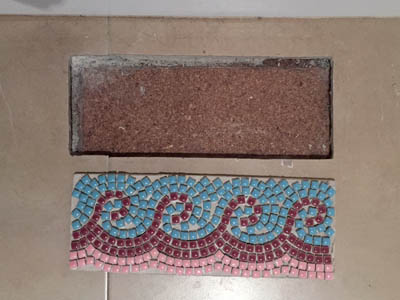
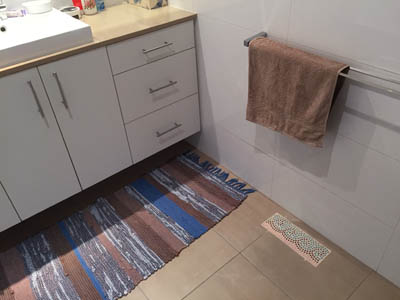
The bathroom only needed one patch. I did a classical inspired wave design in blue, burgundy and pink, using small ceramic tiles:
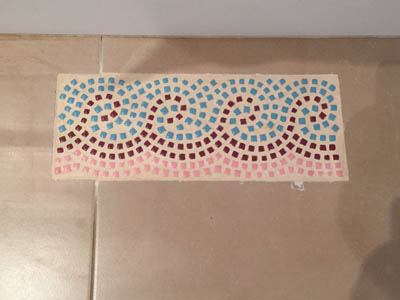
I’d like to do a smaller version as a frieze around the walls, but I had a lot of trouble getting hold of the right amounts of the colours I used just to do the patch. I might see if I have enough left to do a sample strip, then contact the tile seller to see if she can do larger orders.
The entertainment room has two ventilation holes, and it has a floating wooden floor. I designed ‘day and night’ themed patches. Initially I thought I’d use irregular coloured glass ‘melts’ which have smooth edges, but when my order arrived I was disappointed to find they only came in square and triangle shapes, with a couple of bigger trapezoid ones. I laid them out without gluing and didn’t like the result. I considered the Mandala art version of irregular glass tiles, which come with greater variety of shapes, but these, like the ones I bought, had the colour on the surface rather than base of the tile, and I reckon it’d wear off under foot traffic.
A bit more searching and I found 8mm opaque square glass tiles, which were small enough that I was able to get enough detail into the design:
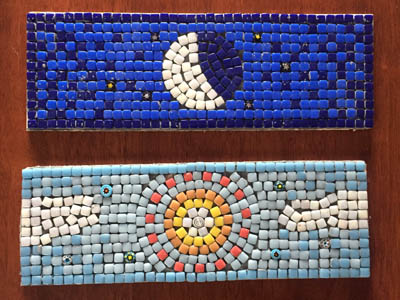
I’m hoping to get them glued in and grouted this week.
The kitchen needs three patches, in something to match the slate floor. I figured… why not slate? So I bought a couple of pieces, smashed them up and made a test patch by pressing pieces into a shallow container of cement mortar, sealing it when dry. I’ve been doubtful at several stages of the test, but the result is better than it first seemed like it would be so I’ll be going ahead with this idea…
… when it isn’t so cold in the garage!
I do like those mosaics, and your innovative approach to covering the vents. For the bathroom, I’m sure you’ve already considered and dismissed a painted / stencil frieze to match the mosaic?
Yes, that was my intention, but the fuss involved in getting hold of the little ceramic tiles has put me off for now.