House Slippers

For my birthday a few years ago I got some lovely vintage and handspun yarns all in the same natural white and grey colour scheme. I tried a few projects, but none of them seemed to suit. Then I saw the Easy House Slippers pattern from Craftzine.

After running a quick test swatch through the washing machine, I knew that the vintage yarns felted at a different rate to the handspun, so I stuck to the two grey vintage yarns. I added some Bendigo Woollen Mills yarn in natural white for the third colour.

The pattern is so easy – just an L-shape made up of garter stitch squares. Sewing them together is a bit mind-bending, but the instructions are clear.

Two runs through the front-loader later I had these:

One thing I don’t like about knitted slippers is that they don’t have any grip, so I’m going to buy some rubber or suede to cut into soles and stick or stitch to the bottoms. I don’t want to slip over on the stairs!

They’re a bit roomy width-wise but I knit the bigger size because I have long feet. There’s plenty of room for thick, winter socks. I love how the squares on the sides keep my ankles warm. My current mid-season slippers are getting a hole at the toe, so I need to replace them. Hmm, I wonder if I can recycle the soles?

Testing, testing

Just a little test of the WordPress app. Blogging from my iPhone. What can I take a pic of? I know! The cat…

20110324-094732.jpg
It worked! I’m not sure how useful this will be. I guess I can post photos of wips as I work on them, or photos of crafty discoveries while I’m out and about. Like, say, at a craft show.

Loopy Scarf

Paul was off working at a race track on the weekend, so I filled my time with crafting. Saturday was machine knitting day, and Sunday was weaving day. I haven’t yet finished off the garment I made on Saturday, so I’ll blog about the weaving first.

Lately I’ve only been weaving large projects on the table loom, so I decided to take inspiration from my recent shift to using up small batches of yarn on small knitting projects and tackle some small weaving projects.

I have a little stash of handspun, including these balls of handspun by the lovely and talented Yarnivorous. I’ve been putting off using it because I hadn’t yet found a project for it that would take advantage of it’s unique characteristics. It was brightly coloured, with short colour changes. Looping the yarn back and forth on the table to see how long the colour changes were gave me a spark of inspiration.

It’s been ages since I worked on the knitters loom, but it was perfect for this project. So easy and fast to warp. It took a while for me to work out how to have loops on either side of the scarf without the warp sliding out into them. I tried twisting the last two warp threads on each side around each other, but it was slow and difficult. The solution I eventually worked out was much simpler: two loopy shots followed by two normal ones.

Once the scarf was done and off the loom, I decided that the fringe at the ends clashed with and distracted from the loops. I considered tying and then sewing the warp ends back into the weave. Then I had another flash of inspiration. I’m still in love with looped, mobius scarves. Why not bring the scarf ends together, tie corresponding warp threads and then sew them back into the weave?

The warp turned out to be thin enough, and the weft thick enough, that the doubling up of warp where the ends are sewn in isn’t noticeable unless you look closely.

I love how this worked out. It suits the yarn, which is bright and fun. It’s a loopy loop scarf!

Lallans 2.0, Lallans Two & Lallans-ish

A few weeks back, in a What I’m Knitting post, I showed you my first attempt at knitting the Lallans Hat from the Twist Collective:

I had hoped it would fit my mother, who has always told me her head is larger than average. But her head must have shrunk, because it looked ridiculous on her! So it was off to the frog pond.

I washed the yarn to get the kinks out, then started again, going down a needle size and knitting the small. This time it came out fine:

But, of course, now that I’d shown it to Mum, she wanted one, so I got knitting and made this:

I gave it a curled up stocking stitch brim, because she likes them. I also had to use white contrast yarn because I didn’t think I had enough brown left, but I like it. I’m sure she will too.

Being on a stash busting drive, I decided to make another using the white (which is Bendigo Luxury 10ply) and leftover brown and blue Cascade 220, playing with colourwork patterns instead of the braid and slip stitch zig zag just for variety:

Which came out a little small, but confirmed for me what the problem was with the first Lallans I knit – the green yarn, Mission Falls 1824 wool, relaxes a lot when it’s washed. It wasn’t just my imagination that it grew.

The white hat isn’t overly small. It fits me (obviously) but feels a bit snug. It would be fine on an adult who doesn’t mind a close fit, has a smaller than average head, or a child. It’ll go into my gift/adoption knitwear bag.

Stash

There was as time, when this blog was mostly about knitting, where I used to take a photo of my stash and analyse it every six months, inspired by other bloggers ‘flashing the stash’. This week I indulged in a bit of stash flashery, in honour of getting my knitting yarn down under ten kilos again:

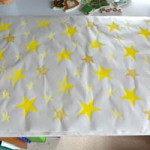
Except that there’s more than ten kilos showing. A lot more. It’s closer to seventeen kilos. Ten kilos is this:

The crossed out yarn on the left is my sock leftovers. I don’t count sock leftovers as stash. (Or other leftovers if there’s less than a ball left.) But there’s so much of it, that I could easily knit several pairs of socks from it – and probably will.

The crossed out yarn on the right is yarn for weaving projects. I did say that it was my knitting yarn that got down below ten kilos, didn’t I?

The weaving stash is over six kilos and who knows how much the sock leftovers weigh. And to be completely honest, the box with the cones of weaving yarn didn’t make it into the pic because I ran out of space on the day bed – though I am counting it in the overall weight.

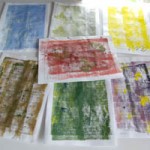
Here’s the break down:

Having got the knitting stash down to my goal again, I considered if I should set myself a new goal. Perhaps to reduce the weaving stash by half. Perhaps to get the knitting stash down to five kilos. For a giddy moment there I considered a goal of zero – use up or give away ALL of the stash before buying more.

After all, there’s no yarn that I want to buy, right? Of course, as soon as I asked myself that question, it led to asking myself ‘if I did buy yarn, what would I buy?’.

Having tried Cascade 220, I understand why it’s the most popular yarn on Ravelry. I might hunt down some of that. I was also impressed by Bendigo Woollen Mills Luxury. Then there’s Tubey. I’ve been testing non-wool yarns and recently found that Crystal Palace Cotton Twirl would probably work fine.

And I’m curious to see what all the fuss is about with Wollmeise sock yarn.

But not yet. The more I’ve reduced the stash, the more I’ve come to enjoy how it forces me to stop putting off decisions. Like what to use the yarn for, or that I just don’t like the feel or colour and should get rid of it, or it’s time to get over the fear of ‘stuffing up’ expensive yarn and make something out of it, or that I really don’t need to hang onto more than one leftover ball from a project in case I need to repair a garment.

It’s also shown me my bad habits. I need to stop being precious about a yarn because it was a gift or I bought it on a trip overseas. I need to stop moving problem yarns from the knitting stash into the weaving stash. In fact, I need to stop considering weaving yarns ‘not stash’ or all the problem yarn is going to put me off weaving and I’ll waste all my time ‘using up’ yarns instead of learning new methods.

I’m not ready to buy more yarn yet. I am going to see if I can get the whole stash under ten kilos first.

But if a stray skein of Wollmeise happens to come my way, I won’t turn down the opportunity to find out what the fuss is all about.

Five Years

It occurred to me today that I started my original craft blog, Knitting and Chocolate, around this time of year, so I looked it up. Sure enough, my first post is dated the 9th of March 2006. I’ve been blogging for just over five years.

So much has changed – and not just the name and content of this blog. Blogging was huge among knitters, then seemed to lose popularity when Ravelry took off. I only read a few knitters’ blogs now. Most are art, sketching, general craft, design, lifestyle, eco/recycling DIY, photography, fashion and refashion blogs.

(Technically I’ve been blogging a bit longer than five years. I signed up to LiveJournal back in mid 2005 so friends and family could keep track of me on a big holiday.)

Wrapped

Sometimes I wish I could insert images into a post in bulk. I still can’t believe there’s no facility for it in WordPress. I went searching for one again, and instead I found the gallery option:

Not quite what I had in mind, but it will do for this post.

This little project came about because I had bought two rolls of newsprint sheets for warm up sketches in life drawing classes, only to find the surface so slippery that charcoal wouldn’t stick. Testing other kinds of paper, I’ve found that heavy duty newsprint has a softer surface that doesn’t resist charcoal, and multi-purpose paper is even nicer cheap paper to work on (and more likely to suit purposes other than life drawing). I’m also using the brown paper that I bought from Reverse Art Truck.

But what to do with the first batch of newsprint? I could use it to cover a work surface when painting, but I prefer to make use of actual newspaper for that. While experimenting with intaglio printing I separated the tools and such for relief printing into their own storage box, and as I did I thought about the extra water based ink colours I’d bought and what else I could use them for.

The two excess craft materials came together in my head, and I had the answer: wrapping paper! I don’t have a lot of the commercial sort, and tend to keep it for craft projects.

In the first pic you can see the homemade stamps, ink, roller and spatula I used for the printing. Most of the stamps were the ones I cut from a foam pet bowl mat. I also tried stamps made from washers, and plastic ones I’d bought from the craft store.

I started with the heart stamps, keeping to one colour, and decided to make two sheets of each pattern where possible or, in the case of the heart outlines, two that matched.

The leaves were the first multi-colour pattern, followed by the stars, in which I tried using gold acrylic paint for the mid-sized ones (but it was a bit thin for this sort of printing) and the fish and waves (with the washer stamp used for the bubbles).

The green and yellow one with stripes wasn’t so successful. The yellow stripes used the plastic shop-bought stamp, and it didn’t take to the ink very well. I suspect it’s better suited to stamp pads than this sort of printing.

At this point I tried a few other things: dripping paint on and then squishing two sheets together (and then adding blue circles using the lid of a bottle; using the roller to apply paint. My favourite is the orange ‘ombre’ one, in which I used up an old tube of orange acrylic paint by ‘inking’ up the roller, then rolling always in one direction, starting from the right.

The last photo is of the laser printed pages I rolled the excess ink and paint off onto. I still love the way these look. One of these days I’m going to work out a way to turn them into something.

Sketch Sunday 68, 69 & 70

The band we went to see on Saturday night was Hawkwind. I joked that I was there as Paul’s support act. He’s a long time fan of Hawkwind and was pretty excited to be seeing them again – I think the last time he did was in ’86. I’m more in that ‘don’t love but don’t dislike’ category.

Knowing what concerts can be like (standing in a crowded space for hours) I swapped my usual big, heavy-ish handbag for a small one I call my my gig bag because it’s just large enough for a cd, sharpie for autographs and cash for drinks and snacks. I also packed pain killers, tissues and eye wash, because the reason I’ve only gone to one or two band gigs for every decade of my life is I am very allergic to smoke. At the last moment I slipped in my sketchbook and a pen.

It proved to be a good decision. It kept me occupied while we waited in the queue:

And when the support band, Night Terrors, was on the lights were still bright enough that I could sketch the band. I started from the right, but ran out of room for the fourth band member:

But since he was the most visually magnetic of the group – very tall, lanky, alternating from stunningly skilled feramin playing to wild, rocking guitar – I did a lone portrait of him:

Afterwards I saw he was working the merchandise counter and waited until there was nobody in his queue to ducked over and got him to sign it. He asked me to send him copies, so I emailed the above pics. (Hmm, not that I think of it, I should have signed them, but I don’t usually bother signing my sketchbook pages.)

Hawkwind were very entertaining and Paul had a really good night. But I liked the support band more, and from the comments I overheard the mostly 40+ crowd were pretty impressed, too. And I didn’t need any of the allergy supplies, thanks to non-smoking rules. I had known that laws were coming in but hadn’t yet shaken my long-time habit of avoiding public venues. Hmm, maybe I’ll go see more live music now.

Unplanned Refashion

Last night Paul and I went to see a band. I found myself wishing that I could wear a particular t-shirt that I bought a few years back when I found myself at an overheated convention venue with no short sleeved clothes in my suitcase. It has little red skulls all over it. Unfortunately it was a wee bit too small, and I ‘outgrew’ it before I had a chance to wear it much.

But what if…?

I rifled through my old fabric stash and found a scrap of red t-shirt material.

The t-shirt itself got cut up the sides, and the scrap cut to size and hemmed at either end.

And with a bit more overlocking, I had a t-shirt I fit into again. With a little more room for me to (ahem) grow into.

(A belated Sketch Sunday to come next post. I wanted to keep things in chronological order.)

Second Thoughts

I dunno about this printing malarky.

After I’d worked out that I needed oil-based printing ink, I hunted some down. A few weekends ago I had some time to try it out. I had the simple collograph plate I’d made from cardboard (on the left) and sealed with varnish. I also tried scratching into the acetate sheeting, copying a warm-up sketch from life drawing classes.

I inked up the acetate plate first. Apply ink, wipe off, soak paper (I chose drawing paper and pages from a book), put everything through the pasta maker:

Then I inked up the collograph plate and did the same:

The printed sheets went between tracing paper and blotting paper, then under a heavy object overnight.

Looking at these now, I’m more pleased with the result than I was at the time. The paper isn’t that suited to printing and crinkled. I should be using watercolour paper or specific printing paper. But I didn’t want to use expensive paper until these tests revealed if the other parts of the process were working okay.

What I found most annoying and off-putting was the ink. It’s much, much messier than I’d ever anticipated. I knew I’d have to use turps for cleaning up and that didn’t worry me because I’ve painted with oils for years. But oil paints will wash off with soap and water. Printing ink gets into your skin and stays there, despite repeated wiping with turps, until you later touch something like the fridge or the book you’re reading or your clothing.

Wearing gloves while using the stuff is definitely a must. Trouble is, I’m allergic to latex. The only non-latex gloves I know of are dishwashing gloves, and they’re so thick and awkward, I can’t imagine handling small printing plates with them on.

The other problem with the ink is that the nearest sink is in the bathroom, and I’m really not keen on getting it covered in difficult-to-remove ink. Clearly this sort of printing requires a different sort of facility. A studio with sinks (and proper ventilation) rather than a ‘family room’ style workroom. One day…

So the intaglio printing tools and materials have been packed away for now. However, I have kept the relief printing tools and materials out, and I have a project in mind for this weekend – which will use the water-based printing inks I bought with the mistaken intention of using them for intaglio printing.