Christmas Presents

I mentioned a while back that I couldn’t show some of the items I’d made recently because they were presents. Well, I can show you some of them now:

Dad’s socks. He really loves receiving hand knit socks. I used Moda Vera yarn, reinforced with nylon thread at the toes and heels, using my usual toe-up short-row heel pattern.

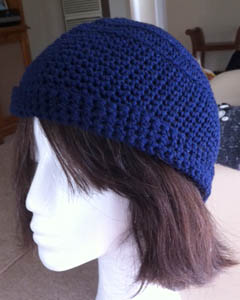
Mum requested some hats. (Actually, she hinted at first, but at first I was oblivious to this, then I ignored the hints since she knows she only has to ask me and I’d happily make her hats.) Knowing that she is a ‘hot’ person, who gets too warm very easily, I dug out some navy cotton ribbon yarn I’d salvaged from a frogged project and used it to work out the sizing to this crocheted hat.

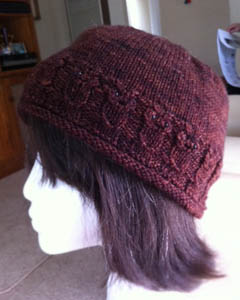
Then, since she has decided recently that she wants to collect owls, I hunted down a hat pattern (sorry, could only find a Ravelry link). I made a lot of adjustments since she was very specific about the size of the brim, I added beads for eyes as I knit the owls, and decreased every second row on the crown to eliminate the bulky gathers.

I used sock yarn, since fingering weight was specified in the pattern. It made for a very loosely knit fabric, which is fine for Mum as it should be cooler.

She was thrilled with both, but refused to model them for me, instead getting out this polystyrene head and a wig for me to pose them on.

Printing with a Pasta Machine

My recent interest in stamps and printing stuff led me to discover that you can use a pasta machine for printing. Well, I had to try that!

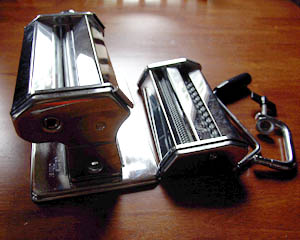
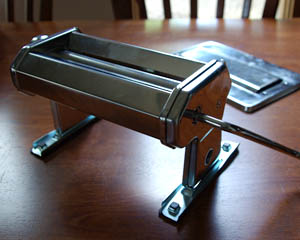
I picked up a machine on sale. It was cheap because it had no box. I knew I would have to make some adjustments, so I certainly didn’t want to buy a full price one. The problem is that pasta flexes, but printing plates don’t. Putting a plate through a machine has this problem:

The plate is going to encounter the base and go no further. Some unscrewing and rescrewing later:

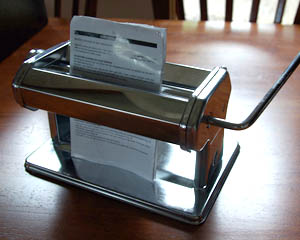
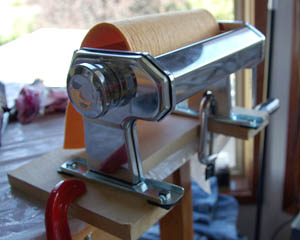
Base removed. Next I got Paul to make a new base that would allow me to clamp the machine to the edge of the table:

I cut a piece of felt from some whacky cleaning product my parents had got themselves sucked in by, and Paul suggested a type of thin and stiff sheet plastic I could try using as a printing plate.

First I tried a very simple method. You ink the plate, put a flat object or stencil on it, then run it through the machine with some damp paper.

I cut a stencil from some thin plastic. The print on the top left is the result. Unfortunately, the dampness of the paper caused the ink to bleed. Maybe because I used watercolour paper. Then I tried running the inked side of the stencil through (top right), then the plate with the stencils removed (bottom left). The ink had reacted in an interesting way to the water in the paper. So I then tried the cut outs from the stencil with acrylic paint (bottom right).

Next I tried scratching into a piece of the plastic I was using as a plate, using a scratchboard tool.

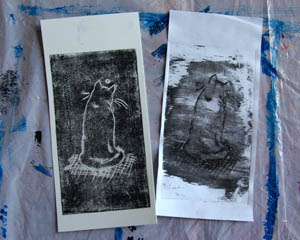
I rolled in on and ran it through, and got a relief effect (I think that’s the term). Then I wiped the ink off to try and get an intaglio effect (the ink caught in the scratches prints).

But it was too easy to wipe the ink out of the scratches. Figuring the scratchboard tool didn’t make deep enough lines, I tried using my linocut carving tools to enlarge them. But that only made it easier to wipe the ink out.

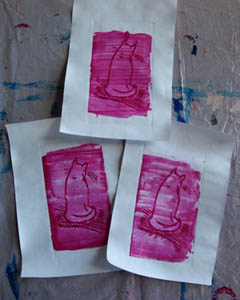
So instead of wiping off the ink, I scraped it off with a scrap of plastic. This worked better, though it leaves a lot of ink/paint behind. I kind of like it, though.

I had lots of fun experimenting. Next I want to try collagraph printing. This is where you make a plate by gluing things to a card then varnishing it. I’ve made a little test collagraph ready for my next opportunity to play with printing.

Sketch Sunday 57 & 58

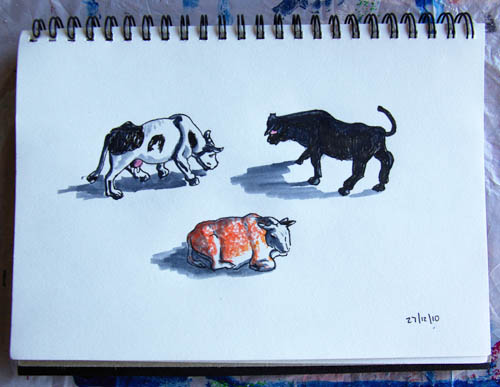
I found a bag of very old plastic farm animals a few weeks ago. They were too amusing not to do something with them – but what?

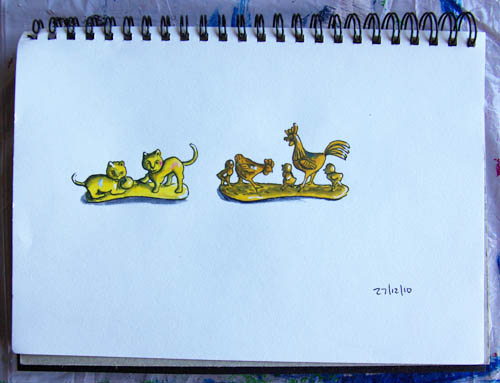
Draw them, of course! Some are surprisingly realistic, while others – like these yellow plastic cats and chickens with tiny remnants of bright pink and blue paint on them – decidedly not realistic.

Projects for 2010 Update

Last week I managed to tick another item of my Projects for 2010 list:

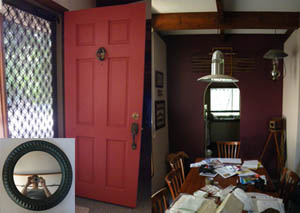
The front door was a hideous shade of salmon pink. Now it is black.

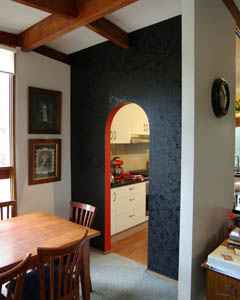
It was one of a set of things I wanted to paint black – the dining room wall and the round mirror frame. All done.

Here are the other projects I managed to finish:

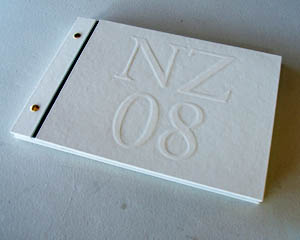
The New Zealand Trip Photo Album:

London Underground Teatowel Pillows:

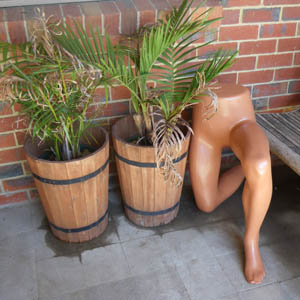
Mannequin Legs Garden Stand:

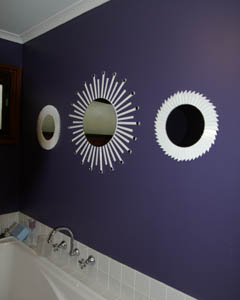
Recycled Object Mirrors (which also became the Wall Art for Bathroom)

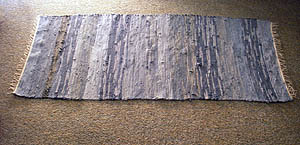
Dyed Denim Rya Rug (which I did as a plain woven rug rather than rya):

There are three projects on that list I still haven’t completed: the albums of Paul’s Dad’s sketches, the plaster mould framing, and turning the set of wooden bowls into frames. The bowls are a low priority because there’s not much point making them into frames until I have something to frame. The plaster moulds have faltered as a project because I don’t know where I’ll hang them.

But the one project I still want to do is the sketch albums. I’ve put them off because I wanted to become a bit more knowledgeable and skilled at bookbinding first. It’s also a mammoth job, involving a difficult selection process. The box they’re in is taking up valuable space in the workroom, however, so that’s a strong motivation to tackle the project. This is the one unfinished 2010 project that will definitely be on the list of Projects for 2011.

As for the rest of that list… well, I’ve been looking around to see what needs to be done, but there aren’t many home decorating projects nagging for attention now, aside from boring ones like redoing the seals in the shower and filling a hole in the guest room wall. Setting myself a list for 2010 got me to prioritise and stop putting off more difficult projects, and keep me on track when shiny new ideas threatened to distract.

Perhaps my new list will simply contain more weaving, knitting and bookbinding. I’m sure a few new recycling and repurposing projects will come along as the year progresses, and I suspect more refashioning will creep in, too. Most of all I’m hoping to do a lot more art and sketching.

Arty Sunday

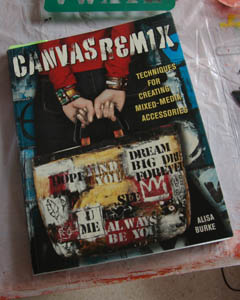
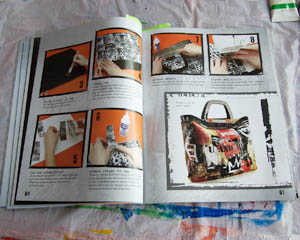
Finding myself with a mostly free Sunday, I decided to try a few arty projects inspired by Alisa Burke‘s Canvas Remix.

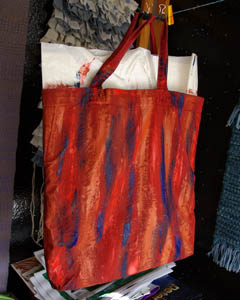
I’d bookmarked this one to try. I didn’t have a canvas bag, but I had an old burgundy cotton shopping bag whose lettering had come off when washed. I figured if I didn’t like the result I wouldn’t mind throwing it away, and if I did then it was a good recycling project.

Here’s the bag after I painted the outside, choosing some complimentary colours in my ‘excess’ acrylic paints collection – colours I’d picked up at garage sales and such, but didn’t tend to use:

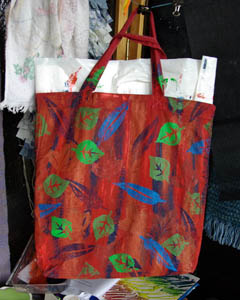
And here it is after I tried out my foam stamps on it:

To finish it I need to get buy water based polyurethane to seal it and handles. So far I’m liking how it’s turned out, though I do think it needs some smart looking handles for it to throw off it’s old cotton shopping bag heritage.

During the drying time, I tried a few other things. Firstly, I took the iPhone cover I’d doodled on (but which, unfortunately, went all smudgy) and painted it black. When that was dry I added brushstrokes of red and orange paint:

When that was dry I tried Alisa’s method of writing over paint, using a Sharpie to write words relating to the useful things you can use an iPhone for:

And then I finished it with a coat of gloss medium & varnish. I’m really happy with how this looks and I’m tempted to give my new iPhone cover the same treatment.

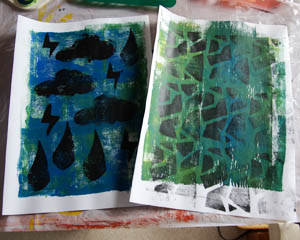
When printing, I roll off the excess paint on the roller onto laser printed pages from the recycling pile, and I’ve found I really like the textures and colour combinations I get:

So I tried printing onto these sheets. I had varied results.

Some I liked, some I didn’t. I found the ones with repeated patterns like the one on the right below looked good, but ones with pictorial shapes were a bit too literal and cutesy.

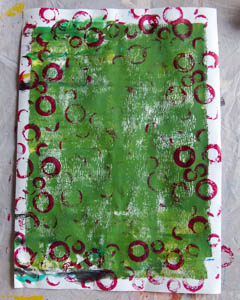
I recently made a few stamps out of bits and pieces from the garage, inspired by these posts on the Daisy Yellow blog:

So I gave them a try, too:

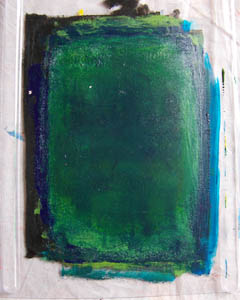
I also really like the way the paint builds up on the sheet of plastic I use as a sort of palette for the roller.

I’m wondering if I could use paper or card instead, then use the ‘palette’ as a background for some kind of artwork as well.

I love how trying one thing gives me other ideas to try. When I was done for the day I wrote notes in my sketchbook, listing ways to refine methods, experiments to undertake another time, and materials to buy. Which is so very organised, for me.

Sketch Sunday 56

Another coloured doodle from middle-of-the-week evening tv time.

I’ve had lots of art-related ideas in my head lately, but there’s not been a lot of doing. It seems the grander the ideas, the more pathetic the output. In truth, it’s because of the time of year. Lots of thinking about the future as the current year comes to a close; a lot of spare time taken up by social gatherings, preparing for social gatherings (cooking and cleaning), and shopping for presents.

An old grand idea has floated to the surface again: to do a part time fine art degree. This time I did some investigation, and I was surprised to find there aren’t any offered in Melbourne. Oh, there are other kinds of part time arty degrees with a reassuring money-making digital and/or design structure. But if you want to do a good old ‘art for art’s sake/find me a garret to starve in’ unapologetic fine art degree you have to do it full time. Or move to the country or interstate.

There is, however, the distance learning option, which would be better suited to my work situation anyway since it can be done one subject at a time. The down side is less interaction with other students.

I have lots of time to think about it. With the work deadlines I have, I wouldn’t be free to start something like that until 2012.

Shirt into a Dress Refashion

Erm. Sorry. Yes, it’s another refashion project. You must be getting sick of them by now. Trouble is, it’s where my creative ideas keep taking me at the moment. I’m sure I’ll get over it. Just as soon as I do that skirt to top one. And another shirt to sleeveless top. And figure out what to make out of the rest of the shirts and t-shirts.

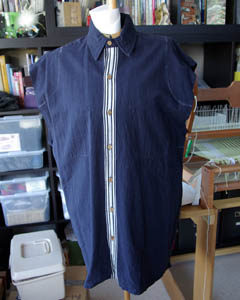
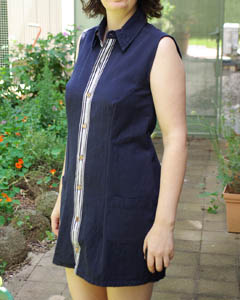
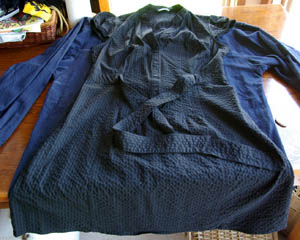
Today’s refashion is a shirt that I’d planned to turn into a skirt. I liked the stripy button bands, and the textured cotton fabric:

But another idea hijacked it: could I make it into a shirt dress? It certainly was long enough. So I laid a shirt dress I’d bought recently on top and started drawing lines with white tailor’s chalk, marking armholes, bust line, etc..

Off came the sleeves.

I got pinning. For this I really needed the dress form, and it was the first time I’d really used it for the purpose it was intended. I could pinch in the fabric where I wanted darts and seams. I’d removed the pockets because they had been right where the bust shaping would go, and now I could see if the new placement looked okay.

Much better than trying on the garment constantly, all the while sticking pins into myself.

By the end of the first session I had it pinned and cut ready for sewing. It wasn’t until today that I had a chance to bring out the sewing machine. I was really pleased to find that the dress form was fairly accurate, so far as positioning of darts goes. The only adjustment I had to make afterwards was to cinch in the darts on the back at the waist a bit more. I’m amazed that I got the armhole, with dart, perfect first go. I also added a buttonhole at the bottom of the band, utilising the spare button that was still attached to the inside of the shirt.

Here’s the finished dress – front:

And back:

I was so pleased with the result, I got Paul to take photos of me wearing it this time, rather than just snapping it on the dress form. Though I’m not sure how he feels about me turning his old clothes into things for me to wear – his reaction was somewhat bemused.

Secret Crafting & T-shirt Refashioning

There’s been a bit of crafting going on this last week, but most of it I can’t show because I’m making presents. There’s been some knitting. There’s been some weaving:

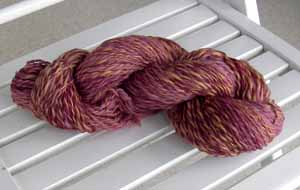
There was some dyeing, too. I over-dyed an olive green skirt black (sorry, no pics) and this yarn:

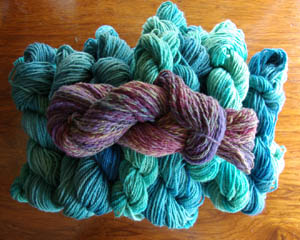
Over-dyed blue:

There was also some more wardrobe culling. When the weather warms up I switch the position of my skivvies and long sleeve cotton knits with my t-shirts for better accessibility, and I finally got around to this last week. I seemed to have an awful lot of t-shirsts, so I sorted and counted them. I was a bit shocked. Somehow I’d managed to end up with 51 – not counting sleeveless ones and singlet tops.

I say ‘somehow’, but I know the source of my t-shirt excesses: conventions and holidays. I always pick up a couple in either situation. I’ve learned to be fussy about holiday t-shirts. I won’t buy them unless I really like them. I’m learning to be picky with con t-shirts, but the pile of ugly, oversized con shirts I don’t wear is evidence that I was once an easy victim to the ‘had a good time so must buy the shirt’ compulsion.
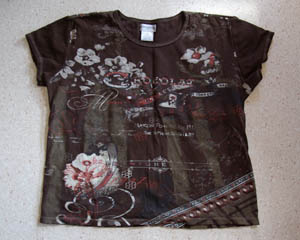
Most of the con t-shirts ended up in the gym/painting pile. Of the holiday shirts culled, this one had potential. I’m a sucker for anything chocolate themed. I’d bought a 1XL size because it was the smallest they had, but though I didn’t mind the bagginess, the material was surprisingly thick, which made it a bit hot for summer.
After searching the internet for ideas, I realised that the thicker material made it good skirt material. So I got chopping:

Side seams done, I considered how to do the waist. Unfortunately, my overlocker doesn’t do hems and my sewing machine’s stretch stitch makes horribly puckered seams. I usually get around this by overlocking on a tubular waistband of ribbing. But I didn’t have any ribbing. Looking around at the other culled clothes, I spotted the solution: a too-small-over-the-boobs sleeveless top I was going to cut up for rags:

Waistband added, and I haz new skirtz.

Since I had the overlocker out, I decided to attack another stretchy fabric project. I had one of Paul’s old t-shirts:

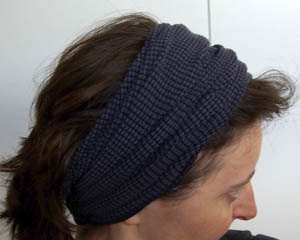
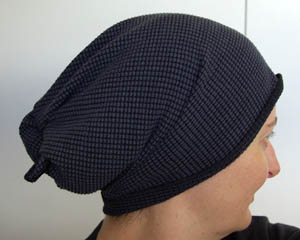
I’d put it aside thinking I’d make it into one of those tube head band thingys you get at camping/adventuring stores. Nothing fancy here, I just cut a rectangle of cloth from the shirt’s back, overlocked the top and bottom edges and then seamed up the sides. You can wear it scrunched together as a headband:

Or stretch it out over your head like a sock hat.

I do this to protect my hair when painting, or make sure none of my hair gets into the food when cooking. Not flattering, but practical. Having succeeded at that, I realised there was something I could do with old con t-shirts:

This one yielded two tube head bands. I nearly chopped up another t-shirt, but decided not to when I realised it involved changing the overlocker thread to white. It takes a much more important project to motivate me to tackle re-threading an overlocker!

Sketch Sunday 54 & 55

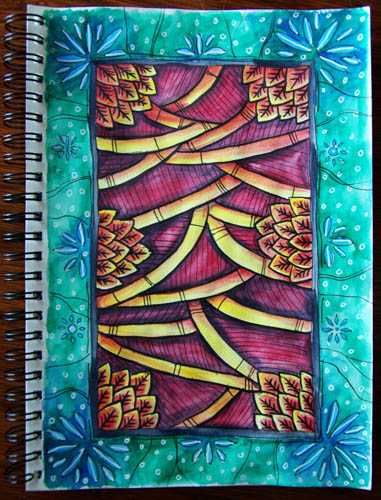
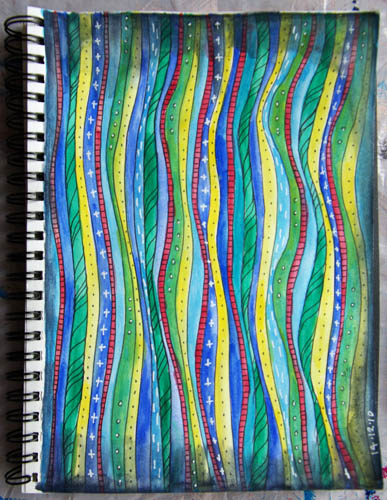
I’m three weeks behind in my Sketch Sunday challenge, thanks to a tight work deadline taking up all my time and energy. But I didn’t completely neglect my sketchbook in that time. There was one night where the itch to sketch had me playing with pattern and colour while watching tv. It didn’t require getting up to find something to sketch, or much concentration. I had no plan, but had in mind the idea of a contrasting border that I’d seen in art journals.

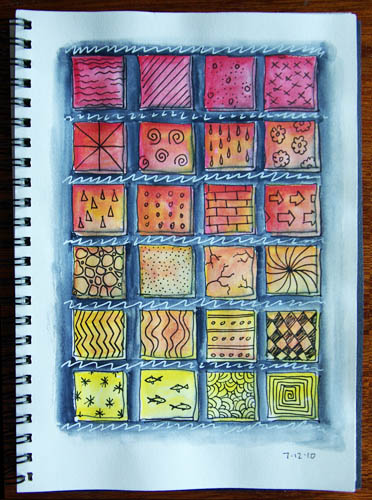
I enjoyed enough to do another page last night. Again, the grid is something I’ve seen in art journals, but when it came to thinking of something to do with the squares I turned to good old familiar doodles.

The work deadline has passed, but I appear to have caught Paul’s man-flu, I’m trying to let my back recover from the usual work related strain, as well as finish making some presents, and read a manuscript for a friend.

I’ll get back to sketching soon, I hope.

Some Days Off

In a nice bit of good timing, I’ve run out of preprepared blog posts just as I reached and met my work deadline. And since it was a mid-week deadline and I’ve worked on most of the last two weekends, I’m taking the rest of the week off. Yippee!

However, my back has suffered badly and I need to avoid doing anything that’ll prevent it healing. The garden, which is turning into a weedy wilderness before my eyes in these rain+sun+rain+sun+rain perfect growing conditions, will have to wait. I can’t sit in one spot and read or work on anything crafty for too long, so I’ll be switching from one thing to the next a lot. That probably means having lots of projects on the go. Which is pretty standard for me anyway.

There’s a blanket on the loom, stamps to make and try out, sketches to do, books to read, bookbinding to finish, cards to make, clothes and yarn to dye and refashioning to try.

And there’s a lot of potential refashioning to try now because Paul, having found he could not squeeze any more shirts into his side of the wardrobe, finally gave in and culled them. I was eagerly waiting to see the rejects and expecting three or four shirts to either refashion or cut up for rag rugs. To my surprise the pile of culled shirts was much larger than that:

This pile doesn’t include the three I decided were too nice to cut up and will go to the op shop, and the one that was made of polyester so awful I just cut the buttons off and threw it in the bin.

I’m going to be hunting down all those ‘turn a man’s shirt into…’ tutorials today.