New Art Challenges

My year of Daily Art happened at just the right time, finishing a month and a half before life got too difficult to accommodate such a challenge. I had meant to take a break and start again after a month, then changed that to three, and before I knew it six months had passed and it was clear painting every day is no longer practical.

Which is fine. I do want to paint at home with some regularity, however, and the Daily Art challenge made me realise I really like and want to continue painting still lifes. To do that regularly at home I needed a permanent painting space where I could control the light and it didn’t matter if I got paint on the floor, so I have converted half of our big laundry into a mini-studio.

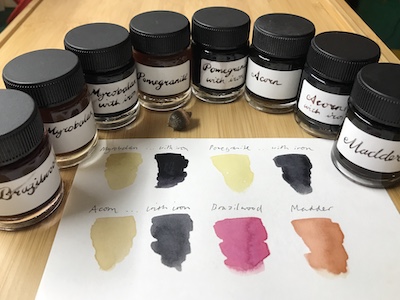
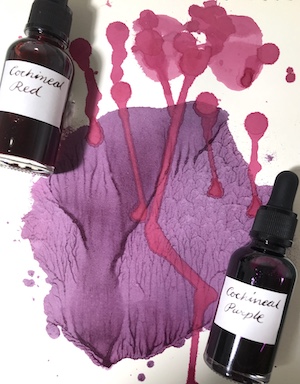
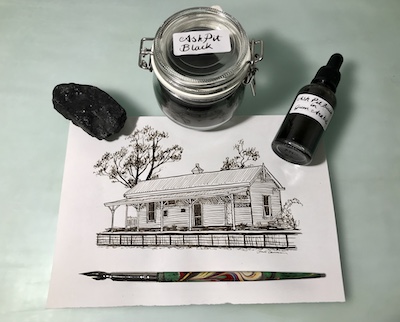
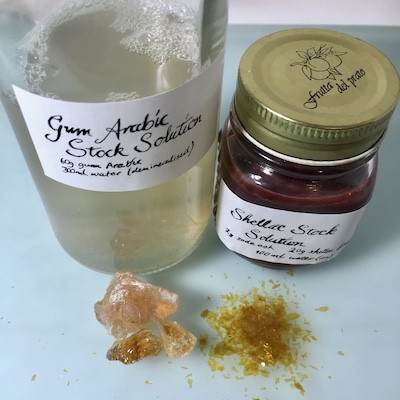
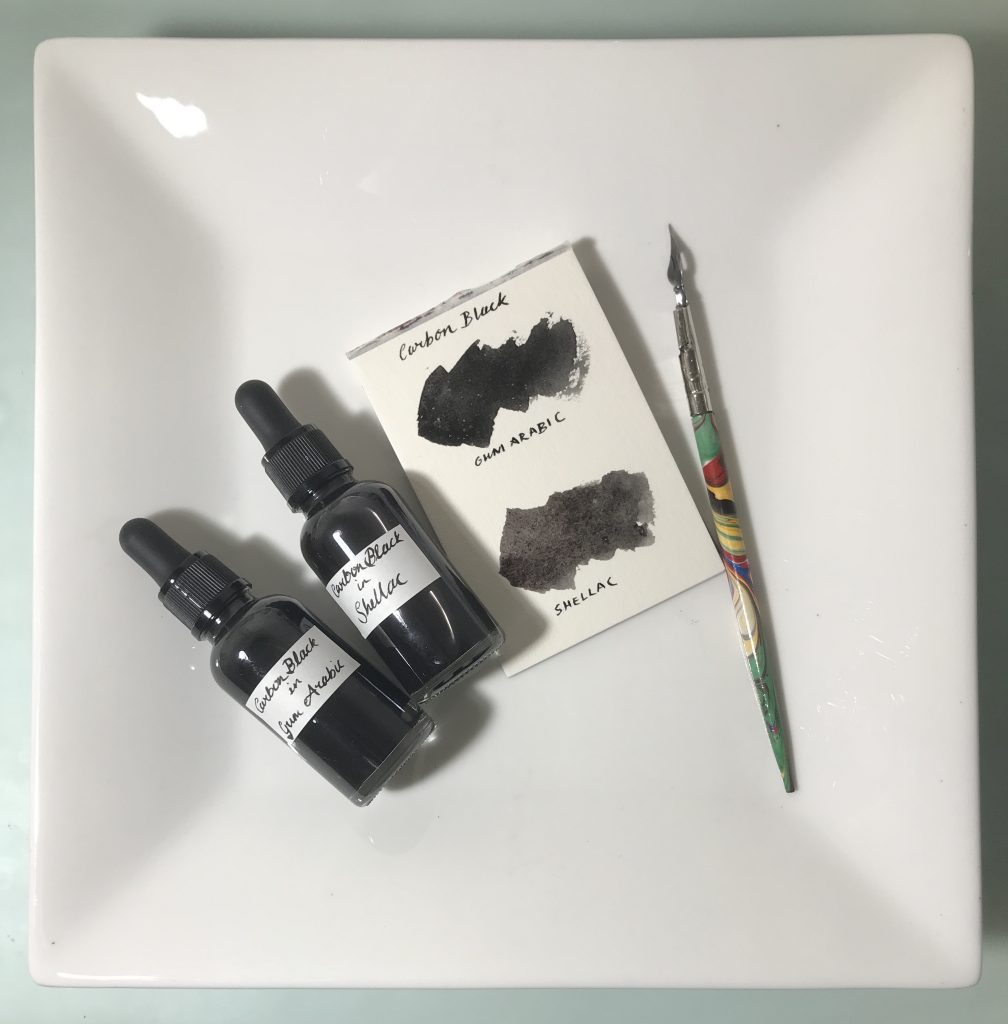
This is where I did most of the ink-making. It was such a cosy nook I decided to keep using it. We removed a drawer unit and inserted shelving and drying racks above the desktop. The cupboards to the right now hold most of my art materials.

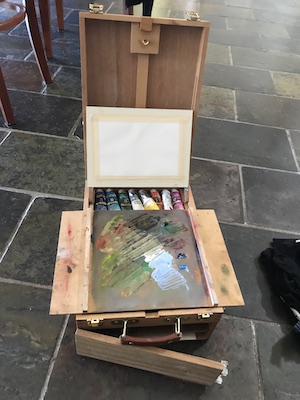
This is an old pine table I restored twenty years ago. I have a new light with an amazing variety of controls and a shadow box set up cobbled together from mdf, aluminium channel and perspex sheeting.

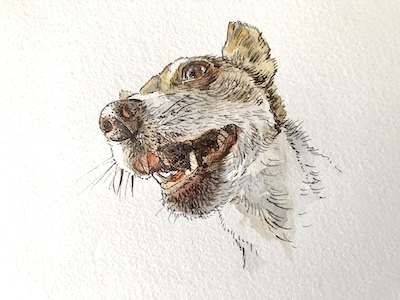
I’m exploring painting different materials. At the moment it is glass, and I intend to focus on wood, ceramic, metal, paper and plastic in future. I’m not exploring grounds or mediums and will probably stick to oils and gouache. But there’s a new aspect that I’m focussing on: saleability.

There’s a lot of work from the Daily Art challenge that isn’t worth trying to sell, which I don’t mind because it was fun to do and I learned a great deal. Now I want to include end use into my plans. In particular I’m considering what makes a piece more likely to sell or be adopted by a friend, and letting that guide my choices. It’ll be interesting to see if I’m right or wrong – either will just be another part of the learning process.

I have also given myself another challenge: keeping art for weekdays, work and family-related matters and restricting hobbies to weekends. For a while now it’s felt like the balance was wrong. So far it has felt surprisingly right to divide up the week this way. I guess old habits die hard.

And while on the subject of imbalances… I’ve been reading articles about AI and finding it all rather fascinating but also sad. Like most new technologies it has potential to be a useful tool, but if it can be used to exploit people someone will find a way. Until the copyright issues are worked out, I’m going to avoid posting images of my paintings online.

Daily Art: Six Months Later

I wrote the first version of this post and another one on framing several months ago, and they were waiting on me finishing and photo graphing some of the framing for the Nature’s Remnants series, which I made shadow box frames for. I got a couple of pieces done for friends who wanted them, but forgot to take a photo. Then the Mum disaster happened and I didn’t touch anything until just before New Year, when I managed to frame a few more for an interstate visitor. I forgot to take photos of those ones too. Then just after New Year the Dad disaster happened and I’ve only just got back to tackling framing again.

Reading over those posts, I decided to delete one and then publish a modified version of this one:

I hoped to learn something from the Daily Art Challenge and I did – a great deal. One unexpected lesson came afterwards: there’s nothing quite like framing to make an artwork look worth spending money on… or not. It’s not that I wanted or needed for everything to be framed up and sold, but there definitely were pieces I had grander expectations for than what the reality turned out to be, and visa versa. Here’s a quick assessment:

Flowers. The little book was popular, and I was surprised at how well I did with a subject I have never gravitated to. I reckon I’d enjoy tackling some bigger floral artworks – especially since flower paintings are quite saleable.

Toys. A definite success all around. I enjoyed painting them, they came out well, people loved them, they frame up really well and I reckon I could easily sell them.

Hands & Feet. They were fun and I’m better at pencil than I thought. Not a saleable thing, though.

Food. A satisfying subject to paint and people liked them. I did better with acrylic than I expected, but I’m not sure I’d use it again if I was to paint this subject again. Most likely I’d try painting them in gouache or oils. Not sure if they’d sell but it’s worth a try.

Cars. The subject was a challenge and I think I did okay with it. People liked them, but overall I don’t think they’re a saleable subject in the medium I used. Copic markers are definitely a good medium for sketching but apparently they’re not very light-fast.

Nature’s Remnants. These were a deliberate effort at making something saleable at the same time as being an experiment in ground and medium. Casein was interesting but a bit stinky and not as easy to use as gouache or oils. The shadow box frames I made were a time-consuming, though ultimately great-looking, solution for how to present them – made much harder because the pieces of marine ply were all different sizes and not square. I don’t know that I’d paint something exactly like them again – more likely I’d depict the subject in another medium on a ground that could go in a commercially-available frame.

Faces. Turns out ballpoint pens are nice to draw with… if you don’t have anything better at hand.

Chairs. No. Just no. Okay, to be specific, it was more the medium than the subject I disliked. It was the only theme I really didn’t enjoy, which is weird because I liked the pen and ink drawing for the accessories theme. I’m astonished and grateful that my friends wanted these.

Pets. What can I say? I loved drawing them, they came out great, people loved them, they were nearly all worthy of framing and I reckon I could do pet portraits as a sideline. But, but, but… oh, how I dislike the dustiness of pastels.

Accessories. I really enjoyed drawing in inks and depicting the objects, but this wasn’t a subject that excited any people who looked at the artworks and though the few I framed up look nice they still aren’t particularly saleable. Having made a pile of inks in the Maiwa workshop and afterwards, I’d like to be doing more drawing in ink, but probably only when sketching for the fun of it.

Tools. It surprised me how well I was able to depict objects in coloured pencil, especially when the coloured hands and feet drawings were weaker than the monotone ones. Looking at the subject material and thinking about people’s reaction to the artworks, I’m not sure anyone is going to want any of these framed and on their wall, even though the couple of sets I mounted looked nice.

Kitchenalia. Ah, there’s a reason oils are my favourite medium. They just feel right. And you could depict bird droppings with oils and somehow that would legitimise it as a subject. I wanted to keep nearly all of these, but did give two sets away.

So to sum up, the most enjoyable subjects to paint were natural and nostalgic. My favourite medium was oil, followed by gouache, but I also did well with pencil, conte pastel and biro. The most framable and sellable artwork was the toys by far, but the pets and kitchenalia were also popular. The Nature’s Remnants were popular but too fiddly to frame.

Applying that to the future, I should produce more small oil and gouache paintings of natural and nostalgic subjects, and keep Copic markers, pencil, pen and ink and ballpoint pen as sketching mediums.

Posted in art

The Season for Madder & Acorns

When I did the Maiwa Ink-making workshop I really wanted to make an ink out of the madder plant I am growing, but the best time to harvest is when the plant dies back, in Autumn/Winter and it was Spring at the time. I also wanted to try making acorn cap and pomegranate ink, but oak trees were also in the opposite season for producing nuts, and my pomegranates were only just starting to flower.

Well, the seasons have turned and I’ve switched from using the dye pot for fabric processing to ink production. I dug out what felt like the largest of the madder roots, chopped them up and put a good handful aside for making ink. The rest were dried and put in with my dye supplies. After comparing a few recipes, I boiled up the root, strained it off, reduced the liquid to 50 ml and added Gum Arabic and clove oil.

We have a pin oak here, but it is only just reaching the age to produce acorns. I was excited to see a few last year. This year all I found at first were teeny tiny acorns with almost no cap at all. Later I did find a few bigger acorns with caps, but it was clear I wouldn’t get many this year either.

I’d told Dad that I wanted to make acorn ink but needed to find an oak tree in full production, and the next time I saw him he presented me with a small bag of caps from a local tree. So I crushed those up and soaked them for a week, then boiled them for an hour. I strained and filtered out the caps then reduced the liquid down to 50 ml. Acorn is a tannin so, after making 30 ml into an unadulterated ink with Gum Arabic and clove oil, I added 12 ml of a 10% ferrous solution to the other 20 ml make an iron-blackened ink.

The iron acorn version works just like iron gall ink, in that it darkens as it oxidises, though not to the deep black galls produce. It’s very satisfying and a great alternative if you can’t find galls. Oak trees are common in Melbourne parks, and you just pick the caps up off the ground rather than having to collect galls from branches.

It had occurred to me that I could make some inks from leftover dye sources from the Print & Paint workshop, and I decided to try making myrobalan and pomegranate inks. Though my pomegranate tree was laden with fruit, they were far from ripe, and I had plenty of powder so I figured I may as well use it.

Using the proportions of ingredients in Maiwa’s iron gall recipe, I set two jars simmering in a water bath, with the jars of powder sitting behind the pan in the same order to remind me which was which. However, I needed to pick them up at one stage then couldn’t remember which order I’d had them in. The solutions looked exactly the same and smelled too similar to identify them, and the inks looked identical except that the non-iron version of one seemed to shift to red. In the end I had to put a quarter teaspoon of each powder into a little container and add water, then filter them both, because the only difference I could recall was that one filtered through a cloth easily while the other blocked up and formed a distinctive paste on the fabric. Good thing I did, because I had switched them around.

Maybe it didn’t matter, since the inks look so similar, but I don’t yet know how these will develop over time. I’d still like to make ink out of the rinds of home grown pomegranates, and I’d like to try making ink from eucalyptus leaves rather than bark. I suspect there’s always another ink to try.

I played a bit making Jason Logan-inspired ink circles. The madder dripped onto a titanium white base did interesting things.

And the brazilwood on madder looks like a petri dish experiment.

Posted in art

Testing Times

Back in December I made this shirt:

It was a test of a vintage pattern and I wasn’t all that impressed with it. The shirt came out okay, but when I went to wear it I found the facing fabric in the button band and collar was much too stiff and uncomfortable, so I cut off the buttons and sent it off to a clothing recycling company.

Just about that time, Tessuti released a similar shaped shirt with a collar, so I bought it, and recently did a test version:

The fabric is a rayon sarong I bought in an op shop. I used a very light facing in the collar and under the buttonholes. It’s very wearable, though the weather here has suddenly grown too cold for short sleeves and single layers. The pattern has some annoyances like teeny tiny photos of very busy cloth that you can’t make out the seams on, and the collar method seemed needlessly fussy.

Nothing bad enough that I wouldn’t use it to make the shirt I was testing patterns for. That one will be made from a piece of fabric I painted in the Maiwa class, plus some black and white linen I bought to go with it. I’d have probably started that project this week if I hadn’t come down with a bug that had me sleeping half of most afternoons. Not Covid, but probably the one spreading among friends with sinusitis as the main symptom.

I’ll get to it soon enough. And I’ve thought a lot about art and hobbies, how much of my time I want to dedicate to either, and how the reality is the opposite. I decided to try limiting hobbies to weekends and art to weekdays. This will be helped by finally getting a workable set up in the new studio side of the laundry. The last piece of the puzzle was a still life “box” that controls the direction of light on the subject.

I was happy with how the trial artwork went. Maybe tomorrow I’ll squeeze in another piece.

Drama #2’s Silly Purchase

During Drama #1 (Mum-Covid-to-Aged-Care) I spontaneously bought a second hand dip pen and ink set on eBay that didn’t arrive until a month after I reported it missing and a few weeks after I’d bought the set new and at full price. During Drama #2, having distracted myself with a lot of fun and silly YouTube videos of artists and crafters trying out art hacks, products and subscription boxes, I decided to try out one of the latter.

I did do a bit of a shop around, comparing past boxes for each subscription and watching unboxings. The craft ones were interesting but it was the art materials ones that appealed the most. I tried to sign up to ArtSnacks twice but the order form wouldn’t work. Then I went to the site of Scrawlrbox, but that ones is based in the UK but they were having problems with international postage. The next one I tried was Palletful Packs. Figuring it was better to test things out by ordering something before committing to a subscription, I ordered one previous subscription pack, and a pack of brushes.

By the time I realised I should have checked the postage, it was too late. Oh boy. A friend who has a US craft box subscription says hers only costs $15 in postage and I’ll be generous and assume that’s US dollars. This order cost me US$63 in postage. More than the more expensive of the two packs cost.

It was, however, worth it. I can’t imagine buying all the contents for under the $200 for boxes and postage, mostly because that’s a LOT of brushes. The acrylic inks, markers, single brush and cute mini watercolour pads were in the past subscription box, the rest was in the brush box. I was expecting the brush cleaner to be the mini version, but it’s full size.

So I’m pretty happy with what I’ve got, but I’m not sure about subscribing when I don’t know how much that’d cost in postage. There’s another art subscription box that looks pretty good and it says $15 for postage to Australia, so I might try one of the previous pack from that before deciding whether I want to go the full sub.

Posted in art

Using Stuff Up

So I may have mentioned the multitude of jars the workshop required. There came a point around week 6 where I decided I needed to use up paint rather than buy more jars. I dug through my bag of clothes to dye and found two long-sleeved tops that I’d attempted to dye before but wasn’t happy with the result.

Putting my newly acquired knowledge to use, I scoured them first. That removed some but not all of the old colour. Then I mordanted them with gallnut, alum and soda.

In the 6th module we’d made some iron solutions for painting, and the tutors suggested using them up by dyeing fabric. I decided to dye one of the tops, which had come printed with stripes. The white areas came out a nice, soft grey.

The second top had a few indigo leaf prints that hadn’t come out strongly enough to look like more than mistakes. So I lined the inside with paper and laid down lines of narrow masking tape, then painted it all over with the mixed colour dye pastes, figuring that I can always mix up more from the pure colours if I need to in later classes. I had to mix a little bit more of a few colours, but managed to empty six jars overall. The indigo leaf prints still show, but come across as a bit of extra patterning.

Steaming was a challenge. After the top had tried I replaced the paper inside with clean pieces, then rolled the sleeves up first, then the body from the bottom up, and continued by rolling the sleeves inside the body. It needed a few patches of paper where the odd shape made tears and I managed to curl it into a neat but open parcel.

Then I had to buy another level for the bamboo steamer and get Paul to remove the base to make a spacer level. That allowed enough room for the parcel. I dyed it for an hour rather than 40 minutes to make sure the heat penetrated.

When it was done I washed it in warm water twice, but it’s still a bit stiff from the gum. I’m going to let it cure for a few weeks then wash it in soapy water.

I’m pretty chuffed with both of these tops, and was ridiculously pleased by emptying six (SIX!) jars ready for future workshop modules. Painting a whole garment was quite time-consuming and fussy, so I wouldn’t do it except in this circumstance. Much easier to print the fabric then sew the garment.

Projects of 2022

Making this post has been a bit of an eye-opener. There’s so little to report! It’s not because I wasn’t being creative. For the first seven months, most of my time and energy for making were going into the 8-shaft weaving course. So much that I’ve had a big case of post-course apathy since. The remaining creativity went into my daily art challenge, which left me inspired and energised, and then the ink-making course, which was SO much fun and has me exploring calligraphy and fountain pens (but not, yet, producing actual projects using either). It didn’t help that a very wet Spring brought on a crazy amount of weeds in the garden, and the Parental Drama consumed a month. What I’m intrigued by most is the fact that, when I managed to squeeze in a bit of craft time, I mainly tackled sewing projects.

A month-by-month list isn’t going to work so I’m switching to subject-based observations.

Sewing: I made a pair of pyjama pants, a pair of plaid shorts, two night dresses, two 50/50 skirts, several cotton knit tops, a wrap dress, a test shirt and a fidget blanket.

Art-related: I made a backdrop for a 007 party, redesigned a french easel, and fashioned a wet panel carrier out of a hamper box.

Weaving: The only woven project I did outside of the course was the Wonky Blocks tea towels, which were a very late Christmas present.

It may not have been a big year for projects, but it was a huge one for learning. Not only did I explore weaving, ink-making and art, but quite a bit of life assessment. I’m not going to push myself to do more projects in 2023. The tasks I’d like to get done aren’t all shaped like projects, easily photographed and described in a blog post. But there will be creativity of some kind, because that is the best kind of de-stressing activity I know.

I’ll Ink to That!

The Maiwa ink-making workshop is done and it’s been a blast. Best online workshop I’ve done. Really. The videos and instruction sheets were clear and informative, the q&a forum was friendly and helpful, and none of it was done via Zoom. Well, there was an optional Zoom session at the end, but I skipped that because…

The last two inks we made were indigo and iron gall. The indigo recipe was simple and quick, and the resulting ink is really dark to write with while giving lovely shades when applied with a brush.

The iron gall ink was more involved but not complicated. I’ve seen YouTube videos in which gall nuts were fermented, but this lesson kept it simple (and probably less fragrant) by using extract-ready gallnut powder. It is fascinating watching the ink slowly deepen from grey to black as it oxidises.

Since there were no more inks to make in the workshop, I began tidying up, removing anything that hadn’t been useful from the work area. That’s when I found a bag of onion skins I had collected with the intention of dyeing cloth. Onion skins contain tannins, so I decided to see if I could make an ink from it. The process was as simple as simmering the skins in just enough de-mineralised water to be able to stir them for about 20 minutes, filtering out the skins, then reducing the liquid to intensify the colour. It smelled like French Onion soup as I was cooking the skins, so that became the name.

Here are all the inks, in little jars for storing airbrush ink that Paul bought for me. Of all the things needed for this workshop, suitable jars were the hardest to find in Australia. I had bought some bottles with droppers, but the narrow neck makes it hard to dip the pen without getting ink on the handle, and you have to find somewhere safe to put the dropper while you’re working.

The next ink I want to make is walnut ink. So far I haven’t found a fresh source of husks, so I’ve ordered some dried ones from the art store. I’ve also collected some bark from one of the big eucalyptus trees here. I’d like to try the bark and leaves of all the eucalyptus trees here. Next Autumn it’ll be time to harvest madder and forage for acorns.

But I’m also aware that I’ve not exactly used up ink very quickly in the past. In fact, when I gathered all the ink I had ready for the accessories month of the daily art challenge I found that a third or so had dried out – which is probably the most common way I ‘use up’ ink. My back protested after I did some calligraphy exercises on Monday, which was no surprise. I can’t do more than an hour of anything that involves sitting. So it doesn’t make sense to keep manufacturing more and more ink. However, it is cool to know I can whip up a batch when I need to, or when an interesting source material comes along. And the accessories month showed me that drawing with ink is really satisfying, so hopefully I’d do more of that, too.

Posted in art

Not Quite Inktober

The second pair of inks we made in the Maiwa course was yellow from weld. This one did not go smoothly because I’d mistakenly bought ground weld, not weld extract. So the first batch went down the sink and I started again with instructions from the tutor on extracting colour from the plant material before repeating the ink-making process. The green is weld with indigo added.

The third pair of inks was extracted from cochineal bugs. Fortunately, I’d bought the right product for this one, and the process went smoothly.

In the middle of all this I made my own ink: Ash Pit Black. The source material was a chunk of charcoal I found where the ash pit at Boort Railway Station was back when they ran steam trains on the line. I ground it up in a mortar and pestle then mulled it for, well, aaaaageees. Maybe an hour. The resulting ink has a brown tone, which is probably because charcoal is not completely burned up fuel so the original source affects the result – in this case the fuel would have been coal. I was worried it would have oil residue in it, but so far nothing has come to the surface.

Of course, I had to try using it to make some art. Here is a drawing of the former Boort Railway station:

Posted in art

An Inkling

A few months back a friend (hi Amanda!) recommended I do a natural dyeing workshop run by the Maiwa School of Textiles. When I headed over to the website I discovered they were also running an ink-making workshop. I’ve been wanting to try making my own paints for a while, and after enjoying doing a month of pen and ink drawings for the Daily Art Challenge I’m keen to go back to that medium. Making inks seems like a natural crossroads between my two interests in fibre (dyeing) and art (ink).

I signed up and after pricing the items in the materials kit I realised it was much cheaper to buy them locally – and I didn’t want to worry that the materials wouldn’t arrive in time. Well, it would have been much cheaper if the shop I used for my price research actually had them all in stock. I hadn’t noticed the ‘out of stock’ on one item, but the other had no warning until I went to buy it. Having most of the materials bought or on order already, it would make no sense point buying the kit for just two items, so I had to hunt around online and wound up buying those two ingredients from Israel (from Dekel Dyes, where you can also purchase an interesting little booklet on making ink that includes eucalyptus as a source). This meant not buying the kit didn’t save me as much money and I still got to worry about a parcel not arriving on time.

Luckily it did, and I gathered everything together before we went on our holiday. I also watched a lot of YouTube videos and reread a book I had on the subject (Make Ink by Jason Logan). Finally the workshop start date arrived, and I started working my way through the weekly modules.

The first task was to make sock solutions. I’d only found gum Arabic in solid and liquid form, not powdered, but figured I could grind it up myself in my mortar and pestle. Wow, that stuff explodes when you smash it. I had gum Arabic shards everywhere. The second stock solution was shellac, which was easy but time-consuming to make.

The second task was to make carbon black ink. An easy task, but I managed to make it complicated somehow when the pigment didn’t want to mix with the solutions. But I persuaded it to eventually, and without too much mess, and finished with two black inks: water-soluble and water-proof. Which I then put to good use:

Gum Arabic based ink on Rhodia ivory paper
Shellac based ink on watercolour paper with watercolour wash
Posted in art