Tick Tock

What a journey this one has been.

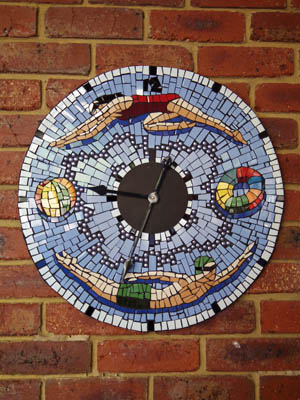
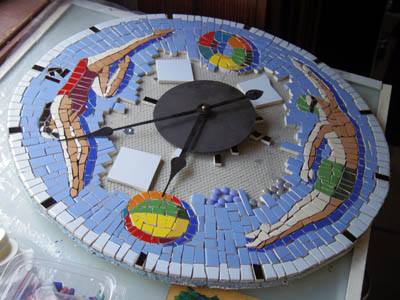
Two and a half year since I started. Long breaks when I got plantar fasciitis and couldn’t stand in the garage to work on it, then discovering that the tiles in the pale blue were discontinued and a long hunt for a replacement. Eventually I found that one of the online mosaic supplies stores sell a tile very close in colour, and by adding glass ‘bubbles’ I hid the change from one to the other.

And then I had to hope the clock mechanism would work. So far it seems to.

Now to decide what to begin next.

A Bath for Birds

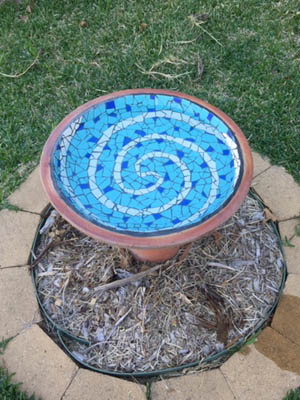
Funny how the mosaic project that involved using a hammer to smash the tiles unsuitable for the swimmers clock was finished first. It really was quite therapeutic! And it fixed the problem of the bath’s mysteriously pitted inner surface.

I’d set up a folding table in Paul’s studio to do the swimmers clock, and then this one took over the space. Once I’d grouted the bath I moved it into the garage for sealing when I got back from Fibrearts. Then I cleaned off the folding table and asked Paul to vaccume the studio while I was away. (Having a sore shoulder, I wasn’t keen to do that bit myself.

I kinda hoped the vacuuming would lead to some cleaning up, and it did. I also hoped it might lead to some photography-related activity in there. It didn’t. Instead, Paul spread his diorama-making out onto the folding table. This meant I going to have to tell him to remove it or resume my mosaic-making elsewhere. Probably back to my area of the garage, where I used to do it. Which isn’t a big problem except when it’s really hot or really cold. Which seems to be most of the year, these days.

Could I possibly set up in our laundry? Paul has not entirely satisfactory ways of using it as a darkroom. Perhaps we could build a darkroom into the back of the studio. I raised it with him one morning. He didn’t like the idea. He said: “Do you really think you’ll continue with mosaics?”

After a shower and a think, I asked pointedly: “Do you really think you’ll continue making dioramas?” He conceded that his question – or rather, the way it had been phrased – hadn’t been very fair.

Because it was a relevant question for both of us. We’ve both have adopted a new hobby since moving to this house and modifying it to suit the hobbies we’d had at the time. We need to consider how to most sensibly incorporate our new hobbies into the space we have, and consider how much time we actually spend on each of our hobbies, not how much time we wish we did.

And perhaps even more importantly, how much stuff we store that relates to them.

Stretched for Fabric

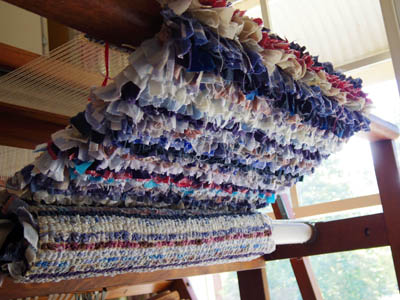
Here’s the rya rug from underneath the loom, showing what the top will be like:

When I began weaving it I pinned a piece of cotton tape to the start and put a knot at the length I wanted the rugs to be, so I would know where to end the first one, leave a gap and start the next. When I had nearly finished knotting in all the strips of fabric I’d cut, having estimated from the knot on the tape and the rows of knots I’d done already that I should have enough, I found the rug was about 15 cm too short. I wondered if the tape was stretching and the rug was actually longer than the tape was saying, so I decided to loosen the warp and measure what I’d woven so far with a measuring tape.

I discovered it was actually 40 cm too short!

Perhaps the tension of the loom was stretching the warp quite a bit. Perhaps the thick fabric it was creating was pulling in the warp quite a bit as well. Perhaps I didn’t measure the tape properly. Whatever the reason, I needed many more strips. So I tore more from the leftover fabric given to me by my friend, and went on a hunt for more fabric. Two other friends had volunteered some fabric scraps, so I made arrangements to visit and raided their stash.

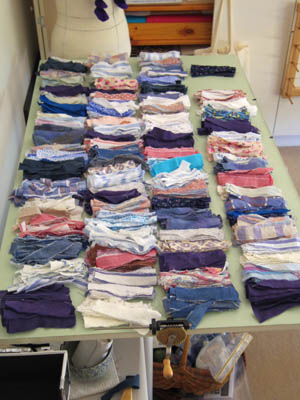
This is the collection of strips set aside for the second half of the rug. I reckon I’ll have the whole table covered by the time I’ve finished the first half.

To fill in the time before the visits I’d arranged, I went back to working on the mosaics. The tiles I’d got from a friend weren’t the same blue as the ones I needed, but complimented the hue. In my earlier hunt for other ways to finish the mosaic I’d picked out some round glass tiles. They looked a bit like bubbles to me, so I figured I’d put some between where the old and new tiles changed.

I needed more, so I ordered them. The shop also had some 10×10 tiles in blue, so I ordered one of each of the three colours on the odd chance they’d match the one’s I’d run out of. It turned out, they did.

There’s the slightest difference, so I’m still going with the glass ‘bubbles’. But before I could do that, I needed to stick down some tiles on the bird bath. Well, once I got started I kept going.

I’m using a mix of grout, water and glass mosaic additive as glue, which is what we used in the class. It’s frustratingly fast setting, so I have to mix up a tiny bit at a time and the last few tiles I attached usually come off again. I’m hoping that the final grouting and sealing will keep everything in place.

Continued/Discontinued

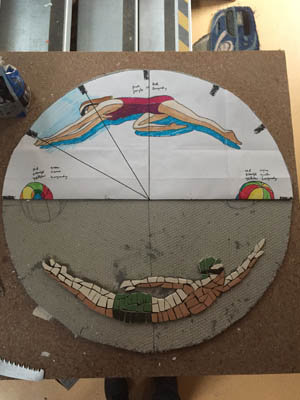
When I had my long bout of finishitis last year, one of the items on the WIP list that I failed to eliminate was the Swimmers Clock. There was simply too many hours of work left to do, to get it done by Christmas. But I did find time to work on it, and my enthusiasm for it and mosaics returned.

Pretty soon, however, I hit a snag. I ran out of blue tiles for the background. They weren’t available at Bunnings, so I headed to the manufacturer, Johnson Tiles. There I learned that the colour was discontinued. The girl at the front desk said there were a few boxes left at the warehouse and ordered them for me, but when I rang on the day she said to call on, she found no order and the person I spoke to said there were none left. This is where the clock is up to:

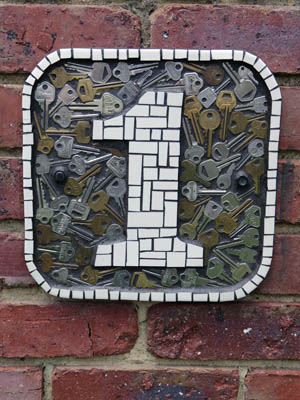
In the meantime, I started another project: a house number. Seeing Paul with his large tin of obsolete keys, I had the idea of using them in the background. I finished the mosaic just after New Year.

The cream tiles are the same type I was using on the clock. However, I ran out of that colour, too. But it isn’t a discontinued colour, and I was able to get a couple from Bunnings. But these did not break as easily or in a predictable way as the old ones. I looked on the back and saw that the old ones say “Made in Britain” while the newer ones says “Made in Malaysia”.

Fortunately I was able to finish the mosaic by simply cutting and breaking until I had the right shapes, making a lot more wastage in the process. But I was kind of glad the blue for the clock was discontinued as it would be a much more frustrating process filling in the last of the background.

I had bought a bunch of duck-egg blue tiles hoping to just transition into another colour on the clock, but they didn’t match very well and the cutting problem put me off trying with any other colour. Googling, I found that the colour is still available in the UK. I can’t tell from the websites if they are made in Britain or Malaysia, however, so I posted on Facebook asking if anyone knew someone over there who could ship some to me.

A few days later, at a party, a friend said the tiles sounded a lot like what he and his wife used on their bathroom. Later he sent a photo, and they do look very much like the ones I need. I just need to get hold of them and see.

In the meantime, again, I’ve started another mosaic. I’ve been meaning to tile one of our bird baths, as it has a hole in the bottom that needs filling. Wondering what I’d do with the hard-to-cut duck egg blue and leftover cream tiles, I realised that if I smash them up with a hammer and use them as random shapes they should work okay. The smaller the pieces, the easier to fit them together.

Of course, I then ran out of cream, but that’s okay, I know I can get those ones at Bunnings.

Kitchen Ventilation Patch Mosaics

I’ve done the last of the mosaic patches in the smaller ventilation holes for the old central heating.

My first idea had been to make something in slate, since the floor was slate. I bought a couple of tiles and did some experiments, and was mostly confident that I could make it work. However, when I sat down to actually put together a mosaic, I found I hated the material. There is absolutely no control over how it breaks, so I wound up with a whole lot of pieces nibbled into shape with my tile nippers, and it looked crap. Even then, I couldn’t be sure they’d stay in that shape, as they kept crumbling.

So I brought out some of the smooth-edged tiles I’d worked with already, fiddled around a bit and either didn’t like anything I came up with or worked out I’d have to buy more tiles. When I considered how much trouble I had buying enough of the right colour of these tiles in the past, I just didn’t have the energy to pursue them.

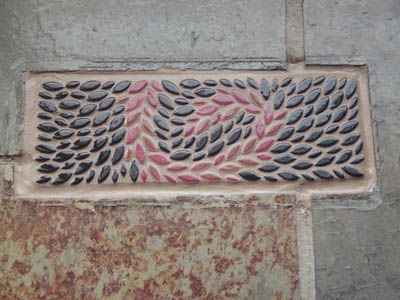
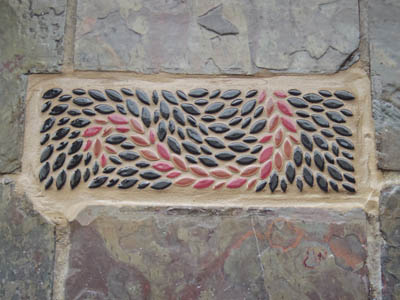
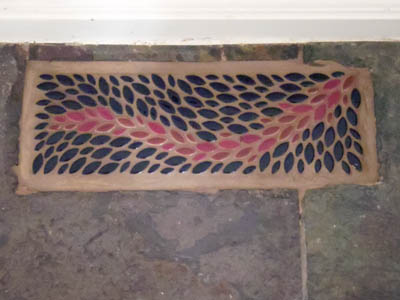
But I’d have to buy something. And I realised that if I wasn’t going to use anything I had already, that freed me up to use any tile that took my fancy and was available. I recalled how I’d seen simple leaf shaped tiles on a mosaic shop website, and loved the sinuous pattern they formed en mass.

I wasn’t going to spent a pile of money without working out if I liked the effect in person, and I didn’t want to discover I hadn’t bought enough tiles only to find they weren’t available any more. I’ve learned that you have to work quickly from concept to finished piece, to make sure the latter doesn’t happen.

So I mocked up a tile in Illustrator, printed it out and confirmed that I’d probably like the effect. I counted the tiles and bought what I thought was enough. However, the tiles I wanted came in batches of two colours. I couldn’t be sure how much of each colour I’d get. I paid extra for fast shipping and when they got here I discovered there were less burgundy tiles than black. I simply reversed the pattern I’d come up with. Then I divided the tiles into three equal sets for the three patches. Laying out the pattern on a cement sheet backing, I worked out that I needed more black tiles, and ordered those straight away.

When they arrived I got to glueing. After a couple of sessions over a few days, I had my patches ready to insert. Then it was just a matter of filling the holes with layers of mdf to get them to the right height, glueing down the mosaics, grouting and sealing.

Another lesson I’d learned from previous mosaics was that I should test the grout colour beforehand. It always dries lighter than I expect. It was worth doing. This time I got it spot on.

There’s one more possible floor mosaic to do: the larger patch when the intake grille for the central heating was. It’s quite a big area, and needs more than a simple filler. But before I do that I have the clock to finish, and I want to do a glass mosaic bowl.

Swings & Roundabouts

I’ve had a mild case of finishitis lately. The part of me that wants to get current projects done is winning the battle against the one that wants to start something new. So what do I have in progress?

The Handwoven Skirt
Currently stalled because my back has been cranky, and sewing is worse for it than weaving.

The Krokbragd Rug
Stalled because I’m waiting to see if I can buy some more carpet yarn from a weaver.

Clasped Weft Fringe Scarves
What I’ve been spending most of my craft time on. It’s been… interesting. Is there such thing as ‘anaesthetic brain’? Because my short term memory was atrocious after the second eye operation. I was incapable of following the draft, and after a number of sessions in which I unwove almost as much as I wove, I gave up and just started making it up as I went. Thankfully, the result is good. Kinda groovy.

Taupe Jacket
Mainly weaving this one in the evenings, while watching tv. I’m warping up the Knitters Loom with a natural wool and for weft I’m using stripes of natural through to brown coloured yarns. I’m intending it to become a jacket. We’ll see.

Eye Embroidery
It’s been the project I grab when I need something portable. However, I may regret not finishing it before now, if my eyesight remains bad for close work.

Swimmers Clock
I need to get back to this. It wasn’t warm enough to work out in the garage, and now it’s too warm.

Weaving Bits and Pieces
I’m making a weaving sword, or wavy beater, inspired by a recent demonstration by Mr Tanji at the Guild. Which I didn’t get to, but the Weavers Matters gals showed me the ropes at the next meeting and it was a lot of fun. Also, working on the idea for the Vari Dent Reed.

Spiral Mosaic Sphere

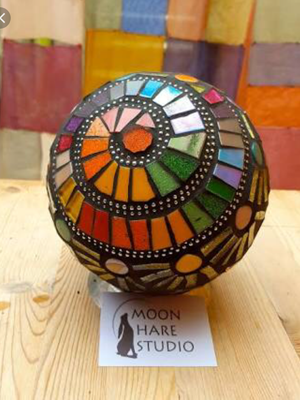
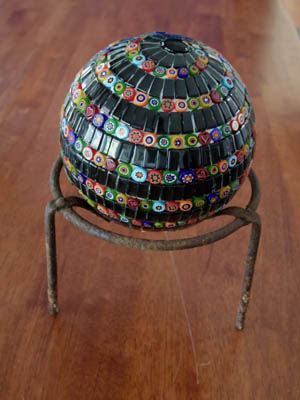
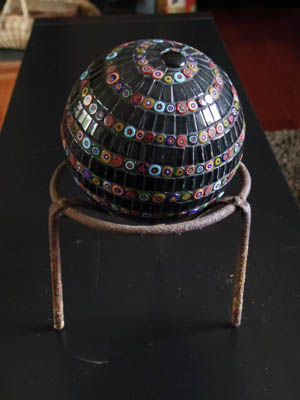
For my second mosaic sphere, I initially wanted to do one in black and white, with six spirals connected in pairs. But while browsing through the results of “mosaic sphere gazing ball” on Google Images I saw a sphere that was one continuous spiral using two rows of tiles:

I realised that this would require no measuring up. All I’d need to do was start the spiral and each row of tiles would sit next the last, until they reached the opposite end I’d started on. Easy peasy.

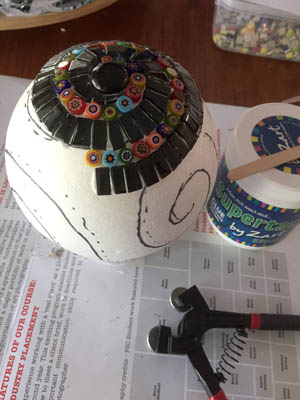
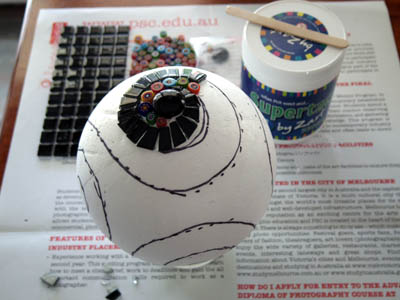
My intention is to use up leftover tiles on spheres. The only kind I had enough of for this design were the glossy black glass ‘mosaic’ tiles left over from our bathroom renovation. When I found I could easily cut these in half at an angle with my glass cutter, I knew they were the right choice for this project. For the narrow row of tiles, I decided to use the larger batch of millefiori I’d bought not long after I’d done the mosaic class because they were pretty, without any idea what I’d use them for. So far I’ve only used a dozen or so millefiori, and mostly ones I’d bought later because they were star shapes. This looked like a good way to use a larger quantity.

So I began with a black droplet, then cut one black tile in half and stuck it down. I worked backwards to taper the tiles back to the droplet, then I got the smallest millefiori and glued it at the opposite point to the tile starting place.

From there it was a matter of swapping from millefiori to black tiles and back again, going around and around. But because of the curved surface, I had to do it in batches or the tiles might move or fall off. Later, Barbara from my art class, who also does mosaics, suggested I stick dressmaking pins in to hold the tiles in place, which allowed me to do more each time.

However, when I reached the middle, I ran out of millefiori.

A hunt for more started. I thought I’d bought them from Bunnings, or Zart Art. But both had a different kind of millefiori in stock – all opaque wheras mine were transparent. I was fairly sure the brand I’d bought was Mandala, so I called them and it turned out that yes, they’d recently changed their millefiori as the transparent ones were more prone to breakage.

Fortunately they still had two packs of the old style ones, so I bought those. When they arrived I got back to work. A few more rounds and I was able to ditch the pins, as all the tiles were now resting on the previous ones, and I got the last 25% done in one sitting.

After letting it dry for a few days, I grouted it with black grout.

I bought a few more polystyrene balls when I went looking for more millefiori at Zart Art, but the vague idea I have for the next one might require me buying more tiles. And now that the weather has warmed up enough to spend time in the garage I’d like to get back to the swimmers clock. And then there’s the ventilation floor patches to do in the kitchen. And I’ve bought enough tiny ceramic tiles to do a matching wave pattern frieze around the bathroom. And I have a large bowl I want to do as well…

They Call them Gazing Balls

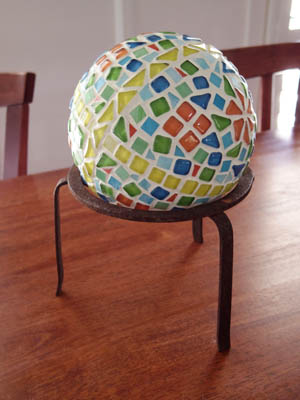
I prefer ‘mosaic sphere’, but I do like the irony of choosing to make a ‘gazing ball’ while recovering from eye surgery. It just happened that I found some polystyrene balls at Zart Art in Box Hill – and their special ‘will glue anything to anything’ Supertac glue – a few weeks ago. After the surgery I decided to give the mosaic sphere thing a try. It’s much easier to see tiles than warp threads at the moment (not that this is stopping me weaving). Since the spheres aren’t going to be touched or walked on, I could happily use broken tiles with sharp edges and glass tiles with the colour on the surface – which gives me a good use for the tiles I’d bought for the ventilation hole patches that turned out to be unsuitable.

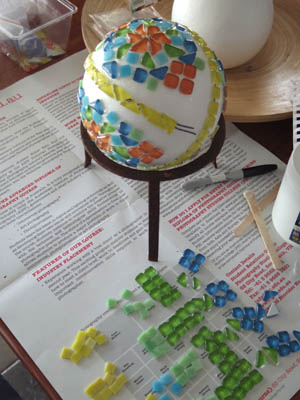
For my first sphere, I had no plan. I just made it up as I went. First some yellow lines to break it into quarters, then flowers out of orange, green for leaves, and lastly filling in the remaining spaces with blue and green. I used up most of the triangle and square glass shapes in those colours, and added some cut glass tiles from Bunnings. I only needed to cut tiles smaller at the end, when I was filling gaps.

The grouting was, er, educational. One day I’m going to learn not to make two to three times as much grout as I need. I also made it a bit too wet, so at first it sagged out of the cracks on the underside of the ball. But I kept adding and smoothing and wiping until it had stiffened up enough to stay put. I did a second coat when the grout had thickened a bit more, too.

I’d watched YouTube tutorials that said the ball should be covered in mesh and mastic so the tiles have something to stick to. I tested the Supertac glue by sticking one tile on then holding the tile and seeing if I could shake it off the ball. It held, so I figured it was worth the risk just using that. The one time I tried to remove a tile that had shifted, I couldn’t even carve it off with a knife. Eventually it came loose, but only by taking a chunk of polystyrene with it. Fortunately the glue stuck it back on just fine. The grout wasn’t inclined to stick to the polystyrene where the gaps between tiles were wide, so for my next sphere I’m making sure all the surface is covered in glue.

Yes, I’ve started another one.

It’s rather addictive.

Ventilation Patch Mosaics – Day & Night

The holes for the old under floor heating in the entertainment room were different sizes and not very square. I guess the installers figured that the covers would hide any inaccuracies. The mosaics didn’t have covers to hide the flaws. We tidied one up as best we could with a dremel, but mostly I figured we’d have to live with the crookedness. Thanks to the thickness of the floating floor, the holes were actually quite deep. We added 9mm thick pieces of wood to bring the mosaics up to level with the floor, but that still left quite a bit of space for the grout to fill.

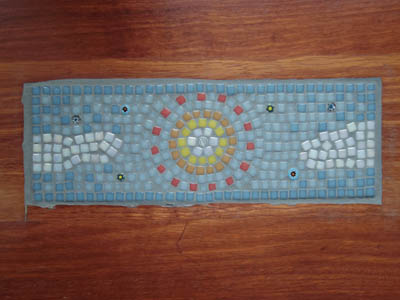
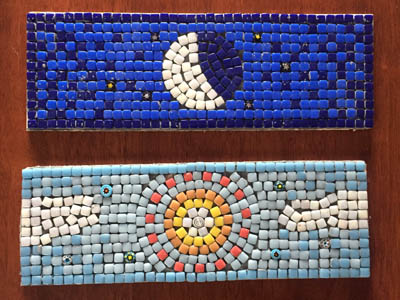
The daytime one is on the south side of the house, which is the side that faces the pool:

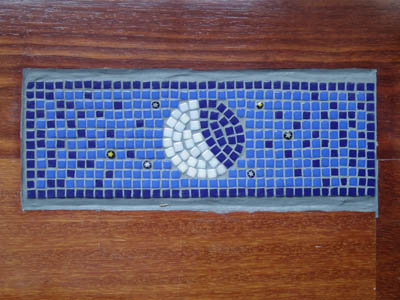
The nighttime ones is on the north side, near the bar we made from an old organ.

I love the nighttime one, but the daytime one came out a bit dull. I used mid-grey grout on both, and maybe it’s a bit too light for the pale blue tiles.

This leaves three ventilation holes to fill in the kitchen. I’ve still got a few trials using slate and cement mortar to do before I attempt a final mosaic. That’ll have to wait for the weather to warm up, as it’s going to be waaay to messy to do in the house.

Ventilation Patch Mosaics

When I did the mosaic workshop earlier this year I came away full of enthusiasm. But I did wonder if, like basketry, that enthusiasm would wane. With basketry, I thought the difficulty getting materials was part of the reason my focus shifted away. But I’ve had enough troubles getting supplies for mosaics that I don’t believe that any more.

I certainly have a lot of tiles now, bought for projects then rejected as unsuitable when they arrived. I learned quickly to get a sample pack before investing in lots of colours. I’m sure I’ll use all the rejected tiles, though. I have projects in mind that they’ll work fine with.

The swimmers clock has been sitting out in the garage untouched, because it’s been too cold to work out there. That’s fine. I’m happy to wait for warmer weather.
Instead I’ve been working on ‘inside’ mosaics – ones that don’t require breaking tiles. That brings me to the ventilation patch project…

When we replaced the old ducted heating here, we wound up with lots of redundant floor vents. Even when shut, they let in cold drafts (and mosquitoes, I suspect). Paul blocked them all off earlier this year. We’ve left the covers on the ones in carpeted areas, which is just the four bedrooms. The rest I want to patch with mosaics.

They need to use a material without sharp edges to cut socks or bare feet. They need to be tough enough to survive being walked on. That means no tesserae, stained glass or broken ceramic. Fortunately there are other options.

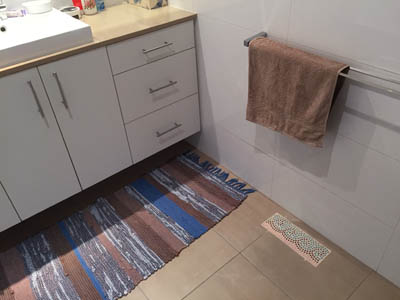
The bathroom only needed one patch. I did a classical inspired wave design in blue, burgundy and pink, using small ceramic tiles:
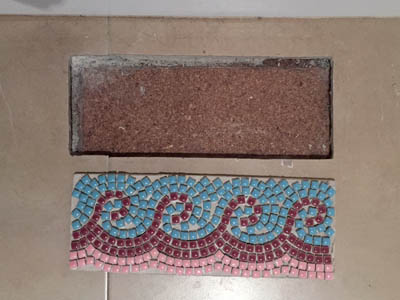
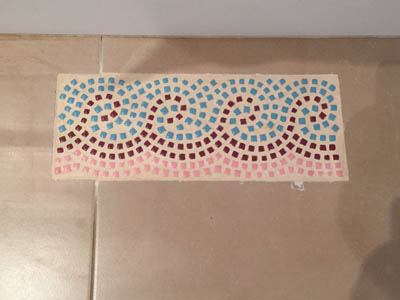
I’d like to do a smaller version as a frieze around the walls, but I had a lot of trouble getting hold of the right amounts of the colours I used just to do the patch. I might see if I have enough left to do a sample strip, then contact the tile seller to see if she can do larger orders.

The entertainment room has two ventilation holes, and it has a floating wooden floor. I designed ‘day and night’ themed patches. Initially I thought I’d use irregular coloured glass ‘melts’ which have smooth edges, but when my order arrived I was disappointed to find they only came in square and triangle shapes, with a couple of bigger trapezoid ones. I laid them out without gluing and didn’t like the result. I considered the Mandala art version of irregular glass tiles, which come with greater variety of shapes, but these, like the ones I bought, had the colour on the surface rather than base of the tile, and I reckon it’d wear off under foot traffic.

A bit more searching and I found 8mm opaque square glass tiles, which were small enough that I was able to get enough detail into the design:
I’m hoping to get them glued in and grouted this week.

The kitchen needs three patches, in something to match the slate floor. I figured… why not slate? So I bought a couple of pieces, smashed them up and made a test patch by pressing pieces into a shallow container of cement mortar, sealing it when dry. I’ve been doubtful at several stages of the test, but the result is better than it first seemed like it would be so I’ll be going ahead with this idea…

… when it isn’t so cold in the garage!